How to Fix AI Hands and Faces
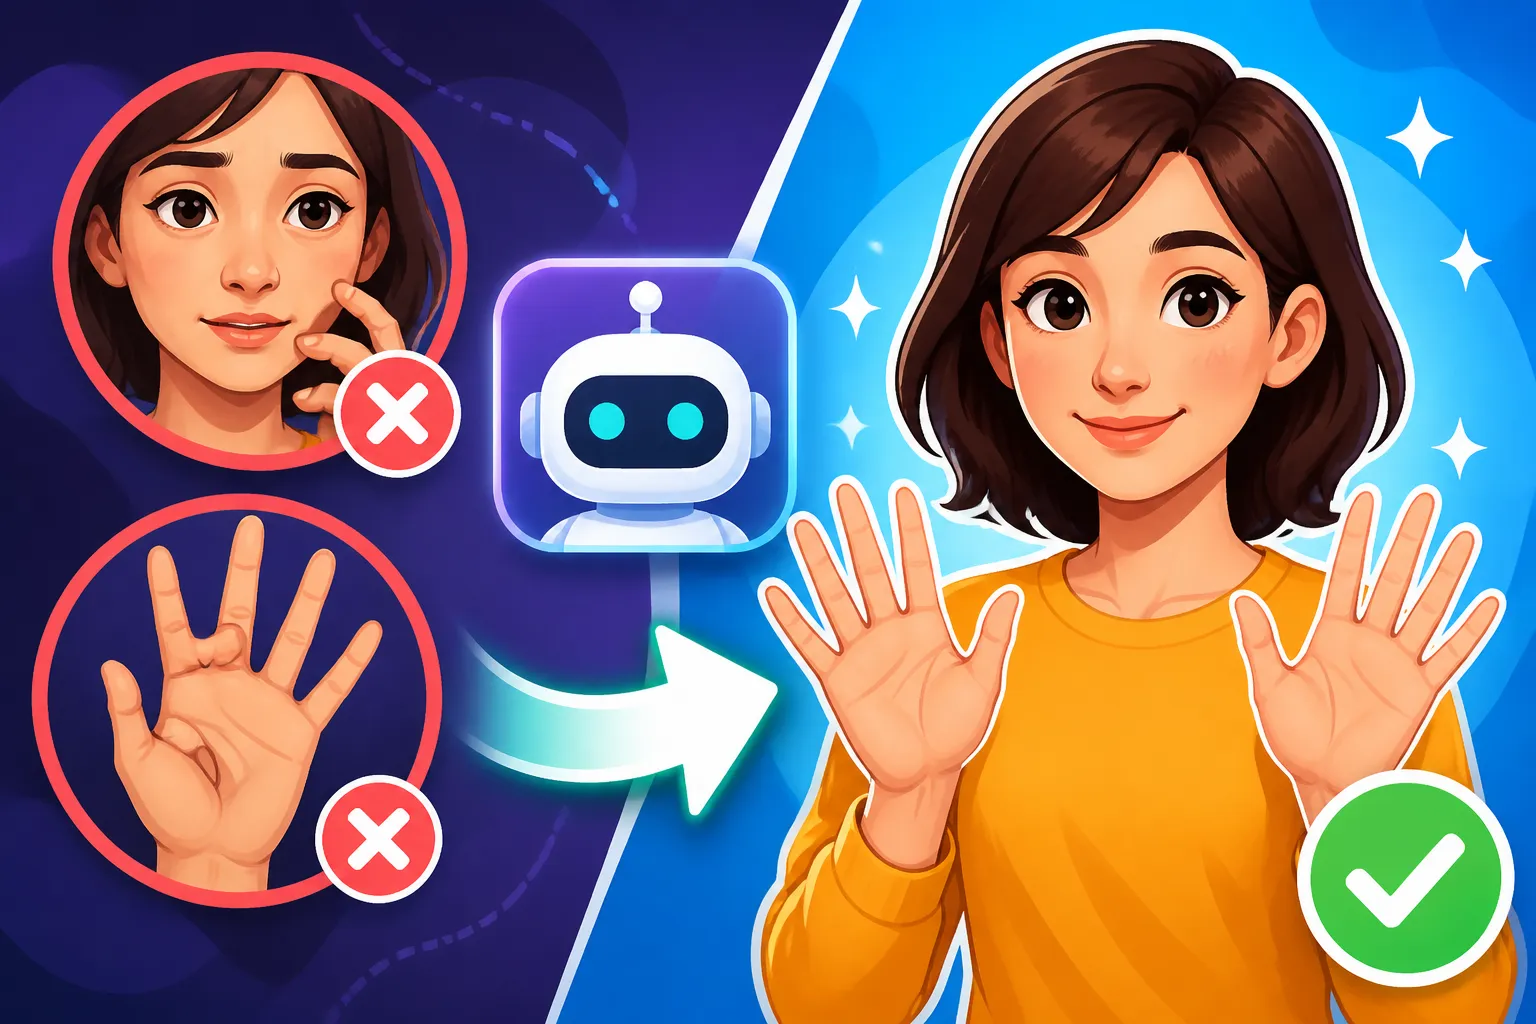
It’s a tale as old as AI image generation itself: you’ve crafted a brilliant prompt, waited eagerly, and the image pops up looking absolutely incredible… except for those hands. Or maybe the eyes are just a little off, staring into two different dimensions. It's incredibly frustrating when an otherwise perfect piece of art or marketing material is completely undermined by these persistent anatomical glitches. This comprehensive guide will dive deep into why AI often struggles with human hands and faces, and more importantly, equip you with a robust toolkit of strategies, prompts, and editing techniques to generate and refine these notoriously tricky features for more realistic and aesthetically pleasing results.
Why AI Struggles with Human Anatomy
Let's be honest, seeing an AI-generated character with seven fingers or an ear growing out of their cheek can be downright jarring. It’s not just you; this is a universal headache for anyone playing in the AI image space. Understanding why these issues happen is the first step toward fixing them, or at least mitigating their occurrence. It’s less about the AI being “bad” and more about the immense complexity of human anatomy combined with how these models learn.
The Intricate Complexity of Human Anatomy
Think about the human hand for a moment. It’s a marvel of biological engineering: five fingers, a thumb, a palm, knuckles, cuticles, varying skin textures, and all of these elements interacting in countless subtle ways. The perspective changes drastically with even a slight rotation. A thumb can look like an extra finger, or a finger can appear dislocated, depending on the angle and context. For an AI model, which processes images as statistical patterns, distinguishing between a correctly formed hand and a slightly mutated one is incredibly difficult because the data it learns from doesn't always provide perfectly consistent, labeled examples across every conceivable pose and lighting condition. Faces, while seemingly simpler, suffer from similar issues, particularly with symmetry, proportion, and the subtle nuances that convey emotion or realism without falling into the unsettling "uncanny valley." Eyes need to look in the same direction, teeth need to be aligned, and expressions need to be natural, not frozen or distorted.
Limitations in Training Data and Interpretation
AI models like Midjourney, DALL-E, or Stable Diffusion are trained on vast datasets of images scraped from the internet. While these datasets are massive, they're not perfect. The sheer variety of image quality, artistic styles, and compositional quirks means the AI encounters an incredible diversity of "correct" and "incorrect" anatomical representations. Sometimes, the AI might infer an extra finger from a shadow, or merge two features because of a blur in the training image. Furthermore, the AI doesn't understand "anatomy" in a biological sense; it understands statistical relationships between pixels. When you prompt for "a person waving," the AI isn't thinking, "I need to render a human hand with five fingers and a palm in a waving gesture." Instead, it's recalling patterns of pixels associated with the concept of "waving" from its training data, which might include countless variations, some anatomically perfect, others less so, and many that are simply artistically stylized. This leads to unpredictable outcomes when it tries to synthesize something new, especially with complex structures like hands and detailed facial features.
Navigating the Uncanny Valley
The "uncanny valley" is a psychological phenomenon where humanoid objects that are almost, but not quite, perfectly realistic evoke feelings of eeriness and revulsion in observers. This is precisely where many AI-generated hands and faces land. When an image is clearly stylized or abstract, we accept its imperfections. But when an AI image aims for photorealism and falls just short – say, a stunning portrait with eyes that are slightly too far apart, or a hand with a sixth digit that’s just a little too subtle to ignore – our brains immediately flag it as "wrong" in a deeply unsettling way. This isn't just about technical error; it's about our innate human perception of what "looks right" in another human, which AI is still learning to master. The challenge isn't just generating fingers; it's generating fingers that feel natural, proportionate, and anatomically correct in every minute detail.
Pre-Generation Strategies for Better Results
You know what they say: an ounce of prevention is worth a pound of cure. When it comes to AI image generation, this means putting in the work upfront with thoughtful, detailed prompts. Many of the frustrating anatomical errors can be significantly reduced, if not entirely avoided, by guiding the AI more effectively before it even starts rendering.
Crafting Detailed Prompts for Human Anatomy
The more specific you are, the better. Generic prompts like "a person smiling" leave too much to the AI's interpretation, which is when those weird hands and wonky eyes tend to appear. Instead, think like a director or a photographer, detailing every aspect. When describing hands, don't just say "hands." Try: "a woman gently holding a teacup, delicate fingers, perfectly formed nails, natural skin texture, soft light on knuckles." For faces, move beyond "beautiful face" to something like: "close-up portrait of a young woman, symmetrical features, clear blue eyes looking directly at the viewer, subtle smile, smooth skin, defined jawline, realistic hair strands, golden hour lighting."
Consider adding descriptors related to common issues. For example, explicitly mentioning "five fingers" or "well-defined knuckles" can sometimes reinforce the correct anatomy. Think about the pose: "hands clasped together, fingers intertwined naturally" is better than just "hands." Experiment with phrases that imply normalcy and proportion. Leverage terms like "anatomically correct," "realistic proportions," or "perfect symmetry." If you're struggling to get the AI to render hands in a specific way, you might consider How to Write AI Prompts for Photorealistic Images or even explore a more specific guide like How to Prompt for Realistic Faces. Remember, the AI is a literal interpreter of your text; leave no room for ambiguity where critical details are concerned.
Using Negative Prompts Effectively
Negative prompts are your secret weapon against unwanted elements. They tell the AI what not to include, and they are absolutely crucial for tackling those stubborn anatomical imperfections. For hands, a strong negative prompt can be a game-changer. Include terms like: bad anatomy, deformed hands, mutated fingers, extra fingers, missing fingers, fused fingers, disfigured hands, ugly hands, weird hands, poor hand anatomy, wrong number of fingers.
For faces, similarly, be explicit about what you want to avoid: ugly, deformed, disfigured, mutated, malformed, poorly drawn face, disfigured face, bad facial anatomy, asymmetrical eyes, mismatched eyes, cross-eyed, strange eyes, distorted nose, weird mouth, extra teeth, missing teeth, unrealistic teeth, crooked smile. The key is to be comprehensive. Many experienced prompt engineers will have a standard negative prompt string that includes these anatomical fixes by default, especially when generating human subjects. If you're looking for more ways to fine-tune this, checking out a guide on How to Use Negative Prompts can provide even deeper insights. It’s about being proactively preventative.
Leveraging Aspect Ratios and Composition
The aspect ratio and overall composition of your image can also indirectly impact how well hands and faces are rendered. When you use a very wide or very tall aspect ratio, or if the subject is very small in the frame, the AI has fewer pixels to work with for intricate details. This can lead to simplified, or worse, distorted hands and faces.
- Closer Shots: For images where hands or faces are a primary focus, use closer shots or a portrait orientation (
--ar 2:3or--ar 9:16in Midjourney, for example). This gives the AI more "real estate" to generate those complex features with higher fidelity. - Central Composition: Keeping the subject centrally framed can also help, as AI tends to render details better in the center of the image. When a hand or face is pushed to the very edge, it's more susceptible to warping or being cut off awkwardly.
- Avoid Extreme Angles: Extremely wide-angle lenses or very unusual camera angles can confuse the AI when it comes to rendering natural human proportions. Stick to more conventional photography angles if anatomical correctness is paramount.
- Testing Different Ratios: Don't be afraid to generate the same prompt across a few different aspect ratios to see which one yields the best results for your specific anatomical challenges. Sometimes, a subtle shift from
16:9to3:2can make a surprising difference in how the AI handles complex details like fingers.
Post-Generation Fixes: Editing AI-Generated Anomalies
Even with the most meticulously crafted prompts and robust negative prompt lists, sometimes those pesky anatomical errors still slip through. It happens to the best of us! The good news is that many AI image generation tools, and even traditional photo editing software, offer powerful ways to clean up these imperfections after the fact. Don't throw away a nearly perfect image just because of a wonky thumb!
Inpainting and Outpainting Techniques
Many advanced AI image tools now feature inpainting and outpainting capabilities, which are revolutionary for fixing specific areas of an image.
- Inpainting: This allows you to select a problematic area (like a six-fingered hand) and then re-prompt the AI specifically for that area. You can describe "a woman's perfectly formed right hand, five fingers visible, holding a phone" over the offending limb. The AI will then attempt to regenerate only that selected region, blending it seamlessly with the rest of the image. Tools like Adobe Firefly, Stable Diffusion, and even DALL-E (especially in ChatGPT) excel at this. It's like having a magic eraser and a skilled artist at your command for tiny, localized repairs. You can literally highlight the messed-up area and tell the AI, "make this a normal hand, please."
- Outpainting: While less common for direct anatomical fixes, outpainting can be useful if an important part of a hand or face was cut off at the edge of the frame. You can expand the canvas and have the AI intelligently fill in the missing portions, giving you more room to work with for subsequent inpainting or editing.
Understanding how to use these features for precise touch-ups can be invaluable. A deep dive into How to Inpaint and Edit AI Images will provide detailed, step-by-step instructions for specific platforms.
Using External Photo Editing Tools
Sometimes, the AI's inpainting isn't quite enough, or you might be using a tool that lacks robust built-in editing. This is where traditional photo editing software like Adobe Photoshop, GIMP, or even simpler tools like Canva, become your best friends.
- Photoshop's Generative Fill (Adobe Firefly Integration): If you're an Adobe user, Photoshop's Generative Fill, powered by Adobe Firefly, is an absolute game-changer. You can select an imperfect hand, and with a simple prompt like "realistic human hand with five fingers," Photoshop will generate new options for that area, often with incredible accuracy and seamless blending. This is perhaps one of the most powerful and intuitive ways to tackle AI-generated anatomical issues using external tools, as it brings AI capabilities to a professional editing environment.
- Clone Stamp and Healing Brush: For more subtle imperfections, like a slightly misplaced pixel or a small anomaly, the clone stamp tool or healing brush in any photo editor can work wonders. You can sample a "good" area of skin or a well-formed finger and paint over the problem area to correct it manually.
- Liquify Tool: For slight distortions in faces or minor proportion issues, Photoshop's Liquify tool allows you to subtly push and pull pixels, adjusting features like eye spacing, nose width, or lip curvature without completely regenerating the area. This is great for those "uncanny valley" moments where everything is almost right.
- Manual Drawing/Painting: For artists or those with tablet skills, sometimes the quickest fix is to simply paint over the problematic hand or face with a digital brush, drawing in the correct features. This requires more skill but offers complete control.
Iterative Generation and Variations
Don't settle for the first result! Almost every AI image generator offers ways to generate variations of an image or to re-run a prompt.
- Re-rolling: If the initial set of images has obvious flaws, simply re-roll the prompt. Often, a fresh batch will produce something much closer to what you envision.
- Variations: If one image in your initial grid is almost perfect except for a specific flaw, generate variations of that one image. This tells the AI, "I like the overall composition and style of this one, now try to make small changes to refine it." Many platforms, including Midjourney, have dedicated buttons for creating variations of a selected image. This can often resolve minor anatomical issues by simply giving the AI another chance to get it right within a similar aesthetic.
- Seed Control: For more advanced users, understanding how to use seeds can be powerful. A seed number allows you to reproduce an image or generate variations based on a specific initial noise pattern. If you get a great image with a slight hand issue, using its seed number for a new generation while subtly altering your prompt (e.g., adding "perfect hands") can sometimes help the AI maintain the overall composition while fixing the detail.
Advanced Techniques for Enhanced Realism
Once you've mastered the basics of prompting and post-processing, there are even more sophisticated techniques you can employ to achieve unparalleled realism, especially when it comes to those tricky human elements. These methods often provide greater control over the AI's output, moving beyond simple text prompts to guide the generation process with visual cues.
Understanding ControlNet and OpenPose
For users who need precise control over pose, composition, and human anatomy, ControlNet is a game-changer, particularly with Stable Diffusion. ControlNet is an extension that allows you to provide an additional "condition" image to guide the AI generation process.
- OpenPose: One of the most popular ControlNet models is OpenPose. How it works is quite fascinating: you provide a stick-figure pose, either drawn manually or extracted from an existing photograph, and ControlNet will make the AI generate an image where the subject's pose matches that stick figure exactly. This is incredibly powerful for hands and faces because it dictates the underlying skeletal structure and joint positions. If you need a character's hand in a specific grip or a person standing in a particular stance, OpenPose ensures the basic anatomical framework is correct, significantly reducing the chance of mutated limbs. You can even use tools to create detailed OpenPose skeletons, down to individual finger joints, to ensure perfect hand positioning.
- Canny and Depth Maps: Other ControlNet models like Canny (edge detection) or Depth maps can help maintain the structure and perspective of human forms. If you have a reference photo with good hand or face structure, you can extract a Canny or Depth map from it and use that to guide your AI generation, telling the AI, "keep these outlines or this sense of depth." This bypasses many of the AI's common struggles by providing a structural blueprint from the outset.
Utilizing Reference Images and Image-to-Image
Providing the AI with visual examples, not just text, can dramatically improve the accuracy of hands and faces.
- Image Prompts: Many AI tools allow you to use an image as part of your prompt. You can upload a reference photo of a perfectly formed hand, a beautiful face, or a specific pose, and then add your text prompt. The AI will try to incorporate elements from the reference image into its generation. This is especially useful for maintaining consistency or achieving a particular style of realism. If you're looking to integrate visual elements into your prompts, understanding How to Use Reference Images in Prompts can be incredibly beneficial.
- Image-to-Image (Img2Img): This technique, often found in Stable Diffusion and other advanced interfaces, involves taking an existing image (even a rough sketch or a photograph) and having the AI transform it based on your text prompt. If you've got an AI image with a decent overall composition but a terrible hand, you can manually sketch a rough, correct hand over the problematic one in a simple editor, then use Img2Img with a low "denoising strength" and a prompt like "perfectly formed human hand." The AI will then subtly reshape your sketch into a more detailed, realistic hand, maintaining its position and integrating it into the existing image. This offers a fine-grained level of control that text-only prompts simply can't match.
Upscaling and Detail Enhancement
Even if your AI image has relatively good anatomy, upscaling and enhancing details can bring out the realism, making minor imperfections less noticeable and amplifying the good parts.
- AI Upscalers: Tools like Magnific AI, Topaz Gigapixel AI, or even built-in upscalers in platforms like Midjourney, can dramatically increase the resolution of your image. As the image gets larger, these tools often use AI to intelligently "fill in" details, which can sometimes subtly correct minor anatomical flaws or add texture to skin and knuckles that makes them appear more natural. A dedicated article like Best AI Image Upscalers and How to Use Them can guide you through the various options.
- Detail Prompts: When generating the image, you can include terms that encourage high fidelity:
highly detailed, hyperrealistic, intricate details, sharp focus, 8k, cinematic lighting. These terms encourage the AI to render with more precision from the start, which can lead to better initial anatomical structures. - Manual Refinement after Upscaling: Once an image is upscaled, you have more pixels to work with for manual edits. A slightly odd finger that was barely visible at 512×512 might be clearer at 4K, making it easier to clone stamp, heal, or even redraw in a traditional photo editor.
Choosing the Right Tool for Human Anatomy
Not all AI image generators are created equal, especially when it comes to the nuanced task of rendering human anatomy. Some platforms have made significant strides, dedicating resources to improve human-like features, while others might still struggle more consistently. Picking the right tool for the job can save you a lot of headache and editing time.
Tools Excelling at Human Features
Certain AI image generators have gained a reputation for handling human subjects, faces, and hands with more finesse than others.
- Midjourney: Often praised for its artistic quality and ability to generate stunning portraits, Midjourney has made continuous improvements in rendering human anatomy, especially with its later versions (like V6 and beyond). While it’s not immune to the occasional six-fingered catastrophe, it generally produces more aesthetically pleasing and anatomically plausible results for faces and hands compared to many competitors. Its ability to interpret nuanced emotional prompts also helps in creating expressive, realistic faces. If you're focusing on high-quality artistic or photorealistic human imagery, exploring a detailed Midjourney Review: Features, Pricing, and Quality or even a deeper dive into Midjourney V7 Features and Updates might be a good starting point.
- DALL-E 3 (especially in ChatGPT): DALL-E, particularly its integration into ChatGPT, has shown remarkable improvements in consistency and realism for human figures. Its understanding of complex prompts and ability to generate coherent scenes makes it quite good at placing hands and faces appropriately within context. While it may not always hit the hyperrealistic mark of Midjourney, it's generally reliable for producing functional and recognizable human anatomy, often with fewer outright errors. For a comprehensive look, consider reading a DALL-E Review: Features, Pricing, and Quality article.
- Adobe Firefly: Adobe's offering, especially with its focus on commercial safety and seamless integration into creative workflows (like Photoshop's Generative Fill), is also making strides. Its strength lies not only in initial generation but also in its unparalleled inpainting capabilities, allowing users to precisely fix anatomical flaws within a professional editing environment. This combination makes it a powerful choice if post-processing is a regular part of your workflow. For commercial applications, you might want to check out an Adobe Firefly Review for Commercial Use.
Tools with Strong Editing Capabilities
Beyond raw generation power, the ability to effectively edit and refine your images within the platform or with seamless integrations is crucial for tackling anatomical issues.
- Stable Diffusion (with ControlNet/Inpainting): While Stable Diffusion's base models can sometimes produce variable results, its open-source nature means it has an incredibly vibrant ecosystem of models, extensions, and plugins. Tools like Automatic1111's WebUI for Stable Diffusion offer robust inpainting, outpainting, and most importantly, ControlNet integration. This gives users an unparalleled level of control over composition and pose, making it a powerhouse for fixing anatomy even if the initial generation isn't perfect. Its flexibility means that if you're willing to invest time in learning its intricacies, you can achieve highly customized and anatomically correct results. You can find more details in a Stable Diffusion Review: Free and Customizable guide.
- Leonardo AI: Leonardo AI offers a user-friendly interface with powerful features, including an image-to-image tool and decent inpainting. Its various models, including "Alchemy," are quite capable of generating good human features, and its editing tools provide a solid workflow for refining hands and faces without needing to jump to external software immediately. Its free tier is also a great way to experiment with these capabilities.
- Canva AI: While perhaps not reaching the photorealism of Midjourney or the technical depth of Stable Diffusion, Canva AI's strength lies in its ease of use and integration into a design ecosystem. For quick, functional fixes for social media or blog graphics, its basic editing tools (resizing, cropping, simple touch-ups) combined with its AI image generation can provide decent results for non-designers. For casual users, a Canva AI Review: Pros, Cons, and Pricing might be useful.
The table below offers a quick comparison of how different tools stack up when it comes to tackling hands and faces:
| AI Image Tool | Primary Strength for Anatomy | Key Features for Fixing Issues | Typical Output Quality for Humans | Learning Curve |
|---|---|---|---|---|
| Midjourney | Artistic realism, complex scenes | Variations, iterative generation, upscale | High (faces, increasingly hands) | Moderate |
| DALL-E 3 | Coherent scene composition, context | Inpainting (via ChatGPT), direct prompts | Good (reliable, less error-prone) | Low |
| Stable Diffusion | Ultimate control, customization | ControlNet, Inpainting, Img2Img, LoRAs | Variable (depends on model), highly fixable | High |
| Adobe Firefly | Commercial safety, editing integration | Generative Fill (in Photoshop), inpainting | Good (realistic, easily edited) | Low to Moderate |
| Leonardo AI | User-friendly, diverse models | Image-to-image, inpainting, free tier | Good (improving constantly) | Low |
Common Mistakes and How to Avoid Them
Even with all the tools and techniques at your disposal, it's easy to fall into traps that exacerbate anatomical issues. Learning from common missteps can accelerate your journey to consistently generating flawless AI images.
Over-relying on Simple Prompts
This is arguably the biggest culprit behind most AI anatomical nightmares. It's tempting to type "man standing" and expect perfection, but the AI simply doesn't have enough information to reliably render all the subtle details.
- The Problem: Simple prompts tell the AI what to generate but not how. Without guidance on pose, lighting, style, or specific features, the AI defaults to its most common learned patterns, which often include anatomical inconsistencies due to the vast and varied nature of its training data. It might generate a hand in a strange, generic position, or a face with a bland, unnatural expression, purely because your prompt lacked the descriptive power to direct it otherwise.
- The Solution: Embrace detail. Be hyper-specific about every element of the human form you want to generate. Describe finger positions, eye color and direction, facial expressions, and even subtle wrinkles or textures. As discussed in How to Write AI Image Prompts, the more evocative and precise your language, the better the AI can interpret your vision. Instead of "a woman," try "a young woman with cascading auburn hair, a determined expression, sparkling emerald eyes, her left hand gently resting on a wooden table, fingers relaxed and perfectly formed." This gives the AI a rich canvas of information to draw from.
Ignoring the Power of Iteration
Many users generate one batch of images, find flaws, and then give up or start from scratch. This wastes valuable potential for refinement.
- The Problem: The first set of images an AI generates is rarely perfect. If you stop there, you're missing out on the AI's ability to refine and improve based on your feedback (even if that feedback is just "generate variations"). You might get a near-perfect image with just one bad hand, but discarding it means losing that nearly perfect composition.
- The Solution: Treat AI image generation as an iterative process. Generate variations of promising images. Use the "upscale" or "refine" features offered by your tool. If one image has a great face but a bad hand, try generating variations with an added negative prompt for "bad hands." If another has a perfect hand but a slightly off-kilter face, use an inpainting tool to regenerate just the face. Think of each generation as a draft, not a final product. Persistent refinement, often through small tweaks and re-rolls, is how professionals achieve consistent quality.
Forgetting Post-Processing is Key
Believing that AI will deliver a "print-ready" image 100% of the time without any human intervention is a common, and often frustrating, misconception.
- The Problem: Even the best AI-generated image can benefit from a little polish. Ignoring post-processing means you're leaving potential quality on the table. A slightly dull eye can become captivating with a minor brightness adjustment. A minor hand warp might be unnoticeable with a subtle blur or a quick touch-up in Photoshop. More critically, complex anatomical fixes often require post-processing tools.
- The Solution: Integrate post-processing into your workflow. Even if you're not an expert photo editor, familiarizing yourself with basic tools like cropping, color correction, and simple touch-ups can elevate your AI images significantly. For those stubborn anatomical issues, learn the fundamentals of inpainting, cloning, or using generative fill in programs like Adobe Photoshop. Don't be afraid to take your AI creations into an external editor to address those lingering imperfections. After all, even professional photographers spend hours in post-production; expecting AI to bypass that entirely is unrealistic. For general quality improvements, you might also find value in learning How to Fix Blurry AI Images or even How to Fix Distorted AI Faces specifically. A complete pipeline involves both initial generation and final polish.
Disclaimer
The information provided in this article is for general guidance and informational purposes only. AI image generation technology is constantly evolving, and the capabilities and limitations of various tools may change over time. Always refer to the latest documentation and terms of service for any specific AI tool you are using.