How to Remove AI Image Artifacts
There's nothing quite as frustrating as generating an incredible AI image, only to find it plagued with weird, unnatural elements – that extra finger on a hand, a strangely distorted eye, or a background object that makes absolutely no sense. You spend time crafting the perfect prompt, waiting for the magic, and then BAM! Digital glitches ruin an otherwise stunning creation. It's enough to make you pull your hair out, feeling like you're constantly battling the AI rather than collaborating with it. But don't despair! This comprehensive guide is dedicated to helping you understand why these "artifacts" appear and, more importantly, how to remove AI image artifacts effectively, giving you cleaner, more professional results.
Understanding AI Image Artifacts: The Digital Glitches
AI image generation has come a long way, but it's still far from perfect. Those strange anomalies we often see in generated images are what we call "artifacts," and they're a tell-tale sign that a computer, not a human, was behind the brush. It can feel like playing a game of "spot the AI error," which isn't exactly what you signed up for when you started experimenting with these powerful tools.
What Exactly Are Artifacts in AI Art?
When we talk about artifacts in AI art, we're referring to any unwanted, unnatural, or nonsensical elements that appear in your generated images. They can manifest in a myriad of ways, and recognizing them is the first step toward fixing them.
Let's break down some of the most common culprits:
- Distorted Anatomy: This is probably the most infamous one. You've seen them – hands with six fingers, thumbs growing out of wrists, eyes that are slightly off-kilter, or limbs bending at impossible angles. Human and animal anatomy are incredibly complex, and AI models often struggle to render them consistently, especially when the subject isn't perfectly facing the "camera" or is obscured.
- Illogical Elements: Sometimes, your AI will throw in objects that have no business being there. A floating teacup in a forest scene, a car merged strangely with a tree, or an entire background structure that defies architectural logic. These are often remnants of the AI trying to interpret a prompt too broadly or pulling from diverse training data in unexpected ways.
- Blurry Textures and Faces: While AI can generate incredible detail, it can also produce areas that are inexplicably soft, blurry, or lack the crispness of the rest of the image. This might be a patchy skin texture, fuzzy hair, or a background that looks like it's out of focus when it shouldn't be.
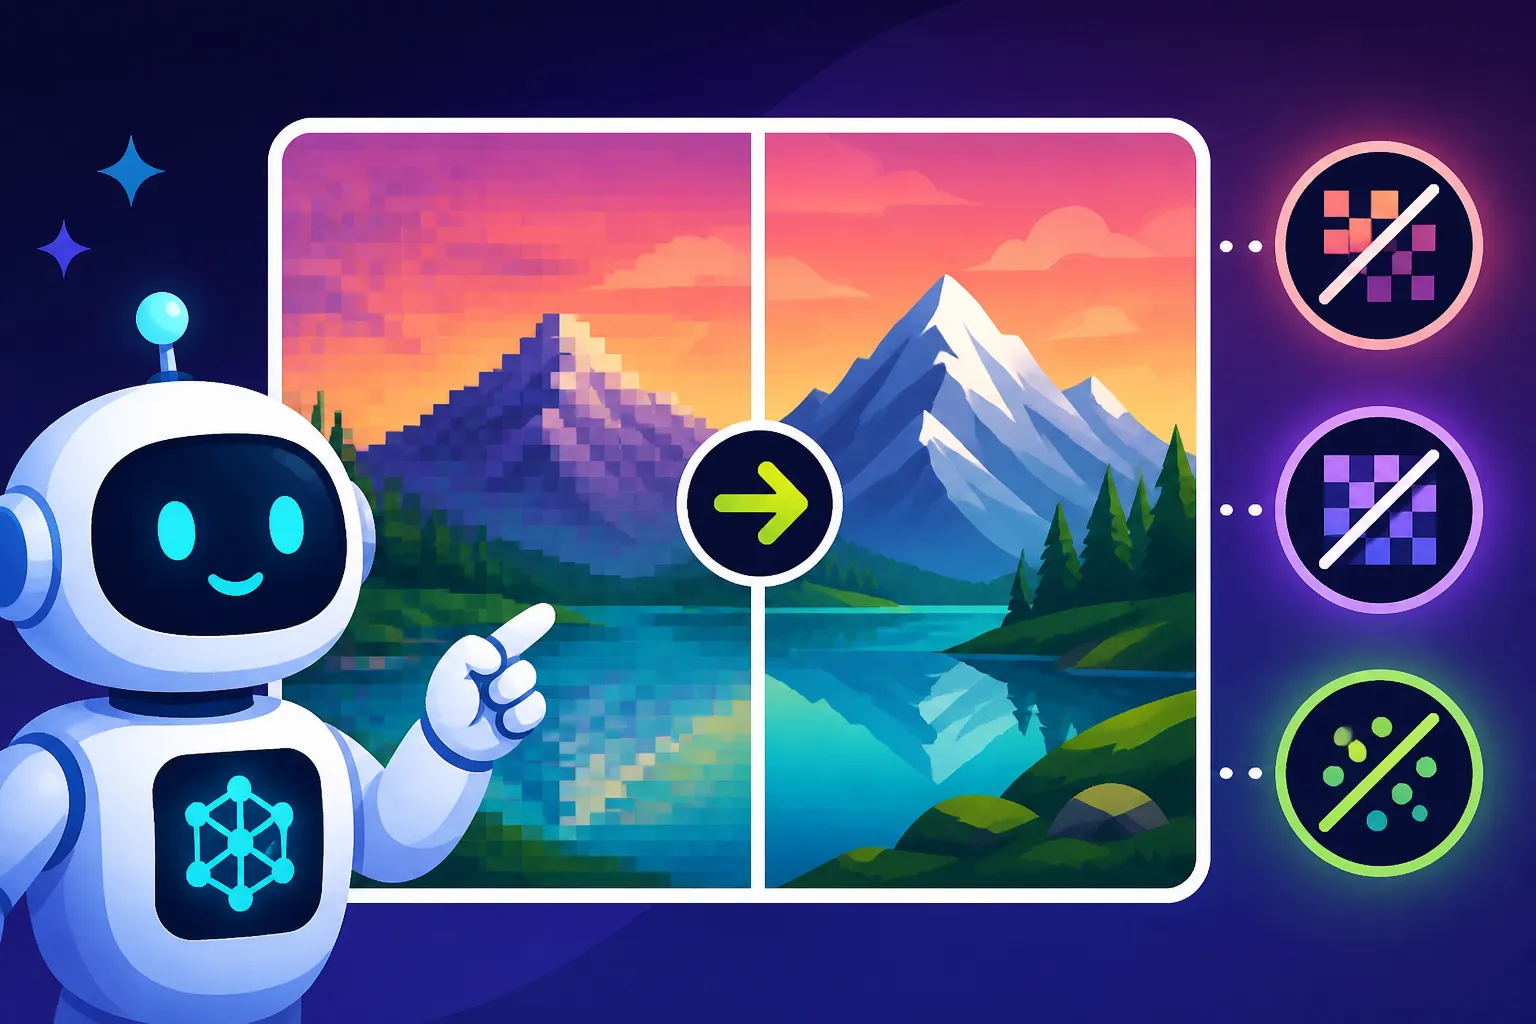
- Pixelation and Jaggies: Especially with lower-resolution generations or aggressive upscaling without proper enhancement, you might notice blocky pixels or jagged edges that detract from the smoothness of lines and curves. This is less common with modern high-quality generators but can still pop up.
- Strange Background Elements: The background often gets the short end of the stick. You might find repeating patterns, bizarre architectural details, or abstract shapes that make no sense, particularly in busy or complex scenes. The AI prioritizes the main subject, sometimes at the expense of coherent surroundings.
- Garbled Text Rendering: If you've ever tried to get an AI to write text within an image, you know the pain. It often comes out as an indecipherable mess of squiggles and random letters. While tools like Ideogram are getting better, accurate text generation remains a significant challenge for most AI models.
These issues happen because AI models don't "understand" the world like we do. They operate on complex mathematical patterns derived from vast datasets. When you give it a prompt, it's essentially trying to piece together a new image by finding statistical correlations in its training data. If the data for a specific element (like hands from a particular angle) is scarce or inconsistent, the AI will "guess," and those guesses often lead to artifacts.
Why AI Models Struggle with Perfection
It's easy to get frustrated when the AI consistently misinterprets your vision, but understanding the underlying reasons can help you anticipate and mitigate these issues. AI image generators are statistical engines, not artists with intuition.
- Statistical Interpolation, Not True Understanding: Think of an AI model as an incredibly sophisticated pattern-matching system. When you ask it for "a person walking a dog," it's not imagining a person or a dog in the way a human would. Instead, it's looking at billions of images of "people," "dogs," "walking," and the relationships between these elements. It then attempts to generate a new image by interpolating between these learned patterns. It doesn't inherently "know" that a human hand has five fingers; it just knows that most hands in its training data have five fingers, so it tries to replicate that statistical average. When the context is unusual, or the detail is complex, the average might break down, resulting in an extra digit or a missing thumb.
- Training Data Biases and Limitations: The quality and diversity of the training data heavily influence an AI model's output. If the training data contains more images of well-formed hands than distorted ones, the AI will lean towards generating good hands. However, if there's a scarcity of specific poses or angles, or if the data itself contains imperfections, those imperfections can be reflected in your generated images. For instance, close-up, perfectly rendered hands are notoriously difficult for AI because the training sets often contain hands that are smaller parts of larger scenes, not the primary focus with hyper-detailed clarity. This is particularly true for complex subjects like human anatomy, where every joint, muscle, and bone needs to align perfectly.
- Prompt Misinterpretation and Ambiguity: Sometimes, the problem isn't the AI's capability but its interpretation of your instructions. Vague prompts can lead to ambiguous results. If you say "a futuristic city," the AI might combine elements from various sci-fi genres in a way that creates jarring or inconsistent architectural styles because it lacks specific guidance. The more precise and descriptive you are, the better chance the AI has of aligning with your vision, but even then, a certain level of randomness is inherent in the generative process.
These underlying mechanisms mean that while AI models are incredibly powerful for generating creative visuals, they still require human guidance and intervention to achieve truly flawless results. It's a dance between your creative input and the algorithm's interpretation, and often, a little post-production cleanup is necessary.
Pre-Generation Strategies: Prompt Engineering for Cleaner Images
The best offense is a good defense, right? When it comes to AI image artifacts, the most effective way to remove them often starts before you even hit that generate button. Mastering prompt engineering is like learning to speak the AI's language more fluently, guiding it away from common pitfalls.
Crafting Detailed and Specific Prompts
Vagueness is the enemy of quality in AI image generation. The more specific and detailed your prompt, the less room the AI has to make assumptions that lead to artifacts. It's about taking control of the narrative.
Imagine you want an image of a person. A prompt like "a woman" is far too broad. The AI has to fill in all the blanks: what she looks like, what she's doing, where she is, what she's wearing. This leaves a lot of room for generic or even bizarre interpretations. Instead, consider:
"A close-up portrait of a serene young woman with intricate red braided hair, delicate freckles across her nose, and almond-shaped green eyes, smiling subtly, soft diffused studio lighting, shallow depth of field, looking directly at the viewer."
See the difference? We've specified everything from hair color to lighting. This level of detail drastically reduces the chances of the AI giving her blurry features or an odd expression. For complex anatomical parts like hands, you might even explicitly state things like "a hand with five distinct fingers" – though AI can sometimes still struggle, it helps to reinforce the desired outcome.
Another crucial technique is the use of negative prompts. These are keywords you tell the AI not to include or emphasize. Think of it as telling a child, "Don't touch the red button." The more comprehensive your negative prompt list, the better you can filter out common artifact types. Here's a solid starter list for many AI generators:
"ugly, deformed, extra limbs, bad anatomy, missing fingers, extra fingers, distorted, blurry, low quality, pixelated, watermark, signature, text, jpeg artifacts, noise, grainy, tiling, poorly drawn hands, poorly drawn feet, poorly drawn face, disfigured, mutation, mutated, gross proportions, extra digits, long neck, bad hands, malformed limbs, wrong anatomy, extra arms, extra legs, fused fingers, too many fingers, out of frame."
Some advanced users even add stylistic negative prompts like "anime, cartoon, sketch" if they're aiming for photorealism. By actively telling the AI what not to do, you're building a fence around its creative process, keeping it within desired boundaries. Learning How to Write AI Image Prompts effectively is truly a game-changer for reducing artifacts right from the start.
Utilizing Parameters and Styles for Consistency
Beyond the words themselves, many AI image generators offer parameters and stylistic controls that can significantly improve output quality and consistency, thereby minimizing artifacts. Think of these as the settings on a camera, allowing you to fine-tune the shot before you even take it.
- Aspect Ratios: Often overlooked, the aspect ratio (
--arin Midjourney, or simple dropdowns in other tools) plays a huge role in composition. If you're trying to generate a full-body portrait in a square aspect ratio (1:1), the AI might struggle to fit everything in naturally, leading to cropped limbs or distorted perspectives. Choosing a vertical aspect ratio like 2:3 or 9:16 for portraits or a horizontal one like 16:9 for landscapes gives the AI a more appropriate canvas, reducing the likelihood of awkward cropping or stretching that can introduce artifacts. - Seed Values: Most AI image generators use a "seed" number to initialize the random noise from which the image is generated. If you get an image that's almost perfect but has a minor artifact, you can often use the same prompt and the exact seed value to generate variations that are very similar but might fix the specific issue. This is incredibly powerful for iterative refinement. Instead of starting from scratch, you're gently nudging the AI in a slightly different direction from a known good starting point. This also helps when you are trying to keep character consistency across multiple images.
- Style References and Model Versions: Many AI tools offer different models or "style references" that excel in particular aesthetics or levels of realism. For example, some models might be fantastic at photorealism, while others are better at painterly styles. If you're consistently getting blurry or cartoonish results when you want realism, ensure you're using the correct model version or applying the right style modifiers. Midjourney, for instance, has evolved significantly through its versions, with Midjourney V7 Features and Updates offering much-improved realism and coherence compared to earlier iterations. Similarly, tools like Flux are often highlighted for their exceptional capabilities in generating photorealistic images. Understanding which models and styles work best for your desired outcome can drastically reduce stylistic artifacts and improve overall quality.
By strategically using these pre-generation controls, you're not just throwing words at an AI; you're becoming a conductor, orchestrating the generation process to produce images that are cleaner, more coherent, and much less prone to those infuriating digital glitches.
Post-Generation Fixes: Editing and Refinement Techniques
Even with the best prompt engineering, some artifacts might still slip through. This is where post-generation editing and refinement techniques become your best friends. Think of it as the final polish in a photography studio – sometimes a little touch-up is all you need to turn a good image into a great one.
Inpainting and Outpainting for Targeted Corrections
Many modern AI image editors now come with powerful tools like inpainting and outpainting. These features allow you to surgically correct specific areas of an image, often with remarkable precision, without having to regenerate the entire thing.
-
Inpainting: The Digital Eraser and Replacer
Inpainting is like having a magic brush that lets you select a specific area of your image and then prompt the AI to regenerate just that part. Got a hand with an extra finger? Select the hand, type a prompt like "a realistic human hand with five fingers," and watch the AI attempt to fix it, often blending seamlessly with the rest of the image. This is particularly useful for:- Fixing Distorted Features: If a face is slightly off, an eye is uneven, or a limb looks unnatural, you can mask just that specific area and provide a clarifying prompt (e.g., "a beautifully rendered eye looking forward," "a natural-looking hand holding a book").
- Removing Unwanted Objects: Accidentally generated a strange object in the background? Simply select it and prompt for "empty space," "blurry background," or even a specific object you do want there.
- Adding Missing Details: If a subject's clothing is missing a button, or a landscape needs a small rock, inpainting allows you to add these elements without affecting the surrounding areas.
Tools like Adobe Firefly, DALL-E (especially within ChatGPT), and many interfaces for Stable Diffusion offer robust inpainting capabilities. They allow you to define the area you want to change, often with a brush, and then provide a new prompt for that specific region. This iterative process of refinement can save you countless hours of full regeneration. For a deeper dive, check out guides like How to Edit AI Images with Inpainting.
-
Outpainting: Expanding and Correcting Edges
Outpainting, on the other hand, is about extending your image beyond its original canvas. While not directly for removing artifacts, it can indirectly help by providing the AI with more context if an artifact occurs near the edge of an image due to insufficient compositional space. If you have an image where a subject is awkwardly cropped, or a background element looks strange right at the border, you can expand the canvas and have the AI fill in the new areas. This can sometimes naturally resolve edge-related issues that occurred because the AI didn't have enough "room" to fully render an object.
Upscaling and Image Enhancement Tools
Once you've dealt with the obvious visual artifacts, your image might still lack a certain polish, especially if it was generated at a lower resolution. This is where dedicated upscaling and image enhancement tools come into play, providing a crucial step in artifact removal and overall quality improvement.
- Intelligent AI Upscalers: Gone are the days of simple pixel doubling, which just makes blurry images bigger and blurrier. Modern AI upscalers like Magnific AI, Topaz Photo AI, and some integrated features in Midjourney or Leonardo AI use sophisticated algorithms to not only increase resolution but also add detail, sharpen textures, and smooth out imperfections.
- How they help with artifacts: These tools can work wonders on subtle artifacts that aren't quite "wrong" enough for inpainting, but still detract from quality. They can smooth out slight blurriness, reduce jagged edges that appeared during initial generation, and even subtly refine inconsistent textures. For example, if a garment has a slightly patchy texture, an upscaler might unify it. They are particularly effective for reducing the "AI look" that some images can have, making them appear more like high-quality photographs. Many users wonder if tools like Magnific Upscaler: Worth the Price, and the answer often depends on how much you value pristine quality and the ability to reclaim detail.
- Choosing the right upscaler: Different upscalers have strengths. Some excel at photorealism, others at artistic styles. Experimenting with a few can help you find one that best complements your generated art. They often come with various settings to control noise reduction, sharpening, and detail enhancement, allowing you to tailor the process.
- Manual Touch-ups with Traditional Image Editing Software: While AI tools are powerful, sometimes a human touch is indispensable. After upscaling, you might still find minor imperfections that are best handled in traditional photo editing software like Adobe Photoshop, Affinity Photo, GIMP, or even simpler tools like Canva.
- Minor Retouching: For tiny blemishes, subtle color inconsistencies, or fine-tuning elements that AI struggles with (like individual strands of hair or delicate reflections), manual editing is often the quickest and most precise solution.
- Cropping and Composition: Sometimes, the best way to "remove" an artifact is to simply crop it out if it's along the edge of the frame and not essential to the composition.
- Overall Polish: Traditional editors are still king for final color grading, contrast adjustments, and applying artistic filters or effects that give your AI-generated image a truly professional finish. While Is Canva AI Good Enough for Pros is a valid question for full generation, its editing features are robust for final touches.
Iterative Regeneration and Variation
Sometimes, the best solution isn't to fix an existing image, but to tell the AI to try again, armed with new information or a slightly different approach. This iterative process of generation and refinement is core to working with AI art.
- Generating Multiple Variations: Most AI image generators allow you to create several variations from a single prompt. If your first generation is 80% there but has a few stubborn artifacts, instead of starting a completely new prompt, generate variations. The AI will make slight tweaks based on your original input, and often, one of the variations will resolve the previous issues while maintaining the overall aesthetic you liked. Don't settle for the first result; explore the options.
- Image-to-Image Prompting: This is a powerful technique where you provide an existing image (either one you generated or even a reference photo) as part of your prompt, along with new text instructions. The AI then uses the visual information from your input image as a guide while incorporating your new textual cues.
- How it helps with artifacts: If you have an image with a great composition but a problematic element (say, a weird hand), you can feed that image back into the AI. Then, in your prompt, you can add negative prompts like "bad anatomy, deformed hand" and reinforce positive elements like "beautiful, realistic hand." The AI will attempt to regenerate the image, prioritizing the visual style and composition of your input while trying to correct the specified flaw. This is especially useful for maintaining character consistency or a specific scene while refining details.
- Patience and Experimentation: The truth is, sometimes it takes multiple attempts, different prompts, and a combination of these techniques to get exactly what you want. Don't be afraid to experiment. Try slightly rephrasing your prompt, adding or removing negative keywords, changing parameters, or combining various tools. AI image generation is as much an art of prompting and refining as it is of purely creative vision.
Advanced Techniques and Workflow Optimization
For those who want to push the boundaries and achieve an even higher level of control and fidelity, there are advanced techniques and workflow optimizations that can drastically reduce artifacts and improve the overall consistency of your AI art. This is where you move from simply generating images to truly directing the AI.
Leveraging ControlNet for Precise Control
One of the most revolutionary advancements in AI image generation, particularly with Stable Diffusion, is ControlNet. If you've ever found yourself frustrated that the AI ignores your desired pose, composition, or depth, ControlNet is your answer. It's like giving the AI a blueprint to follow, dramatically reducing the chance of major structural artifacts.
- What is ControlNet? ControlNet allows you to feed an additional "control image" alongside your text prompt. This control image acts as a structural guide, telling the AI exactly how to arrange objects, poses, or even lighting in the generated image. There are various ControlNet models, each specializing in a different type of structural information:
- Pose (OpenPose): Provides a stick-figure representation of human or animal poses, ensuring limbs are exactly where you want them, preventing common issues like twisted bodies or extra limbs.
- Canny Edges: Extracts outlines from an image, allowing the AI to generate a new image that adheres to the exact contours of objects in your reference. Great for maintaining the structure of buildings or complex objects.
- Depth: Uses a depth map to guide the AI on how far away objects should appear, improving perspective and preventing illogical spatial arrangements.
- Normal Maps: Provides information about the surface orientation of objects, useful for preserving fine details and textures.
- Scenario: Ensuring Correct Character Poses to Avoid Limb Distortions: Let's say you want a character in a dynamic action pose, but every time you generate it, their arms or legs are distorted or misplaced. With ControlNet, you can find a reference photo of the exact pose you want (or even draw a simple stick figure), and then use the OpenPose model. Feed that pose image into ControlNet along with your descriptive text prompt ("a superhero in a dynamic leaping pose, comic book style, highly detailed"). The AI will then generate the image, forcing the character to adopt the exact pose from your reference, making limb distortions significantly less likely. This is a far more reliable method than hoping descriptive text alone will guide the AI accurately. Learning How to Use ControlNet in Stable Diffusion can transform your ability to control image output.
Combining AI Tools for Best Results
No single AI image generator is perfect at everything. Some excel at photorealism, others at artistic styles, and a select few are great with text. A powerful workflow often involves using multiple tools, leveraging each one's strengths to compensate for another's weaknesses. This "best-of-breed" approach is often referred to as building a Best Two-Tool AI Image Stack or even a multi-tool stack.
- Generating an Initial Concept, then Refining:
- You might start by using a tool renowned for its artistic quality and aesthetic appeal, like Midjourney, to generate the core concept and composition of your image. Midjourney is fantastic for broad creative strokes and capturing a unique mood.
- Once you have a general image you like, but it has minor flaws or needs specific elements, you can then take that image to another tool. For instance, if the image has garbled text, you might import it into Ideogram, which is specifically designed for superior text rendering, and use its inpainting or text-generation features to add or correct any lettering. Similarly, if you need precise inpainting for a distorted face, you could take the image to DALL-E (especially via ChatGPT) or an advanced Stable Diffusion setup for its more granular control over specific areas.
- Utilizing External Photo Editors for Final Polish: Don't forget the power of traditional graphic design software. After using various AI tools, the image might still benefit from a final pass in programs like Adobe Photoshop, GIMP, Affinity Photo, or even a user-friendly platform like Canva.
- Color Correction and Grading: These tools offer far more sophisticated controls for adjusting colors, contrast, and overall mood, giving your AI image a consistent, professional look.
- Minor Artifact Cleanup: For tiny, persistent artifacts that AI struggled to remove (a stray pixel, a subtle blur line), manual cloning, healing, or smudging in Photoshop can work wonders.
- Layering and Compositing: If you generated elements separately (like a logo from Ideogram and a background from Midjourney), you'll need a traditional editor to seamlessly combine them. While Is Canva AI Good Enough for Pros for comprehensive AI generation is debatable, its layering and editing features are definitely pro-level for compositing.
This hybrid approach allows you to achieve results that are often superior to what any single AI tool can produce on its own. It's about building a workflow that plays to the strengths of each platform, resulting in a cleaner, more refined final product that's free of frustrating artifacts.
Specific Artifact Troubleshooting Guide
While the general strategies above cover a lot of ground, certain types of artifacts are notoriously stubborn and benefit from targeted troubleshooting. Let's tackle some of the most common and annoying ones head-on.
Fixing Distorted Hands and Limbs
Ah, the dreaded AI hand. It's practically a meme at this point. Hands, with their intricate arrangement of bones, joints, and varying finger lengths, are incredibly challenging for AI models. Limbs can also suffer from strange bends or extra joints.
- Detailed Prompting, Reiterated: This is your first line of defense. When generating images that include hands or full bodies, be excessively descriptive. Instead of just "a hand," try "a beautiful, slender woman's hand gently holding a rose, five fingers clearly visible, perfectly rendered, detailed knuckles and fingernails." Also, don't shy away from strong negative prompts like "bad anatomy, deformed, missing fingers, extra fingers, malformed hands, ugly." Reinforce your desired outcome clearly.
- Inpainting Specific Hand Areas: If you get an otherwise perfect image with just a problematic hand, inpainting is your best friend. Zoom in, carefully mask only the problematic hand, and then use a prompt like "a realistic human hand with five fingers, perfect anatomy." You might need to try this a few times, as hands remain a challenge even for inpainting models. Sometimes it's better to be less specific on the action of the hand in the inpaint prompt and just focus on the anatomy. For more in-depth solutions, refer to resources like How to Fix Extra Fingers in AI Images.
- Using Image References with ControlNet: If you have access to Stable Diffusion with ControlNet, this is arguably the most effective method. Find a reference photo of a hand in the exact pose you desire, ensuring it's a well-formed hand. Use the OpenPose or Canny model in ControlNet to guide the AI to replicate that specific hand structure. This gives the AI a visual blueprint, significantly increasing the chances of generating a perfect hand.
- Hiding the Problem: If all else fails and you're against a deadline, sometimes the simplest solution is to creatively hide the hand. Could the subject be holding something that obscures part of it? Could the hand be slightly out of frame? Is there an angle where the hand isn't the primary focus? This isn't "removing" the artifact, but it's a practical workaround.
Correcting Faces and Eyes
While AI has gotten remarkably good at generating faces, subtle distortions in eyes, noses, or overall facial symmetry can still occur, particularly in close-up portraits or when the face is at an unusual angle.
- Close-up Prompts for Portraits: If your main subject is a face, make sure your prompt explicitly asks for a "close-up portrait" or "headshot." This tells the AI to focus its resources on rendering facial details, reducing the likelihood of generic or poorly formed features. Specify details like "sparkling blue eyes," "a gentle smile," or "symmetrical features."
- Inpainting Small Facial Features: Just like with hands, inpainting is invaluable here. If an eye is wonky, or the nose looks odd, carefully mask just that feature. Then, provide a specific prompt like "a realistic, almond-shaped brown eye looking directly forward" or "a delicate, straight nose." You might need several attempts and slight prompt variations to get it just right. Guides like How to Fix Distorted AI Faces offer step-by-step solutions for these common issues.
- Leveraging Models Known for Facial Generation: Some AI models or fine-tuned versions are specifically trained to excel at generating realistic and beautiful faces. If you're consistently struggling, consider exploring tools that have a reputation for strong portraiture. For instance, some of the newer, higher-quality models found in tools like Midjourney or Leonardo AI often produce more consistent facial structures.
- Post-processing in Photo Editors: For very subtle issues like slight asymmetry, minor skin blemishes, or color imbalances around the eyes, traditional photo editing software (Photoshop, GIMP) with tools like liquify, healing brushes, and dodge/burn can make a huge difference without needing to re-generate with AI.
Handling Garbled Text and Logos
This is arguably one of the toughest nuts to crack in AI image generation. Most general-purpose AI models still struggle immensely with generating coherent, legible text or complex logos directly within an image. It's often a jumbled mess of pseudo-letters.
- Recommend Tools Specialized in Text: If text is crucial, your best bet is to use an AI image generator specifically designed to handle typography. Ideogram is widely regarded as one of the best for this. Its models are explicitly trained to understand and render text within images accurately. If you need a logo with text, or a poster with a tagline, start with Ideogram or move your generated image there for text overlay. Check out Ideogram Review: Best for Text in Images for more insights.
- Generate Text Separately and Composite: For most other AI tools, the most reliable workaround is to generate your image without the text, leaving a blank space where the text should go. Then, use a separate graphic design tool (like Canva, Adobe Illustrator, or Photoshop) to add the desired text or logo as an overlay. This gives you complete control over font, size, placement, and legibility. It's an extra step, but it guarantees professional results.
- Keep Text Prompts Simple and Prominent: If you must attempt text generation within a general AI tool, keep your text extremely short (1-3 words), simple, and make it a very prominent part of your prompt. For example, "a vintage sign with the words 'EAT HERE' in bold red letters, clear typography." Even then, expect mixed results. For more guidance on this challenging task, refer to How to Write Prompts for Text in Images.
- Use Placeholders: Sometimes, it's useful to prompt for a "sign with blank space for text" or a "banner with placeholder text" so that the AI generates an appropriate area where you can later manually add your legible text.
By understanding the specific challenges of each artifact type and employing these targeted strategies, you can dramatically improve the quality of your AI-generated images, transforming them from glitchy drafts into polished masterpieces.
| Artifact Type | Common Manifestation | Primary AI Fixes (Pre-Generation) | Primary AI Fixes (Post-Generation) | Other Strategies |
|---|---|---|---|---|
| Distorted Anatomy | Extra fingers, twisted limbs, asymmetrical features | Detailed anatomical prompts, strong negative prompts | Inpainting specific areas, iterative regeneration (seed) | ControlNet (OpenPose), manual touch-ups in photo editor |
| Illogical Objects | Random objects, merged elements, nonsensical additions | Highly specific object/scene descriptions | Inpainting to remove/replace, outpainting to extend | Cropping, manual removal in photo editor |
| Blurry/Patchy Textures | Soft details, inconsistent surfaces, fuzzy elements | High-quality model selection, specific style prompts | Upscaling with enhancement, sharpening in photo editor | Add "sharp, detailed, 4k, ultra realistic" to prompts |
| Garbled Text/Logos | Unreadable letters, strange symbols | (Difficult for most general AIs) | N/A (AI struggles to fix its own garbled text) | Use Ideogram, generate separately and composite, manual overlay in graphic design software |
| Pixelation/Jaggies | Blocky edges, low-res appearance | High-resolution generation settings | Dedicated AI upscalers (Magnific AI), anti-aliasing in photo editor | Use "high resolution, sharp, smooth" in prompts |
| Unnatural Lighting/Shadows | Flat lighting, illogical shadows, inconsistent light sources | Detailed lighting prompts (e.g., "golden hour," "studio lighting") | Color grading and shadow adjustment in photo editor | Reference images for lighting, specific stylistic parameters |
Disclaimer
The information provided in this article is for general guidance and informational purposes only. While we strive to offer accurate and up-to-date advice, the field of AI image generation is rapidly evolving. The effectiveness of specific tools, prompts, and techniques may vary depending on the AI model, version, and individual use case. Always exercise your own judgment and conduct further research as needed.