How to Upscale AI Images
It’s a scenario many of us have faced: you’ve spent precious time crafting the perfect prompt for your AI image generator, and it spits out something truly magnificent. You download it, excited to share, only to realize that when you zoom in or try to use it in a larger design, it looks… pixelated. Those crisp details you saw on your screen become a muddled mess, ruining the professional look you were aiming for. This guide is here to walk you through the essential process of upscaling AI images, ensuring your creations always look sharp, detailed, and ready for primetime.
Why Upscaling AI Images is a Must-Do
You've got these incredible images generated by AI, but often, the initial output just isn't quite up to snuff for many real-world applications. Whether you're a content creator, a small business owner, or just an enthusiast sharing your art, the resolution limitations of raw AI output can be a serious bottleneck. This isn't just about making things bigger; it's about making them better.
The Pixelation Problem with Raw AI Output
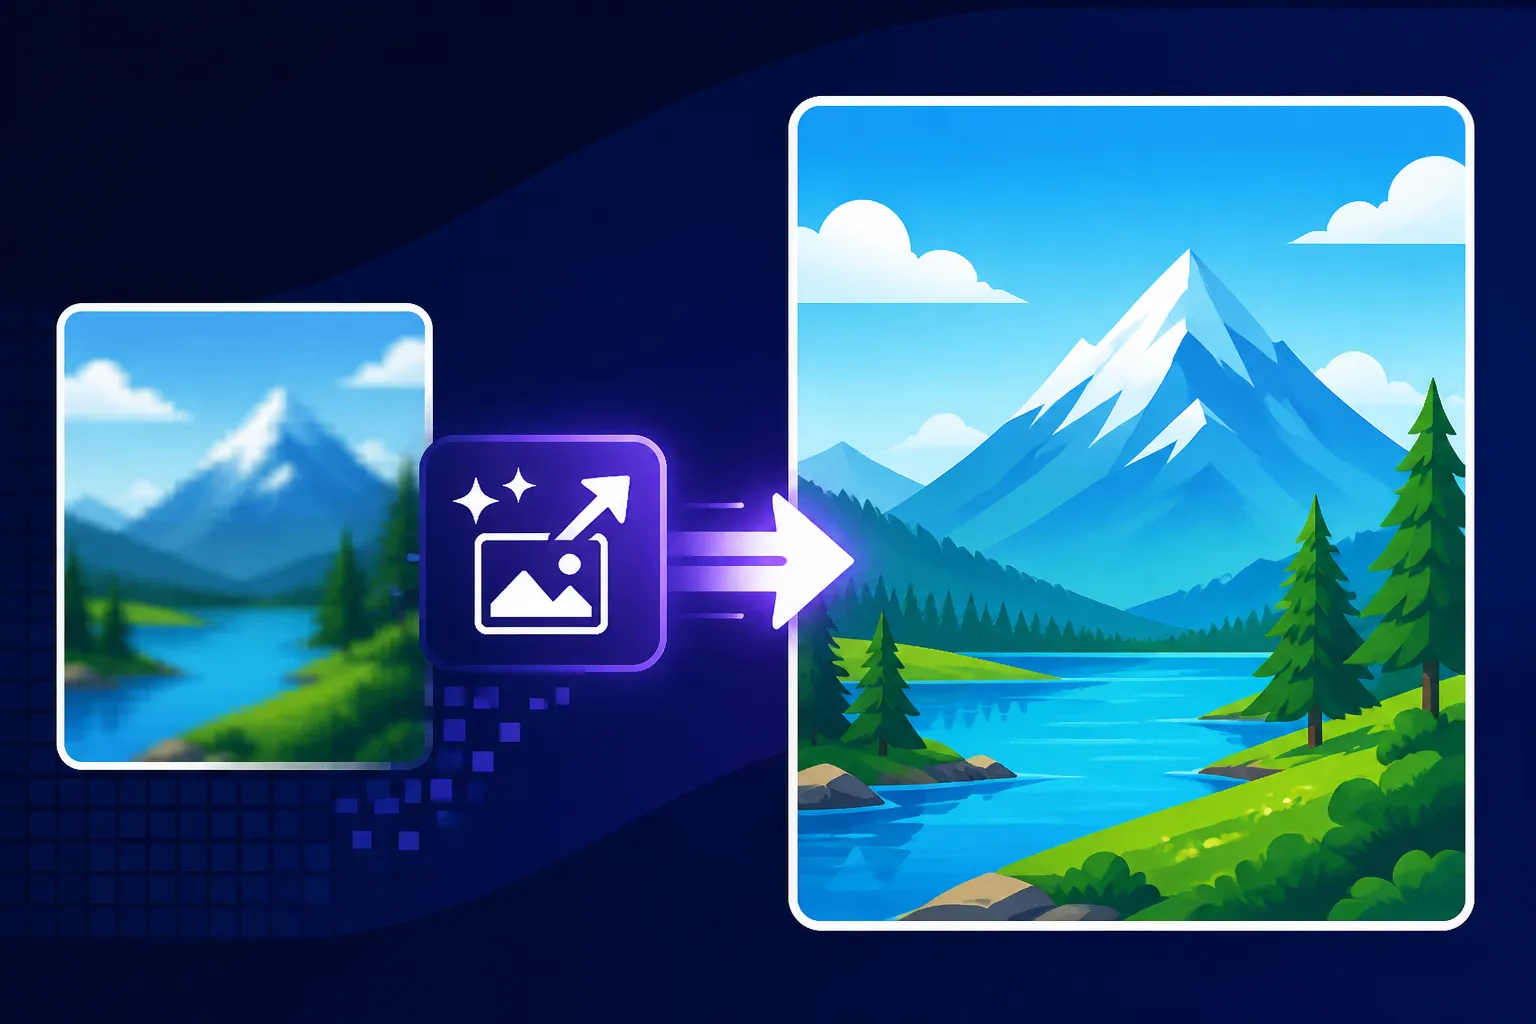
Think about it: most AI image generators, when first spitting out an image, are optimizing for speed and general coherence, not necessarily ultra-high resolution. You might get an image that's 1024×1024 pixels, or perhaps 1792×1024 if it's in a common aspect ratio. While this looks perfectly fine on a small phone screen or in a casual social media post, try to print that image on a poster or drop it into a high-resolution presentation, and suddenly those beautiful lines and intricate textures start to break down. You see jagged edges, blocky colors, and a general lack of crispness that screams "low quality." It’s like trying to stretch a small photograph across a billboard—it just doesn't work.
This pixelation isn't just an aesthetic annoyance; it can seriously undermine the impact of your work. If you're relying on AI images for your brand, blurry or pixelated visuals can convey an unprofessional image, suggesting a lack of attention to detail or resources. It’s a common frustration, and one that upscaling effectively addresses by intelligently adding the necessary pixel information.
Enhancing Detail and Clarity for Professional Use
Upscaling isn't merely about stretching pixels; modern AI upscaling tools actually infer and generate new details, dramatically improving clarity. Imagine you have an AI-generated image of a serene landscape. Without upscaling, the leaves on the trees might blur into a green mass, and distant mountains might lack definition. After a good upscaling process, those individual leaves can become visible, the texture of the bark might emerge, and the ridges of the mountains gain a distinct, crisp quality. This is the power of AI-driven upscalers: they don't just enlarge; they enhance.
For professionals, this enhancement is crucial. Bloggers need high-resolution images for their articles to look polished and load well across various devices. E-commerce businesses rely on sharp, detailed product photos to attract customers and showcase their offerings. Graphic designers need images that can withstand significant manipulation and integration into larger projects without falling apart. Even for personal projects, having a high-fidelity image means you can print it, frame it, or simply admire it at a larger size without regret. Essentially, upscaling transforms your raw AI output from a draft into a finished product, ready for almost any application.
Understanding How AI Upscaling Works
The idea of making a small image bigger without losing quality might sound like magic, or perhaps a violation of some digital law. Historically, that was largely true. Simply stretching an image in a standard photo editor often resulted in a pixelated mess. However, AI upscaling operates on a fundamentally different principle, leveraging advanced computational power to intelligently add information where none existed before.
The Magic Behind AI Algorithms
At its core, AI upscaling relies on sophisticated machine learning models, often deep neural networks, that have been trained on vast datasets of images. These datasets typically include pairs of low-resolution and high-resolution versions of the same image. Through this training, the AI learns to recognize patterns, textures, and structures within images. When you feed it a low-resolution image, it doesn't just stretch the existing pixels; it predicts what the missing pixels should look like based on everything it has learned.
Think of it like this: if you show a human a blurry image of a face, they can often infer the sharp details of the eyes, nose, and mouth because they've seen millions of faces. AI upscalers do something similar, but with incredible precision and speed. They can reconstruct edges, add realistic textures, and sharpen details that were previously lost to pixelation. This process is far more intelligent than traditional interpolation methods, which simply guess the color of new pixels based on their immediate neighbors. Instead, AI considers the broader context, recognizing objects and understanding how they should appear at a higher resolution. This deep understanding is what allows for the impressive results we see today.
Different Upscaling Approaches: From Nearest Neighbor to Neural Networks
To truly appreciate AI upscaling, it's helpful to briefly understand the journey of image resizing. Early and simple methods like Nearest Neighbor just duplicate pixels, resulting in blocky, jagged images. Bilinear and Bicubic interpolation are slight improvements, creating smoother transitions by averaging pixel values, but they still struggle to add new, meaningful detail. These methods essentially "blur" the image to hide the pixelation, rather than truly enhancing it.
Then came the advent of more advanced, often AI-driven, approaches. Generative Adversarial Networks (GANs) and Convolutional Neural Networks (CNNs) are at the forefront of modern upscaling. Tools employing these networks, such as those found in platforms like Magnific Upscaler: Worth the Price, are capable of astonishing feats. Instead of just interpolating, they generate entirely new pixel data that aligns with what the AI predicts would be present in a naturally higher-resolution version of the image. Some AI upscalers also leverage diffusion models, similar to how many modern AI image generators work, to reconstruct images with incredible detail and texture. These models don't just guess; they generate plausible high-resolution interpretations, often adding a level of realism and sharpness that was once thought impossible without manual artistic intervention. This evolution means that getting a high-quality, larger version of your AI image is no longer a pipe dream, but a highly achievable reality.
Top AI Image Upscalers to Consider
The landscape of AI image upscaling tools is constantly evolving, with new players emerging and existing ones refining their algorithms. For creators working with AI-generated visuals, having a reliable upscaler is almost as crucial as the generator itself. When looking for the best AI image upscalers and how to use them, you'll find a mix of dedicated standalone tools and features integrated directly into AI art platforms.
Dedicated Upscaling Tools
These are services or software specifically designed with one primary purpose: to take a low-resolution image and make it high-resolution while enhancing its quality. They often use highly optimized AI models to achieve superior results.
One prominent example is Topaz Labs Gigapixel AI. This desktop application is a powerhouse, known for its ability to upscale images by up to 600% while preserving (and often improving) details. It uses deep learning to understand features like texture, edges, and colors, then intelligently adds millions of pixels to create a much larger, sharper image. Many professional photographers and graphic designers swear by it for its exceptional clarity and detail reconstruction, especially when dealing with older, lower-resolution source material or when preparing images for large-format prints.
Another popular choice is Magnific AI. While still relatively new, Magnific AI has quickly gained a reputation for producing incredibly detailed and often creatively enhanced upscales. It offers a unique approach, allowing users to guide the AI with text prompts during the upscaling process, essentially "remixing" the image as it's enlarged. This can lead to astonishing results, adding new textures or enhancing stylistic elements in a way other tools don't. While it often comes with a subscription, many find its unique blend of upscaling and creative enhancement worth the investment. It's a fantastic option if you want to push the boundaries beyond simple enlargement and inject some extra artistic flair into your images.
Beyond these, there are numerous online services like Upscale.media, VanceAI Image Upscaler, and Waifu2x (which is particularly good for anime and cartoon art). Many of these offer free tiers for a limited number of upscales or lower resolutions, making them great starting points for experimentation. They generally provide straightforward web interfaces where you upload your image, select an upscale factor, and download the enhanced version. Their algorithms are tuned to perform complex tasks like denoising, sharpening, and artifact removal during the enlargement process, ensuring your images look cleaner and more professional.
| Upscaler Tool | Type | Key Features | Best For | Pricing Model |
|---|---|---|---|---|
| Topaz Labs Gigapixel AI | Desktop App | Up to 600% upscale, advanced detail recovery | Professional photographers, large prints | One-time purchase |
| Magnific AI | Online Service | Prompt-guided enhancement, creative upscaling | Artists, unique stylistic enhancement | Subscription-based |
| Upscale.media | Online Service | Simple interface, good for quick upscales | Casual users, quick enhancements | Free tier available, paid plans for more |
| VanceAI Image Upscaler | Online Service | Batch processing, various AI models (anime, art) | Businesses, diverse image types | Free trial, subscription-based |
| Waifu2x | Online Service | Noise reduction, anime/manga specialization | Anime artists, cartoon images | Free to use |
AI Image Generators with Built-in Upscaling
Many of the leading AI image generation platforms now understand the need for high-quality output and have integrated upscaling capabilities directly into their workflow. This is incredibly convenient, as you can generate an image and then immediately upscale it without leaving the platform.
For instance, Midjourney offers various upscale options and "upscale variations" directly within its Discord interface or web app. When you generate a grid of images, you can select one to "upscale" it to a higher resolution, and then even further enhance it with features like "Light Upscale Redo" or by using the new "Zoom Out" features which implicitly involve upscaling and content generation. As highlighted in Midjourney Image Quality Tested and Reviewed, these in-platform options are designed to maintain the signature Midjourney aesthetic while boosting resolution.
DALL-E 3 (especially within ChatGPT Plus or Microsoft Designer) also provides excellent upscaling. When you generate an image, it often comes out at a decent size, but DALL-E's internal processes are constantly working to ensure clarity. While it might not always have an explicit "upscale" button like Midjourney, the output resolution is generally good, and often further refinements can be requested through prompts. If you're looking for an in-depth comparison, you might find DALL-E Image Quality Tested and Reviewed insightful.
Other tools like Leonardo AI and Stable Diffusion also offer their own methods. Leonardo AI, for example, has an "HD Upscaler" and various "Upscale" buttons that appear after generation, allowing users to boost resolution by 2x or 4x. Stable Diffusion, especially when run locally or through user-friendly interfaces like Automatic1111, provides access to various upscaling models (often called "ESRGAN" or "R-ESRGAN" models) that can be applied after generation. These integrations streamline the creative process, allowing you to generate and refine your images seamlessly within one environment.
The convenience of built-in upscaling cannot be overstated. It eliminates the need to download a low-res image, upload it to another service, process it, and then download it again. This saves time and ensures a more consistent quality control process, especially for users who churn out a large volume of images.
Step-by-Step Guide to Upscaling Your AI Images
Ready to transform your pixelated AI creations into stunning, high-resolution masterpieces? The process is generally straightforward, but there are a few nuances depending on whether you're using a dedicated tool or a built-in feature. Let's break down how to effectively upscale AI images.
Preparing Your Image for Upscaling
Before you dive into the upscaling process, a little preparation can go a long way in ensuring the best possible results. This step is often overlooked, but it's crucial for maximizing the quality of your final image.
First, start with the highest quality base image available from your AI generator. While upscalers are good at inferring details, they aren't miracle workers. If your initial AI output is heavily compressed, has significant artifacts, or is extremely low resolution to begin with, the upscaler will have less good information to work with. Always download the largest native resolution offered by your AI image generator. For instance, if Midjourney offers a button to upscale an initial grid image to a 1024×1024 or 1792×1024 version, always choose that first before trying a secondary upscaler.
Next, consider basic cleanup if necessary. Sometimes, raw AI outputs can have minor imperfections, like stray pixels, odd color fringing, or very slight distortions that could be exacerbated by upscaling. While dedicated upscalers are often good at denoising, if there are obvious small flaws, a quick pass in a photo editor like Photoshop or GIMP to remove them can prevent the upscaler from trying to "enhance" those flaws. This isn't always needed, but if you notice glaring issues, it's worth a moment to address them. For issues like blurry details or distorted faces, you might find specific guidance in articles like How to Fix Blurry AI Images or How to Fix Distorted AI Faces before you even think about upscaling.
Using a Standalone Upscaler
For those times when your AI generator's built-in options aren't enough, or you want specialized control, a standalone upscaler is your best friend. This is typically a three-step process:
- Upload Your Image: Head over to your chosen standalone upscaler (e.g., Magnific AI, Topaz Gigapixel AI, Upscale.media). Most online tools will have a clear "Upload" or "Drag & Drop" area. If it's desktop software, you'll open the image through a "File > Open" menu. Make sure to upload the prepared, highest-resolution version you have.
- Select Upscale Factor and Settings: This is where you tell the tool how much bigger you want your image to be. Common options are 2x, 4x, 6x, or even custom percentages. Many tools will also offer additional settings:
- Denoising: Reduces visual noise, which can be present in some AI outputs.
- Sharpening: Enhances edge definition. Be careful not to overdo this, as it can lead to an artificial look.
- Face Enhancement: Some upscalers have specific models trained to improve facial details, which is incredibly helpful given how AI often struggles with realistic hands and faces.
- Artistic/Creative Control (e.g., Magnific AI): If using a tool like Magnific AI, this is where you might input additional text prompts to guide the AI's enhancement process, adding details or stylistic elements as it upscales.
- Process and Download: Once you've selected your desired settings, initiate the upscaling process. This might take a few seconds to several minutes, depending on the tool, your internet speed, and the size of the image. After processing, you'll typically be presented with a preview of your upscaled image. If you're happy with the result, hit the "Download" button. Most tools will save the image as a JPEG or PNG, often preserving the original file name with an appended "_upscaled" or similar tag.
Leveraging In-Platform Upscaling Features
If your AI image generator offers built-in upscaling, this process is usually even more integrated and seamless.
- Generate Your Initial Images: Start by creating your images as you normally would within your AI platform (e.g., Midjourney, Leonardo AI, DALL-E in ChatGPT).
- Select and Upscale: After the initial generation (e.g., the 4-grid image in Midjourney), you'll typically see options beneath the image grid. For Midjourney, you'd click one of the "U" buttons (U1, U2, U3, U4) to upscale a specific image from the grid. This usually bumps it up to a higher resolution, say from 512×512 to 1024×1024.
- Further Refinements/Upscale Variations: Many platforms don't stop there. Once an image is upscaled, you might see further options. Midjourney, for instance, offers "Vary (Strong)" or "Vary (Subtle)" to create new versions at the same resolution, or sometimes "Upscale (2x)" or "Upscale (4x)" buttons for even higher resolutions with the latest models. Leonardo AI has an "HD Upscaler" button that can be applied post-generation. These advanced options allow you to push the resolution and detail even further, or make stylistic changes at the same time. The goal is to make the image look less "AI-generated" and more polished, as explored in How to Make AI Images Look Less AI.
- Download: Once you're satisfied with the upscaled image, locate the download button. In Midjourney, this usually appears when you click the image to view it full-size in a browser; for DALL-E within ChatGPT, it's typically a small download icon on the image itself.
By following these steps, you can confidently turn your initial AI-generated ideas into high-quality visual assets that truly stand out.
Best Practices for Optimal Upscaling Results
Upscaling isn't just about hitting a button and hoping for the best. To truly get the most out of these powerful AI tools and ensure your images look their absolute best, there are several best practices to keep in mind. Mastering these can elevate your AI art to a professional level.
Choosing the Right Upscale Factor
One of the most common questions is "How much should I upscale?" The answer isn't a one-size-fits-all, but it revolves around your target use and the quality of your original image. Many upscalers offer choices like 2x, 4x, or even custom multipliers.
For general web use, social media, or standard blog images, a 2x upscale from an initial 1024×1024 image (making it 2048×2048) is often more than sufficient. This provides plenty of resolution without creating excessively large file sizes that could slow down web pages. If you're aiming for print, particularly large prints or intricate designs, you might consider a 4x or even 6x upscale. A 4x upscale on a 1024×1024 image would result in a 4096×4096 pixel image, which is excellent for most high-quality prints up to poster size. For something truly massive, or if you want to achieve the highest possible detail, like preparing an image for a gallery-quality canvas print, you might even look into dedicated tools that can push to 8x or more, or layer multiple upscaling passes. The ultimate goal is often to hit a target of How to Upscale AI Images to 4K or higher, depending on the final display medium.
It's also important to remember that there are diminishing returns. Upscaling by 16x might sound impressive, but unless your original image has a significant amount of underlying detail for the AI to infer, you might just end up with an artificially sharpened or overly smooth image without truly new valuable detail. Experimentation is key; try different factors and compare the results to see what looks best for your specific image and intended use.
Handling Artifacts and Imperfections
Even the best AI upscalers aren't perfect, and sometimes, the process can introduce or exaggerate artifacts, or fail to correct existing imperfections from the original AI generation. These can manifest as strange textures, unnatural smoothness, or even "hallucinations" where the AI invents details that don't quite fit.
The first line of defense is choosing an upscaler with robust denoising and artifact removal capabilities. Many tools have specific settings for this. If you notice issues, try adjusting these settings. For example, if the image looks too grainy, increase denoising. If it looks too soft, gently increase sharpening, but watch out for halos around edges. If the upscaler itself causes problems, you might need to use an external photo editor. Tools like Adobe Photoshop or GIMP can be invaluable for post-upscale cleanup. You can use their blur tools to soften over-sharpened areas, clone stamp out small blemishes, or even apply targeted noise reduction.
Sometimes, the best solution is to iterate. If one upscaler produces undesirable artifacts, try a different one. Different algorithms excel at different types of images, so a tool that struggles with photorealistic faces might shine with intricate architectural details. For specific issues like strange textures or unnatural patterns, articles such as How to Remove AI Image Artifacts can provide targeted advice on cleanup. Don't be afraid to experiment with multiple tools or even a combination of an upscaler and manual touch-ups to achieve perfection.
When to Stop Upscaling: Diminishing Returns
It's tempting to think "bigger is always better," but that's not necessarily true with AI upscaling. There comes a point where further upscaling provides little to no noticeable improvement in quality, and can even start to degrade the image. This is the concept of diminishing returns.
Typically, upscaling beyond 4x or 6x from a standard AI output (like 1024×1024) can often yield minimal additional detail, instead resulting in images that look artificially smooth, overly sharpened, or simply too large without a corresponding increase in perceived value. The AI might start inventing details that look repetitive or nonsensical, or it might smooth out genuine textures to the point where they lose their character. For example, if you're trying to achieve a highly realistic look, over-upscaling can sometimes strip away the nuanced imperfections that contribute to authenticity, making the image look plastic.
The key is to stop when the image meets your specific needs for its intended output medium (web, print, etc.) and when you no longer see a significant improvement in detail or clarity. Sometimes, a 2x upscale that looks natural and clean is far more effective than a 8x upscale that looks artificial and processed. Always examine the upscaled image at 100% zoom. If you're no longer seeing new, believable detail, and are instead noticing smoothing, over-sharpening, or peculiar patterns, it's time to stop. For tips on achieving natural-looking images, consider reviewing resources like How to Add Realism to AI Images. The goal is quality and utility, not just sheer pixel count.
Common Challenges and Troubleshooting
While AI upscaling tools are incredibly powerful, they aren't always a magic bullet. Users often encounter specific issues that can be frustrating, especially when trying to achieve a pristine, professional look. Knowing how to identify and address these common challenges is crucial for successful AI image refinement.
Dealing with Blurry or Muddled Details
One of the most frustrating outcomes when upscaling is finding that certain areas, despite the increased resolution, still look blurry, soft, or downright muddled. This is particularly noticeable in complex areas like intricate patterns, fine text (if present), or detailed backgrounds. There are a few reasons this can happen, and thankfully, several strategies to tackle it.
Firstly, the initial quality of your generated image plays a huge role. If the AI generator itself produced a somewhat ambiguous or low-detail element in the first place, even the smartest upscaler will struggle to "invent" convincing detail. It's like asking someone to describe a blurry photograph in sharp terms – they can guess, but accuracy is limited. If you're starting with a weak foundation, the upscale might just enlarge the blur. In such cases, you might want to revisit your original prompt, adding more descriptive terms to encourage the AI to generate sharper details from the outset. For instance, instead of "a forest," try "a dense forest with individual leaves clearly visible on oak trees, dappled sunlight revealing intricate bark textures."
Secondly, the upscaling algorithm itself might be too aggressive with denoising or smoothing. Many upscalers have a balance between sharpening and noise reduction. If the denoising is too strong, it can accidentally smooth out legitimate fine details, making them appear blurry or muddled. Try adjusting the denoising settings downwards, or look for an "enhance details" or "texture preservation" option within your chosen upscaler. Some tools like Topaz Gigapixel AI offer different AI models specifically for "Standard," "Art," or "Low Res" inputs, each handling detail preservation differently. Experimenting with these different models can often yield better results for specific image types. Additionally, if you're battling persistent blur, refer to the detailed guidance in How to Fix Blurry AI Images for more specific techniques.
Over-Sharpening and Unnatural Textures
On the flip side of blurriness, we have over-sharpening, which can make an image look harsh, artificial, or even create distracting halos around edges. This often happens when the sharpening slider is pushed too far, or when an upscaler's default settings are too aggressive for a particular image. While some sharpening is good for crispness, excessive sharpening can introduce noise, give textures a "gritty" or "plastic" appearance, and ultimately detract from the realism of the image.
Unnatural textures can also emerge, where the AI attempts to fill in gaps or infer details but creates patterns that don't quite make sense for the subject matter. For example, a smooth wall might suddenly have a strange, artificial grain, or skin textures might look like a digital painting rather than actual skin. This often occurs because the AI is guessing based on its training data, and sometimes those guesses don't perfectly align with the specific visual context of your image.
To combat over-sharpening, first, ease off the sharpening settings within your upscaler. Try reducing the sharpen intensity gradually and observe the preview. Often, a subtle amount of sharpening is all that's needed. If your upscaler doesn't offer fine-grained control, or if the issue persists, you can perform post-processing in a photo editing tool. In Photoshop, for example, you can use the "Unsharp Mask" or "Smart Sharpen" filters with controlled radius and amount, or even apply a subtle Gaussian blur to specific overly sharp areas to soften them.
For unnatural textures, look for texture-specific controls in your upscaler, if available. Some advanced upscalers allow you to dial back texture enhancement. If not, manual intervention might be required. In a photo editor, you could try applying a very slight noise reduction filter (being careful not to over-smooth legitimate details) or using a frequency separation technique to selectively smooth out artificial textures while preserving natural ones. The goal is to achieve a balance where the image is sharp and detailed, but still looks natural and aesthetically pleasing, reinforcing the idea of a Best AI Image Generator for Quality output. It’s about refinement, not brute force.
Disclaimer
The information provided in this article is for general informational purposes only and does not constitute professional advice. While we strive to provide accurate and up-to-date information, the field of AI technology is rapidly evolving, and tools and their capabilities may change. Always test any AI image upscaling tools and techniques with your specific images and use cases to determine their suitability and effectiveness.