How to Create a Character Reference Sheet with AI
Let's be real: creating a detailed character reference sheet from scratch is a monumental task. You pour hours into sketching front views, back views, side profiles, getting the proportions just right, ensuring every single accessory and expression is consistent. It's a labor of love, but it can also be a massive bottleneck, especially when you're on a tight deadline or trying to visualize a complex character with nuanced details. This guide is all about cutting through that struggle, showing you how to leverage AI image tools to streamline the process, maintain consistency, and bring your unique characters to life faster than you ever thought possible.
Understanding Character Reference Sheets and AI's Role
Before we dive headfirst into the exciting world of AI-assisted character design, let's take a moment to really understand what a character reference sheet is and why it’s so crucial. It’s more than just a collection of pretty pictures; it’s the blueprint, the definitive guide to your character's visual identity.
What Exactly is a Character Reference Sheet?
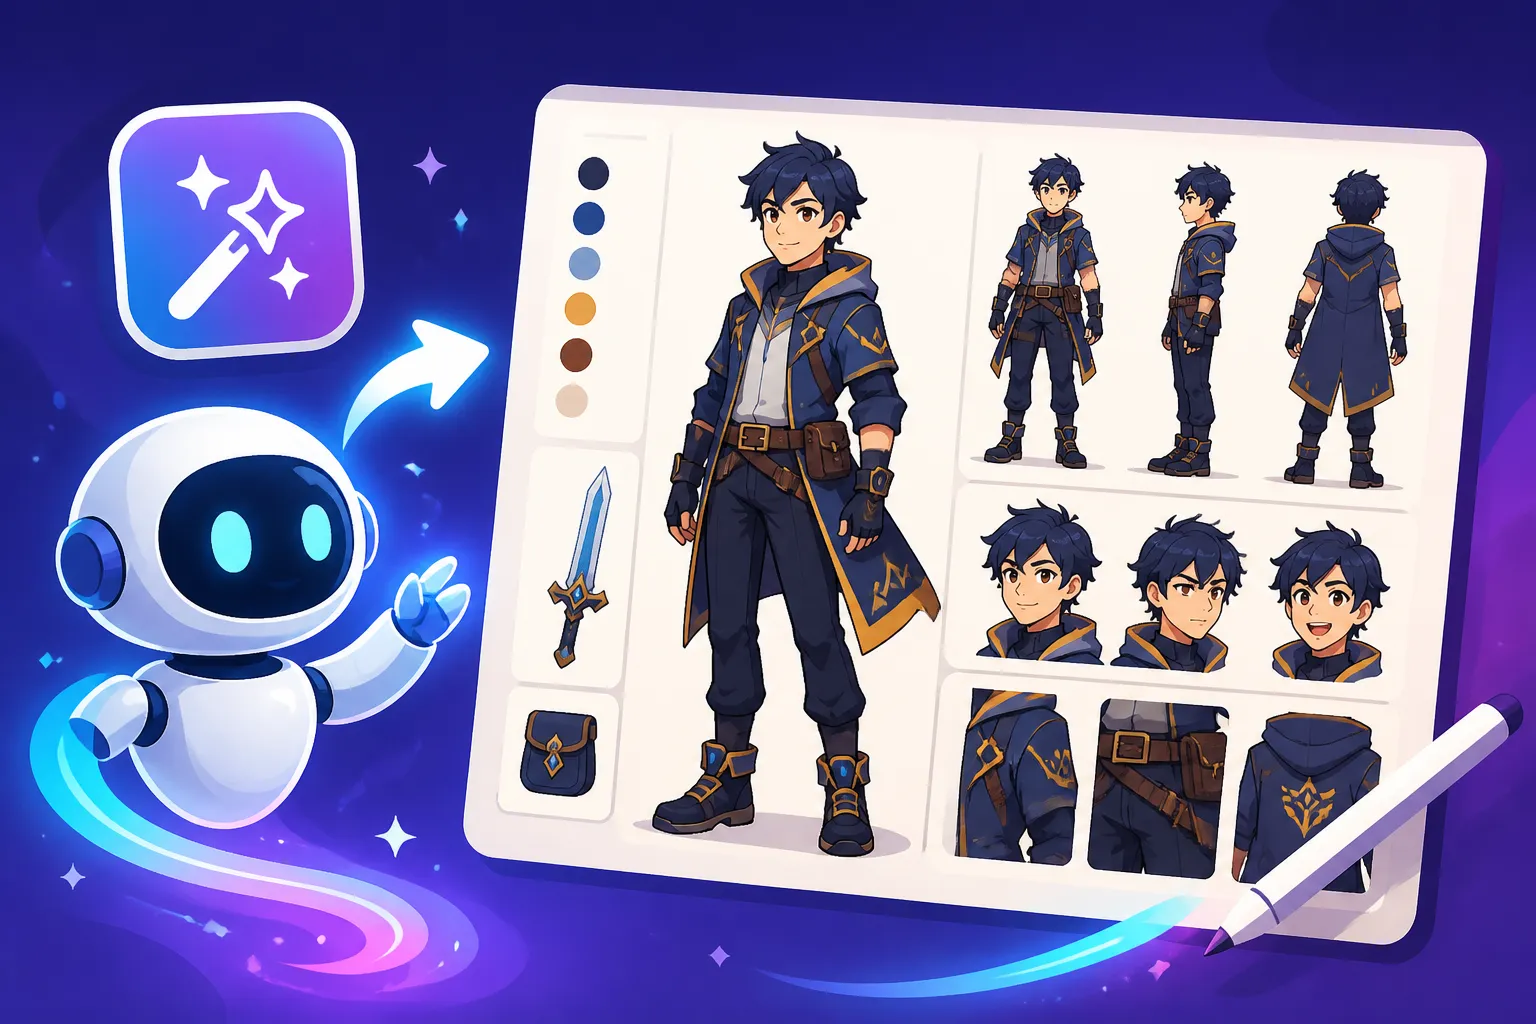
Think of a character reference sheet, often affectionately called a "ref sheet" by artists, as a comprehensive visual document that captures every essential detail about a character. Typically, it includes multiple views – a full-body front view, often a back view, and sometimes side profiles – to show their complete silhouette and how their clothing and features look from all angles. Beyond the basics, it usually highlights specific details: close-ups of facial expressions, hand gestures, unique accessories, prop designs, and even color palettes with hex codes.
For illustrators, animators, game developers, or even writers who want a solid visual foundation for their characters, a ref sheet is indispensable. It ensures consistency across different pieces of art, helps other artists or team members accurately depict the character, and serves as a quick visual reminder of their core aesthetic. Without one, you might find your character’s hair color subtly shifting or their intricate arm tattoo disappearing in subsequent drawings – minor inconsistencies that can really chip away at the character's integrity over time.
Why AI is a Game-Changer for Character Design
Now, imagine trying to create all those consistent views and intricate details manually for every single character in a large project. It’s incredibly time-consuming, prone to slight variations from one drawing session to the next, and requires a high level of artistic skill and patience. This is where AI image tools step in as a true game-changer. They don't replace your creativity or vision; instead, they act as an incredibly powerful assistant.
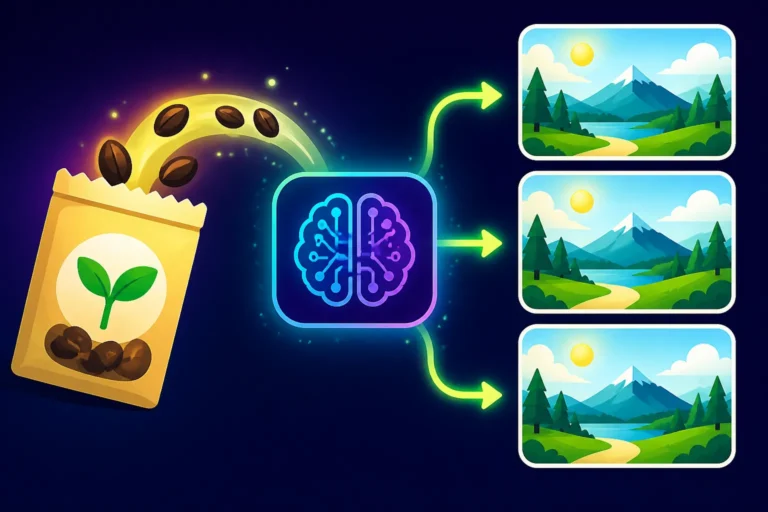
AI generators excel at rapidly producing variations on a theme, maintaining core elements while allowing for subtle changes. This means you can generate dozens of poses, expressions, or clothing variations in minutes, drastically speeding up the ideation phase. The consistency is a huge win too. By using carefully crafted prompts and "seed" numbers – a unique identifier that allows you to reproduce or iterate on a specific image – you can ensure that your character's facial features, build, and even the texture of their clothing remain strikingly consistent across multiple images. This saves countless hours of manual redrawing and tweaking, letting you focus on the broader narrative or design choices rather than getting bogged down in repetitive visual tasks. If you're looking to dive deeper into getting great results, learning How to Write AI Image Prompts is a fantastic starting point.
Prepping for AI Character Generation: The Blueprint
Just like any creative endeavor, you can't just jump into AI character generation without a plan. The better your blueprint, the better your results. Think of this as the essential groundwork that will make your AI tool sing your character's song, rather than just humming a random tune.
Defining Your Character's Core Identity
Before you even think about typing a single word into a prompt box, you need to deeply understand your character. This isn't just about what they look like; it's about who they are. Their personality, backstory, and motivations all play a massive role in shaping their visual presence.
- Personality Traits: Is your character stern and serious, or whimsical and mischievous? Do they exude confidence or shyness? These traits will inform their typical expressions, posture, and even their choice of clothing. A grumpy wizard will likely have a different silhouette and sartorial choices than a cheerful bard.
- Backstory Elements: Where do they come from? What's their profession? What significant events have shaped them? A character from a harsh, industrial city might have grittier attire and a hardened look compared to someone from a lush, magical forest. Consider a warrior who has seen many battles versus a fresh-faced recruit – their experiences should be etched into their appearance.
- Key Visual Traits: Beyond the obvious (hair color, eye color), think about distinguishing marks, unique scars, specific tattoos, or even a particular gait they might have. Does their nose have a distinctive bump? Is one ear slightly notched? These are the details that make a character truly memorable and visually distinct.
Write all of this down! A short character bio or bullet points outlining these elements will serve as your guiding star when crafting prompts. It’s like directing an actor; the more you know about their role, the better they can embody it.
Gathering Visual Inspiration and Keywords
Once you have a solid grasp of your character's identity, it's time to translate that into visual cues and keywords that an AI can understand. This stage is all about building a rich descriptive vocabulary for your prompts.
- Mood Boards: Start collecting images that evoke the aesthetic, style, and mood of your character. This could be anything from photographs of real people, fashion designs, existing artwork, architecture, or even color palettes. Pinterest is an invaluable tool here, allowing you to curate visual collections that speak to your character's essence. If you're looking for inspiration on different styles, checking out AI Image Prompt Examples by Style can give you a great head start.
- Descriptive Words and Adjectives: Translate your mood board and character bio into a robust list of keywords. Think about:
- Art Style: Photorealistic, anime, pixel art, watercolor, oil painting, cinematic render, concept art, hyper-detailed, whimsical, grimdark.
- Facial Features: Sharp jawline, button nose, piercing blue eyes, kind smile, scarred cheek, defined cheekbones, full lips.
- Body Type: Athletic, slender, muscular, stocky, tall, short, lean.
- Clothing & Accessories: Leather armor, flowing robes, steampunk goggles, futuristic bodysuit, tattered cloak, ornate jewelry, practical boots.
- Atmosphere & Lighting: Soft glow, dramatic shadows, dappled sunlight, foggy, ethereal, gritty, vibrant.
- Era/Setting: Medieval, cyberpunk, Victorian, futuristic, fantasy, modern, post-apocalyptic.
Don't hold back. The more descriptive words you have, the richer and more accurate your prompts will be. This keyword bank will be your primary tool for guiding the AI.
Structuring Your Initial Prompts
Crafting effective AI prompts is an art form in itself. For character reference sheets, it's crucial to be both descriptive and structured. You’re essentially telling the AI a story about your character, one visual detail at a time. A good rule of thumb is to break down your character into core elements and address them sequentially in your prompt.
A basic structure might look like this:
[Character Type/Description], [Art Style], [Key Visual Traits], [Clothing/Accessories], [Pose/Expression], [Lighting/Background], [Quality Modifiers]
Let's say you're creating a character named "Elara, the Elven Archer." Your prompt might start with:
"Full body shot of Elara, an agile elven archer, with long braided silver hair and piercing emerald eyes, a faint scar across her left brow, lithe athletic build, wearing worn forest green leather armor with intricate leaf patterns, carrying a recurve bow, serious expression, standing in an ancient moonlit forest, cinematic fantasy art, highly detailed, octane render, 8K."
Notice how specific details are included: the braided hair, the scar, the armor, the bow, the expression, and even the environment. For generating consistent characters, a common technique is to use consistent phrasing for the character's core appearance across all prompts. This helps the AI "remember" the character. You might also want to learn How to Write AI Prompts for Consistent Characters to deepen your understanding here.
A valuable tool for early ideation is to create a prompt matrix to test different descriptions against various styles or poses.
| Character Element | Core Description | Style Modifier 1 | Style Modifier 2 | Pose/Action | Notes |
|---|---|---|---|---|---|
| Character Core | A stoic dwarf warrior | Photorealistic | Concept Art | Standing tall | Crucial for consistency |
| Key Features | Braided red beard, piercing blue eyes, scarred face | Cinematic | Fantasy | Arm crossed | Facial details |
| Attire | Heavy plate armor, worn leather cloak | Grimdark | RPG artwork | Holding axe | Weapon as prop |
| Expression | Determined, unyielding | — | — | — | For emotional range |
| Environment | Cavern entrance, snowy mountain | — | — | — | Background context |
This helps you systematically explore how different keywords influence the output, getting you closer to your desired aesthetic before you commit to generating full reference sheets.
Step-by-Step AI Character Sheet Creation
Now that you've got your character's blueprint ready, it's time to put those AI image tools to work. This is where the magic happens, transforming your descriptive text into visual representations. Patience and iterative prompting are key here!
Generating Core Poses and Expressions
The foundation of any good character reference sheet is a set of consistent, clear poses. You'll typically want a front view, a back view, and possibly side views to capture the character's entire physical presence and costume design. Don't forget about expressions – they bring your character's personality to life.
- Front View First: Start with a straightforward front-facing pose. Your initial prompt should be highly descriptive about the character's core appearance (from your defined identity and keywords) and specify "full body front view, neutral stance." This gives you a baseline image to work from.
- Example Prompt:
"Full body front view of a cyberpunk hacker, slender build, vibrant purple dreadlocks, glowing blue bionic eye, wearing a sleek black trench coat with neon accents, tech gauntlets, neutral stance, standing against a futuristic city backdrop, highly detailed, realistic, sharp focus, 8K."
- Example Prompt:
- Back and Side Views: Once you have a satisfactory front view, you'll want to maintain as much consistency as possible for the other views. This is where using the seed number from your successful front view image is paramount. Most AI tools provide a seed number (or a similar parameter) that essentially tells the AI to start from the exact same "random" noise pattern as a previous generation, dramatically increasing the chance of producing consistent results.
- Next Prompt (using same seed):
"Full body back view of a cyberpunk hacker, slender build, vibrant purple dreadlocks, glowing blue bionic eye, wearing a sleek black trench coat with neon accents, tech gauntlets, neutral stance, standing against a futuristic city backdrop, highly detailed, realistic, sharp focus, 8K, --seed [your_seed_number]" - Repeat for side views, modifying the "back view" to "side view" accordingly. You might need to generate several options and pick the closest one, then potentially use inpainting (more on that next) to tweak minor inconsistencies.
- Next Prompt (using same seed):
- Expressions: After establishing the core poses, focus on expressions. Use your character's personality traits to guide your prompt. A "stoic" character might have a "slight smirk" or a "determined gaze," while a "playful" character could have a "wide grin" or a "mischievous wink." Again, leverage that seed number to keep the facial features consistent.
- Example Prompt (using same seed, focusing on face):
"Close-up portrait of a cyberpunk hacker, vibrant purple dreadlocks, glowing blue bionic eye, a wide grin showing sharp teeth, futuristic city lights bokeh background, highly detailed, realistic, sharp focus, 8K, --seed [your_seed_number]"
- Example Prompt (using same seed, focusing on face):
Remember to generate multiple options for each pose and expression. AI isn't perfect, and often, out of four generated images, one or two will be much closer to your vision.
Iterating for Consistency and Detail
This is often the most time-consuming part, even with AI, but it’s where your character truly comes into its own. AI image generators can be fantastic, but they can also sometimes introduce subtle (or not-so-subtle) inconsistencies.
- Using Seeds for Reproducibility: As mentioned, the seed number is your best friend. Always save the seed of a generation you like, especially for your base character. This allows you to generate variations or new poses while keeping the core identity intact. Think of it as cloning your character for different scenarios. Understanding How to Use Seeds for Reproducible Images is fundamental for this process.
- Inpainting and Outpainting: Many advanced AI tools offer features like inpainting and outpainting.
- Inpainting lets you select a specific area of an already generated image and regenerate just that part with a new prompt, while keeping the rest of the image untouched. This is incredibly useful for fixing wonky hands, refining an accessory, or tweaking a facial feature that didn't quite hit the mark. For example, if your hacker's hand looks a bit off, you can mask it and prompt specifically for "detailed cyberpunk hacker's hand holding a data chip."
- Outpainting allows you to extend the canvas beyond the original image boundaries and generate new content that seamlessly blends with the existing image. This can be great if you realize you cropped too tightly on your full-body shot and want to show their futuristic boots more clearly, or if you want to add a wider background. If you're struggling with minor fixes, learning How to Edit AI Images with Inpainting can really speed up your workflow.
- Control Structures (e.g., ControlNet): Some advanced platforms, particularly those built on Stable Diffusion, offer powerful control structures like ControlNet. These allow you to input an existing image (like a simple line drawing, a depth map, or a pose estimation from a photo) to guide the AI's generation. For character sheets, this is phenomenal. You could sketch out a basic T-pose or a specific action pose for your character, feed it into ControlNet, and then use your detailed text prompt to generate your character in that exact pose, dramatically improving consistency and control over difficult postures. This is an advanced technique, but it offers unparalleled precision.
Adding Specific Props, Clothing, and Accessories
A character is rarely just a body; they are often defined by their gear, garments, and unique trinkets. This is where you layer on the finer details.
- Prompting for Specific Items: When generating new images, or inpainting sections, be incredibly specific about props. Don't just say "sword," say "ornate elven longsword with a glowing hilt and intricate runes."
- Clothing Variations: A character might have different outfits for different situations. Use your base character prompt and then swap out the clothing description.
- Example Prompt (using same seed, new outfit):
"Full body front view of Elara, an agile elven archer, with long braided silver hair and piercing emerald eyes, a faint scar across her left brow, lithe athletic build, wearing a simple hunting tunic and leather breeches, holding a quiver, neutral stance, standing in an ancient moonlit forest, cinematic fantasy art, highly detailed, octane render, 8K, --seed [your_seed_number]"
- Example Prompt (using same seed, new outfit):
- Hair and Accessory Close-ups: For highly detailed reference sheets, consider generating separate close-up images of intricate elements. This could be a detailed rendering of a specific piece of jewelry, the clasp on their cloak, or the unique pattern on their bracer. This level of detail is invaluable for modelers or cosplayers.
- Example Prompt:
"Close-up of an intricate, glowing blue bionic eye, with subtle wiring visible, highly detailed, realistic, macro photography style, on a cyberpunk hacker's face, --seed [your_seed_number]"
- Example Prompt:
Remember to consistently use your character's core descriptors and the seed number when generating these supplementary images to maintain visual cohesion.
Refining and Assembling Your AI-Generated Reference Sheet
You've generated a treasure trove of images – different poses, expressions, and detailed elements of your character. Now it's time to bring it all together into a coherent, professional-looking reference sheet. This stage is all about curation, polish, and presentation.
Post-Generation Editing and Touch-Ups
While AI is powerful, it's not always perfect. You'll often find minor glitches or artifacts that need a human touch to iron out. This is where traditional editing software, like Adobe Photoshop or even free alternatives like GIMP or Krita, comes into play.
- Fixing Common AI Quirks: Be on the lookout for common AI pitfalls:
- Hands and Feet: These are notoriously tricky for AI. You might find extra fingers, distorted digits, or oddly angled feet. Inpainting can help, but sometimes a small brush stroke in an external editor is faster. If you're frequently struggling, we have a guide on How to Fix AI Hands and Faces.
- Proportions and Anatomy: Sometimes, an arm might be slightly too long, or the head a little too small. Minor warping can often be fixed with liquify tools or content-aware fill in image editing software.
- Text and Symbols: If your character has text on their clothing or a specific symbol, AI often garbles it. It's usually best to generate the base image and then overlay crisp text or symbols manually in an editor.
- Minor Inconsistencies: A stray pixel here, a slightly off-color patch there. These small details can accumulate and make an otherwise excellent image look a little "off." A quick clean-up in your editing software will make a world of difference.
- Color Correction and Blending: Ensure that all the generated images have a consistent color temperature and saturation. You might need to adjust brightness, contrast, or color balance to make everything look cohesive, especially if you generated images across different AI models or at different times. Blending them seamlessly is key to a polished final product. For improving overall image quality, consider learning How to Upscale AI Images for clearer details.
Laying Out Your Reference Sheet
Once your individual images are polished, it's time to assemble them into the final reference sheet. This is where you organize everything in a clear, easy-to-digest format.
- Choose a Layout: Popular layouts include a central large full-body front view, with smaller back and side views, close-ups, and expression examples arranged around it. You can also opt for a more modular grid-based approach. The goal is clarity and readability.
- Add Text Annotations: This is crucial! Don't just display images; explain them.
- Character Name & Basic Info: Prominently display the character's name, age, species, and a brief personality blurb.
- Key Features: Point out scars, unique eye colors, distinctive hairstyles.
- Clothing & Props: Label different elements of their attire, explain the function of specific props.
- Color Palette: Include swatches of primary colors used in the character's design, along with their hex codes (e.g., #FFD700 for gold). This is incredibly helpful for other artists.
- Specific Notes: Any unique quirks, movement styles, or lore-specific details that aren't immediately obvious visually.
- Ensure Readability: Use a clean, legible font. Avoid overcrowding the sheet. Give each element enough breathing room. The layout should guide the eye logically from one piece of information to the next.
Best Practices for Future Character Consistency
Creating one great reference sheet is fantastic, but what about maintaining that character for future projects or creating new characters in the same world? There are strategies to ensure long-term consistency.
- Saving and Organizing Prompts: Your detailed prompts are golden. Keep a well-organized document or spreadsheet where you save the exact prompts, parameters, and seed numbers for your core character generations. This "prompt library" becomes an invaluable resource. Think about a guide on How to Build a Reusable Prompt Library for deeper strategies.
- Using Character-Specific Models (LoRAs): For advanced users, especially with Stable Diffusion, you can train a "LoRA" (Low-Rank Adaptation) model specifically on images of your character. This creates a small, highly specialized model that "knows" your character's appearance intimately. Once trained, you can then use this LoRA in conjunction with general AI models to consistently generate your character in virtually any pose, situation, or style with much simpler prompts. This takes commitment but offers the ultimate in character consistency.
- Maintaining a Visual Style Guide: Beyond individual character sheets, consider creating a broader visual style guide for your entire project or "universe." This would include overall art direction, common color palettes, and stylistic rules that ensure all your characters and environments feel like they belong together.
By meticulously planning, iteratively generating, and carefully refining, you can leverage AI image tools to create stunning, consistent character reference sheets that empower your creative projects and save you countless hours of manual labor. It's about working smarter, not harder, and unleashing your imagination with an incredible digital assistant by your side.
Disclaimer
Please note that while AI image generation is a powerful tool, the specific features, pricing, and capabilities of AI platforms can change rapidly. Always refer to the most current information provided by the AI tool developers for the latest details on usage, commercial rights, and features.