Best AI Image Prompt Formulas
If you've ever found yourself staring at a blank prompt box in an AI image generator, feeling that familiar pang of frustration as your mind draws a blank, you're absolutely not alone. Or maybe you've typed in what you thought was a perfectly good description, only to receive an image that's… well, a bit off, or totally generic, failing to capture the vibrant vision in your head. It’s tough when these powerful tools feel like a black box! This comprehensive guide is designed to pull back the curtain, diving deep into the most effective AI image prompt formulas so you can consistently create stunning, specific, and impactful visuals.
Deconstructing the Blueprint of a Powerful Prompt
Getting started with AI art often feels like learning a new language, and in many ways, it is. You’re translating your creative ideas into a format that an artificial intelligence can understand and render. The biggest mistake many folks make is treating the prompt box like a simple search bar, typing in a few keywords and hoping for the best. While that can work for basic concepts, it rarely delivers truly exceptional results. To consistently hit those high notes, you need to understand the fundamental building blocks of a great prompt.
Think of it like cooking: you don't just throw ingredients into a pot and expect a gourmet meal. You need a recipe, specific measurements, and an understanding of how each component contributes to the final flavor. AI prompts are no different. They have their own structure, their own "ingredients," and understanding how to combine them effectively is the key to unlocking the full potential of tools like Midjourney, DALL-E, or Stable Diffusion. This isn't about memorizing every single keyword, but rather understanding the types of information the AI needs to create what you envision.
The Core Components of an Effective Prompt
Every powerful AI prompt, whether it's for a photorealistic portrait or an abstract fantasy landscape, generally contains a few key elements. These aren't rigid rules etched in stone, but rather a flexible framework that you can adapt to almost any creative endeavor. Neglecting one of these components often leads to vague, uninspired, or wildly inaccurate outputs. Mastering them is a journey, but it's one that rapidly accelerates your ability to produce exactly what you want.
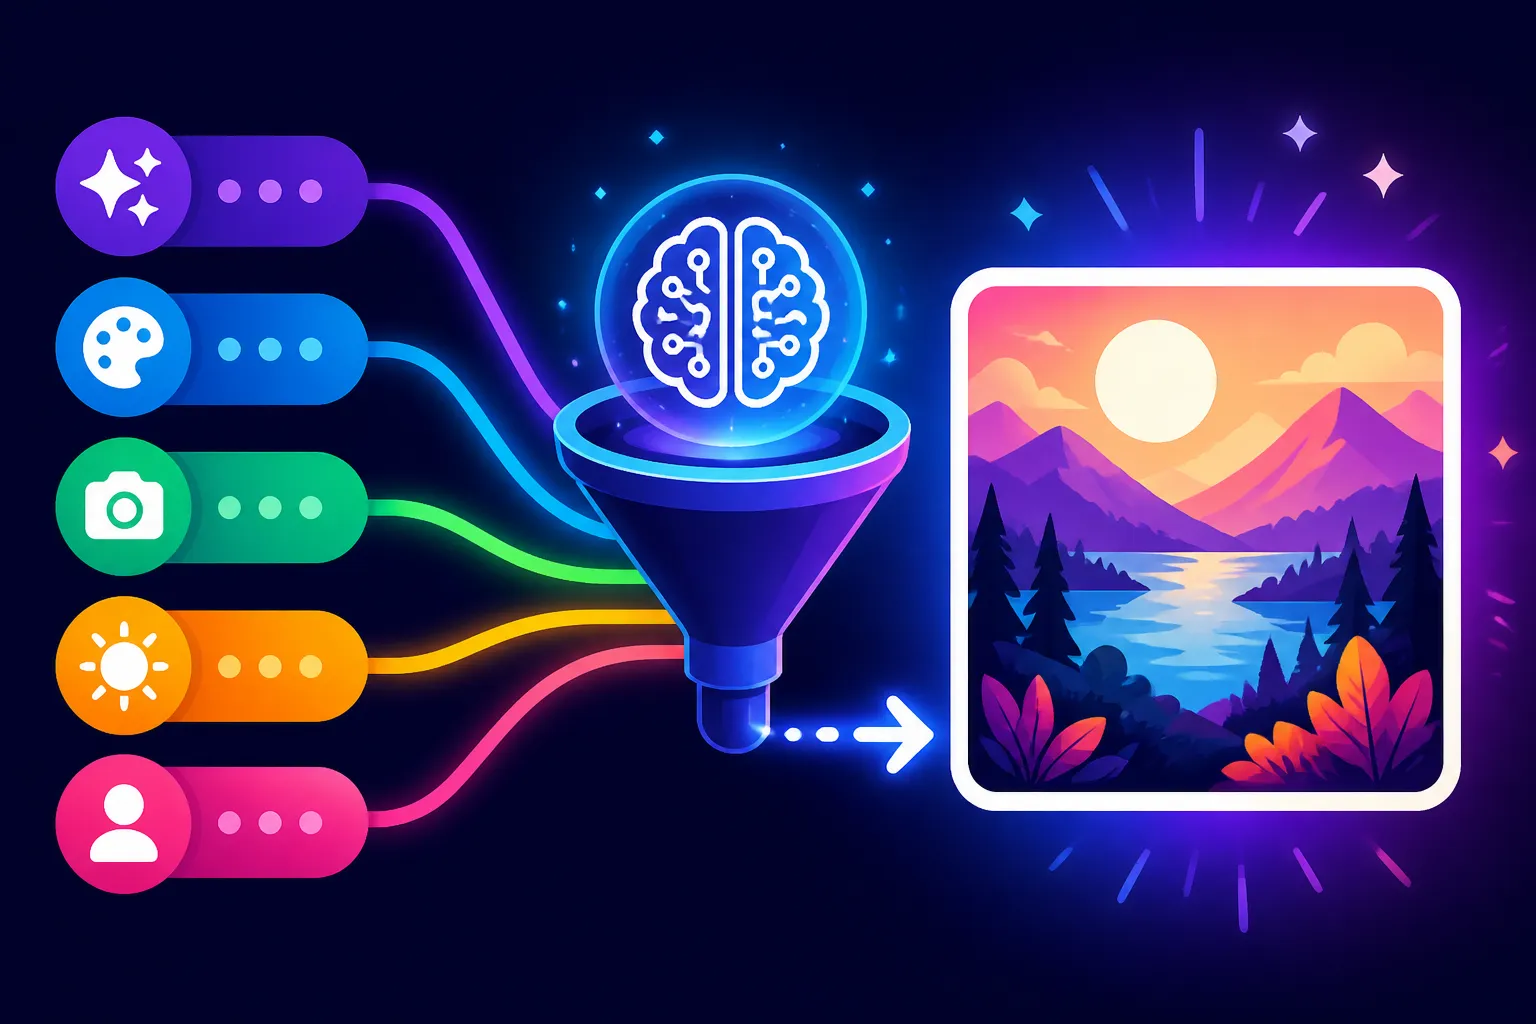
First and foremost is the Subject. This is the absolute star of your image – what are you trying to depict? Is it a majestic lion, a futuristic cityscape, a cozy cottage, or a whimsical fairy? Being clear and specific here sets the foundation. Next comes the Action or Scene, which describes what the subject is doing or what's happening around it. A lion roaring on a savanna is far more evocative than just "lion." Then we layer in the Style, which dictates the aesthetic. Do you want it to look like a watercolor painting, a sci-fi concept art piece, a Pixar animation, or a high-resolution photograph? This is where your artistic direction truly shines. Finally, Details and Modifiers fine-tune everything. This includes elements like lighting, camera angle, color palette, mood, specific textures, and even artistic influences. The more thoughtfully you build these layers, the more precisely the AI can manifest your vision.
Why Structure Matters More Than Keywords
While keywords are certainly important, it's the structure that gives them power. Imagine you're trying to tell a story. You wouldn't just list a bunch of nouns and verbs; you'd arrange them into sentences, paragraphs, and chapters to create a coherent narrative. Similarly, an AI prompt isn't just a jumble of words; it's a carefully constructed sentence or phrase designed to guide the AI's generation process. A well-structured prompt ensures that each keyword builds upon the last, contributing to a holistic and detailed output.
Without structure, even the best keywords can lead to confusion. For instance, "dog running park happy golden hour" might give you something, but "A golden retriever, full of joyful energy, gracefully leaping through a sun-drenched park during the magical golden hour, captured with a wide-angle lens, cinematic lighting" paints a far more vivid picture and gives the AI a much clearer roadmap. The second prompt uses a clear subject, action, setting, mood, and specific photographic details. It’s like giving the AI a storyboard instead of just a list of props. This understanding of how to sequence and connect descriptive elements is often the secret ingredient behind truly amazing AI-generated art, and it's something we'll explore in detail in the following sections.
The Versatile "Subject-Style-Setting-Details" Formula
When I first started dabbling with AI image generation, the sheer number of options and parameters felt overwhelming. It was like standing in front of an orchestra with every instrument available, but no sheet music! That's why I gravitated towards what I now call the "Subject-Style-Setting-Details" formula. It’s a fantastic starting point for almost anyone, from complete novices to seasoned creators, because it provides a clear, logical framework that you can easily remember and adapt. It's the foundational recipe that allows you to bake a pretty decent cake every single time, even if you’re not a pastry chef. This formula provides a strong backbone, preventing those frustrating moments where your AI-generated image feels like it missed the mark entirely.
This isn't just a random string of words; it's a tried-and-true method that tackles the most critical aspects an AI needs to understand. By systematically addressing the "who/what," the "how it looks," the "where it is," and the "extra flourishes," you're building a comprehensive instruction set for the AI model. It helps the AI understand not just what to create, but how to present it, and within what context. It truly democratizes the process of crafting complex and beautiful visuals, allowing you to focus on your creative vision rather than getting bogged down in syntax.
Breaking Down the Four Pillars
Let's dissect this powerhouse formula:
1. Subject: This is your primary focus. Be as specific as possible. Is it a "cat" or a "fluffy Persian cat with emerald eyes"? Is it a "house" or a "Victorian mansion with a wraparound porch"? The more precise you are here, the less room the AI has for misinterpretation.
- Example: Instead of "woman," try "a young woman with fiery red hair and freckles."
- Why it works: It tells the AI exactly what element should dominate the scene and prevents generic interpretations.
2. Style: This is where you dictate the aesthetic. Do you want it to look like a photograph, a painting, a cartoon, or a 3D render? Specificity here is key. You can even combine styles, like "cyberpunk anime style." You might find yourself wanting to check out a guide on AI Image Prompt Examples by Style to get a better feel for the vast possibilities here.
- Examples: "oil painting," "digital art," "hyperrealistic photograph," "pixel art," "Studio Ghibli style."
- Why it works: This dramatically alters the visual language of the output, ensuring the AI aligns with your artistic preference. Without a style, images can often look bland or default to a generic "AI style" that might not be what you're after.
3. Setting/Environment: Where is your subject located? This provides context and background. Is it indoors or outdoors? What time of day is it? What kind of environment is it – a bustling city, a serene forest, a futuristic spaceship?
- Examples: "in a dimly lit enchanted forest," "on the surface of Mars with two moons visible," "inside a cozy coffee shop with steam rising from mugs."
- Why it works: The setting grounds your subject, giving the image depth and narrative. It helps the AI compose the scene, including background elements, atmosphere, and even the overall mood.
4. Details/Modifiers: This is where you add all the extra flavor. This can include lighting, color palette, mood, camera angles, artistic influences, textures, and specific actions. This is your chance to fine-tune the image and imbue it with personality.
- Examples: "cinematic lighting, warm golden hour glow, highly detailed, dramatic shadows, volumetric fog," "muted color palette, calm serene mood," "shot on a Canon R5, 85mm lens," "inspired by Zdzisław Beksiński." For photographers, specifying lens types, f-stops, and film stock can drastically change the output to look like a truly captured moment.
- Why it works: These modifiers are the secret sauce. They elevate an ordinary image to an extraordinary one, allowing you to control nuanced elements like atmosphere, depth, and specific visual effects that make your image unique. You'd be surprised how much How to Write AI Prompts for Photorealistic Images can benefit from precise details here.
Crafting Your First "Subject-Style-Setting-Details" Prompt
Let's put this into practice with a hypothetical scenario. Imagine you want to create an image of a majestic dragon.
- Subject: A magnificent, ancient dragon with iridescent scales.
- Style: Epic fantasy illustration.
- Setting: Perched atop a jagged, snow-capped mountain peak at dawn.
- Details: Steam curling from its nostrils, sunbeams piercing through heavy clouds, a vast fantastical landscape stretching below, highly detailed, dramatic.
Combining these, you get a prompt like: "A magnificent, ancient dragon with iridescent scales, epic fantasy illustration, perched atop a jagged, snow-capped mountain peak at dawn. Steam curling from its nostrils, sunbeams piercing through heavy clouds, a vast fantastical landscape stretching below, highly detailed, dramatic."
See how much more descriptive and guiding that is compared to just "dragon"? This structured approach not only makes it easier for you to formulate your ideas but also provides the AI with a comprehensive set of instructions, significantly increasing your chances of generating an image that closely matches your mental picture. It's a fantastic way to improve your AI Image Generation Tips and Tricks and start creating something truly special.
| Formula Component | Description | Example Keywords | Impact on Output |
|---|---|---|---|
| Subject | The main object or character of the image. | "robot," "fantasy knight," "cup of coffee," "galaxy" | Defines the central focus; precision reduces ambiguity. |
| Style | The artistic or visual aesthetic. | "photorealistic," "watercolor," "cyberpunk," "pixar" | Determines the overall look and feel, from color to texture. |
| Setting | The environment or background. | "ancient ruins," "underwater city," "bustling market" | Establishes context, atmosphere, and supporting elements. |
| Details | Specific attributes, mood, lighting, camera. | "golden hour," "intense gaze," "wide-angle," "vibrant" | Fine-tunes the image, adding depth, emotion, and technical photographic qualities. |
Mastering Specificity for Photorealism and Detail
Generating images that truly look like photographs, or that possess an incredible level of intricate detail, goes beyond simply adding "photorealistic" to your prompt. While that keyword is a good start, achieving that jaw-dropping realism or finely crafted detail requires a much more nuanced approach to your prompting. It’s about convincing the AI that it’s not just generating an image, but meticulously capturing a moment or rendering a scene with all the complexities of the real world. Many creators struggle here, getting images that feel almost real, but not quite. This often stems from a lack of specific, sensory details that bring the scene to life for the AI.
The key lies in understanding that AI models learn from vast datasets of existing images. When you use highly specific descriptive terms, especially those related to photography, art techniques, and physical properties, you’re essentially directing the AI to recall and synthesize similar elements from its training data. This process allows it to construct an image that mirrors the realism or detail you’re aiming for. It's not just about what something is, but how it exists in the physical world – how light hits it, what texture it has, how deep the shadows are, and even the imperfections that make things feel authentic.
Injecting Photographic and Sensory Details
To push your images into the realm of photorealism or extreme detail, you need to think like a professional photographer, an experienced painter, or even a meticulous cinematographer. What specific technical terms would they use to describe their work? These are the keywords you want to incorporate.
Consider adding elements related to:
- Camera and Lens: Specifying "shot on a Canon EOS R5," "cinematic wide-angle lens," "85mm prime lens," "macro photography," or "telephoto shot" tells the AI about perspective, depth of field, and general photographic style. A good read on How to Write AI Prompts for Photorealistic Images will emphasize these aspects.
- Lighting: This is crucial. Instead of "good lighting," think "softbox lighting," "backlit with a strong rim light," "dramatic chiaroscuro," "natural diffused light," "studio lighting setup," "golden hour," "blue hour," "moonlit," "neon glow," or "overcast." Lighting fundamentally shapes mood and realism.
- Resolution and Quality: Keywords like "8K resolution," "ultra detailed," "hyperrealistic," "photorealistic," "fine art photography," "award-winning photo," "magazine cover quality," "cinematic," or "photorealistic render" emphasize the desired output fidelity.
- Texture and Materiality: Describe what things are made of and how they feel. "Rough concrete," "smooth polished chrome," "weathered leather," "dew drops on spiderweb," "velvet texture," "metallic sheen," "translucent fabric." These small details add immense realism.
- Atmosphere: "Volumetric fog," "dust particles in the air," "rain-slicked streets," "hazy distant mountains," "smoke rising." These environmental details immerse the viewer in the scene.
A prompt for a hyperrealistic portrait might look like: "A stoic elderly man with deep wrinkles and kind eyes, captured with a Canon R5, 85mm f/1.4 lens, natural window light from the side, soft shadows, extremely detailed skin texture, pores visible, shallow depth of field, 8K, photorealistic, documentary style portrait."
Iteration and Refinement for Unrivaled Accuracy
Achieving perfect photorealism or detail often isn't a one-and-done process. It's about iteration and refinement. Your first prompt might get you 70% of the way there, and then you tweak it. This is where you leverage the power of small adjustments.
If the image isn't detailed enough, try adding more descriptive adjectives related to texture or complexity. If the lighting feels off, experiment with different lighting conditions. If faces aren’t quite right, focusing on specifics like "individual strands of hair," "subtle smile lines," or "realistic eye reflection" can make a massive difference. This iterative process is a cornerstone of getting the Best AI Image Prompt Formulas to work for you. Many people give up too soon, thinking the AI can't deliver, when in reality, they just need to refine their instructions. Keep a log of your prompts and the results, so you can learn what works best for specific outcomes. This is also where knowing How to Get Better AI Image Results truly comes into play – it's about persistent, intelligent tweaking.
Don't be afraid to add specific artist names or photographic styles as references. For instance, "photorealistic street photography, inspired by Saul Leiter" can bring in a specific aesthetic that might be hard to describe with just adjectives. Remember, the AI is a highly sophisticated pattern-matching machine, and the more precise patterns you feed it through your words, the more astounding its outputs can become.
Crafting Prompts for Artistic and Stylized Outputs
While photorealism is certainly impressive, AI image generators truly shine when they're let loose to explore the vast realms of art and stylized creations. This is where your inner artist can run wild, transforming concepts into digital paintings, whimsical cartoons, gritty graphic novel pages, or abstract masterpieces. The challenge here isn't just describing what you want to see, but how you want it to feel, its texture, its color palette, and the specific artistic tradition it should emulate. Generic prompts often lead to generic art, and nobody wants that when they're aiming for something truly unique.
Many new users get stuck in a rut, consistently generating images that look similar, or default to a safe, uninspired style. This usually happens because they aren't fully leveraging the extensive "style vocabulary" available to AI models. These models have been trained on billions of images spanning every conceivable art movement, medium, and aesthetic. Tapping into that vast knowledge base requires understanding how to articulate specific artistic directives in your prompts. It’s about moving beyond "colorful drawing" to something far more evocative and targeted.
Leveraging Art Movements and Mediums
To steer your AI towards a specific artistic vision, you need to use the language of art history and artistic mediums. These are powerful cues that guide the AI's rendering engine to emulate established styles.
Think about incorporating:
- Art Movements: "Impressionist painting," "surrealist art," "cubist sculpture," "Art Nouveau poster," "Baroque style," "futuristic brutalism," "abstract expressionism."
- Specific Artistic Styles: "Studio Ghibli animation," "Disney concept art," "Pixar render," "comic book art," "manga illustration," "pop art," "vaporwave aesthetic." You might discover some excellent examples in AI Image Prompt Examples by Style.
- Art Mediums/Techniques: "Oil painting on canvas," "watercolor," "charcoal sketch," "pen and ink drawing," "mixed media collage," "digital painting," "claymation," "stained glass," "woodcut print."
- Artist Influences: While AI doesn't become an artist, mentioning a style similar to a renowned artist can be a potent modifier. For example, "in the style of Van Gogh," "reminiscent of Frida Kahlo," or "inspired by Hayao Miyazaki." Be aware that this can sometimes lead to copyright concerns depending on the artist and your intended use, so use with discretion.
For example, if you want a whimsical forest scene, instead of just "magical forest," try "an enchanted forest, whimsical watercolor painting, vibrant hues, glowing mushrooms, soft focus, dreamlike." This immediately brings to mind a very specific visual language.
Controlling Color, Texture, and Mood
Beyond the overarching style, granular details about color, texture, and mood are essential for truly compelling artistic outputs. These elements contribute significantly to the emotional impact and visual richness of your generated image.
- Color Palette: Be explicit about your desired colors. "Monochromatic blue palette," "vibrant neon colors," "pastel tones," "sepia-toned photograph," "muted earth tones," "high contrast black and white."
- Texture: Even in stylized art, texture can add depth. "Rough brushstrokes," "smooth vector art," "grainy film texture," "stained paper effect," "geometric patterns."
- Mood/Atmosphere: Convey the emotional tenor. "Melancholy atmosphere," "joyful and playful," "ominous and dark," "serene and peaceful," "chaotic and energetic."
Consider a prompt for a digital illustration: "A lone figure standing on a desolate alien planet, cyberpunk digital painting, neon-lit cityscape in the background, rain-slicked ground reflecting vivid purple and electric blue lights, gritty texture, ominous atmosphere, highly detailed." This prompt combines a specific style with detailed color, texture, and mood cues to create a distinct visual narrative. For those using Midjourney, experimenting with specific parameters for stylization can be particularly effective, and guides like Midjourney Prompt Guide delve into these options. The more thoroughly you describe these elements, the less the AI has to guess, and the closer it will get to your unique artistic vision.
Advanced Prompting Techniques for Complex Scenarios
Once you've gotten a handle on the basic "Subject-Style-Setting-Details" formula, you'll inevitably encounter situations where a simple linear prompt just doesn't cut it. Maybe you want to combine disparate concepts, emphasize certain elements over others, exclude specific details, or maintain consistency across a series of images. This is where advanced prompting techniques come into play, transforming you from a basic AI user into a true "prompt engineer." It's about taking more direct control over the AI's creative process, guiding it with surgical precision rather than broad strokes.
The jump from basic to advanced prompting can feel like learning to drive a stick shift after only ever operating an automatic. There are more levers, more pedals, and a greater sense of direct involvement. However, with that complexity comes an incredible boost in control and creative freedom. These techniques are often what distinguish truly bespoke, unique AI art from the more common, run-of-the-mill generations. They allow you to wrestle with the AI and bend it to your will, producing results that would be impossible with simpler directives.
Utilizing Weights and Multi-Prompts
One of the most powerful advanced techniques is the use of weights (sometimes called "prompt weights" or "multi-prompts," depending on the AI model). Weights allow you to assign varying levels of importance to different parts of your prompt. This means you can tell the AI, "Focus more on this element, and less on that one." This is incredibly useful when you have competing ideas or want to ensure a certain aspect doesn't get overshadowed.
- How it works: In many AI tools like Midjourney or Stable Diffusion, you can add
::followed by a number after a word or phrase to assign a weight. A higher number means more emphasis. For example, "futuristic city::2 bustling market::1" tells the AI to prioritize the "futuristic city" aspect more than the "bustling market" aspect, while still including both. You can also use negative weights (e.g., "ugly::-0.5") to subtly de-emphasize elements you don't want. Understanding How to Use Weights in AI Prompts is a game-changer for precise control. - Multi-prompts: Some models also allow you to effectively combine multiple distinct ideas within a single prompt, often separated by specific syntax (like
ANDor+). This is different from weights in that it's about blending distinct concepts rather than just emphasizing parts of one idea. For instance, you might prompt "cyberpunk knight AND medieval castle."
These techniques are invaluable when you're trying to achieve a delicate balance, perhaps mixing two contrasting styles, or ensuring that a specific object stands out prominently against a complex background. Without them, the AI might give equal importance to every word, leading to a muddled or unsatisfying composition.
Harnessing the Power of Negative Prompts
Sometimes, it's easier to tell the AI what you don't want to see than what you do want. This is the concept behind negative prompts. By explicitly stating elements to exclude, you can refine your output, remove unwanted artifacts, or prevent the AI from defaulting to common clichés. This is especially useful for maintaining quality control and avoiding the uncanny valley.
- How it works: Most AI image generators have a dedicated field for negative prompts (often labeled
--noin Midjourney, or a separate "Negative Prompt" box in interfaces for DALL-E or Stable Diffusion). Common negative prompts include "blurry, ugly, distorted, low resolution, bad anatomy, extra limbs, watermark, text, out of frame." For instance, if you’re generating characters, a negative prompt like "deformed hands, ugly face, two heads" can significantly improve the quality of your subject. A dedicated guide like How to Use Negative Prompts can provide an extensive list of useful terms. - When to use them: Negative prompts are particularly effective for troubleshooting common AI quirks, such as distorted limbs, strange facial features, or unwanted text. They also help in preventing generic elements from appearing if you want something truly original. If you're struggling with How to Fix Bad AI Image Results, negative prompts are often the first line of defense. They allow you to proactively guide the AI away from undesirable outcomes, making your positive prompts even more effective.
By combining weights, multi-prompts, and negative prompts, you gain an unprecedented level of control over your AI-generated images. These techniques, though initially requiring a bit of experimentation to master, are essential tools for anyone serious about pushing the boundaries of what AI art can achieve. They empower you to execute highly specific and complex creative visions, moving beyond simple descriptions to truly direct the AI's artistic process.
Troubleshooting Common Prompting Pitfalls and Solutions
Even with the best prompt formulas and advanced techniques at your disposal, you're bound to run into issues. It's an inevitable part of the creative process with AI, much like a painter might struggle with a certain shade of blue or a writer might battle with writer's block. The frustration often sets in when your perfectly crafted prompt yields an image that's just… wrong. Maybe the subject has too many fingers, the lighting is off, or the entire scene feels muddled and indistinct. These common pitfalls can be incredibly demotivating, making it feel like the AI simply "doesn't get it."
The good news is that most of these issues aren't due to a flaw in your artistic vision, but rather a miscommunication with the AI model. Understanding these common problems and knowing specific strategies to address them will dramatically improve your success rate and reduce your frustration. It’s not about giving up, but about learning how to speak the AI's language more clearly and effectively. Think of it as debugging your creative code.
Diagnosing and Fixing Distorted Elements
One of the most infamous issues in AI-generated art is the appearance of distorted or malformed elements, especially with hands, faces, and complex objects. You've seen them: the six-fingered pianist, the eye floating a little too far to the side, or the car that looks like it's melting. It's the "uncanny valley" of AI, and it can instantly break the illusion of an otherwise stunning image.
- Hands and Faces: These are notoriously difficult for AI models. To improve results, be hyper-specific. For hands, try prompts like "anatomically correct hands," "five fingers," "detailed fingers," "realistic hands gripping a [object]." For faces, focus on "realistic face," "symmetric features," "detailed eyes," "expressive face," "human face." Using a strong negative prompt like "deformed hands, extra fingers, ugly, mutated, distorted face" is also highly effective. Checking out How to Fix AI Hands and Faces can offer even more tailored solutions.
- Complex Objects/Scenes: If objects are melding together or appearing distorted, break down the prompt. Instead of "a car driving through a forest at night," try "a sleek, black sports car, headlights cutting through the darkness, driving on a winding road. Surrounding forest, dense trees, moonlight filtering through branches. Nighttime scene, cinematic." Sometimes, specifying a clear perspective ("from above," "close-up," "wide shot") can help.
Addressing Generic or Uninspired Outputs
Have you ever generated an image that's technically "correct" but utterly bland? It lacks soul, dynamism, or that unique spark. This is a common sign that your prompt isn't giving the AI enough creative direction or specific stylistic cues. The AI is playing it safe, defaulting to its most common interpretations.
- Inject More Specificity: Go back to the "Subject-Style-Setting-Details" formula and expand each section. Instead of "forest," try "enchanted ancient forest with glowing flora." Instead of "man," try "a grizzled adventurer with a leather satchel and a weathered compass."
- Use Stronger Style Descriptors: Replace "art" with "hyperrealistic digital painting," "retrofuturistic illustration," "neo-noir comic book art." Don't be afraid to name specific artists or art movements (as discussed in the previous section).
- Emphasize Mood and Atmosphere: Add words like "ethereal," "gritty," "serene," "dramatic," "chaotic," "playful." These emotional cues can significantly shift the AI's output. A helpful resource for getting the Best AI Image Generator Overall often includes advanced prompting tips to avoid generic results.
- Vary Prompt Order: Sometimes, simply reordering your prompt elements can subtly change the AI's interpretation. Experiment with putting your most important elements first or last.
Remember, AI models are still tools, and like any tool, they perform best when given clear, detailed, and precise instructions. By systematically identifying what went wrong and applying these targeted solutions, you can dramatically improve the quality and originality of your AI-generated images, transforming frustration into creative triumph.
Leveraging Contextual Cues and Hidden Commands
Beyond the standard descriptive words and structured formulas, many AI image generators offer a suite of more advanced, often less obvious, commands and parameters. These aren't always part of the basic prompt anatomy you learn in an "AI Image Prompt Guide for Beginners", but they are invaluable for power users looking to fine-tune every aspect of their image generation. Think of them as the hidden levers and buttons on a sophisticated camera that let you manipulate focus, exposure, and composition in ways a simple point-and-shoot never could. Ignoring these can mean leaving a significant portion of the AI's capabilities untapped, leading to images that might be good, but not great.
These "contextual cues" and "hidden commands" often come in the form of specific syntax, abbreviations, or numerical parameters unique to each AI model. They require a bit of experimentation and familiarity with the specific tool you're using, but the payoff in terms of control and creative freedom is immense. They allow you to move from simply describing a scene to actively directing the camera's angle, the overall mood, the level of chaos, and even the "personality" of the AI itself.
Diving Deep into AI-Specific Parameters
Each major AI image generator – be it Midjourney, DALL-E, Stable Diffusion, or others – has its own set of unique parameters that can drastically alter your output. These often appear at the end of your prompt, preceded by hyphens (--).
For instance, in Midjourney, you might use:
--ar(aspect ratio): Essential for controlling the shape of your image.--ar 16:9for widescreen,--ar 9:16for portrait,--ar 1:1for square. If you're designing for Instagram, an--ar 4:5might be perfect.--style(stylize): This parameter influences how artistic or "loose" the AI's interpretation is. A higher value might produce a more abstract, creative image, while a lower value sticks closer to the prompt.--v(version): Allows you to specify which version of the model to use (e.g.,--v 6or--v 7). Each version has different strengths and weaknesses, and sometimes an older version might be better for a specific style. A detailed Midjourney V7 Features and Updates article would explain these nuances.--seed: This is incredibly useful for reproducibility. If you generate an image you love, you can retrieve its seed number and use it in subsequent prompts to create similar compositions or variations while maintaining a consistent base.
For Stable Diffusion users, understanding concepts like ControlNet (for precise pose, depth, or edge control), LoRAs (fine-tuned models for specific styles or characters), and various samplers can transform your output. These require a deeper dive into the technical aspects of the model but offer unparalleled creative command. Meanwhile, tools like DALL-E and Adobe Firefly might integrate these controls more seamlessly into their user interfaces, but the underlying principles of guiding the AI remain the same.
Mastering Camera Angles, Composition, and Artistic Intent
Beyond technical parameters, certain descriptive phrases act as powerful contextual cues that the AI interprets as directorial commands for composition and mood. These aren't always explicit --commands but are highly effective prompt elements.
- Camera Angles: Direct the AI like a cinematographer. "Close-up shot," "wide-angle vista," "aerial view," "worm's-eye view," "dutch angle," "POV shot." These immediately establish perspective.
- Composition: Words like "rule of thirds," "leading lines," "symmetrical composition," "negative space," "centered," "cinematic composition" guide the AI in arranging elements within the frame. If you're looking for Best AI Image Generator for Blog Images, understanding composition is vital for impactful featured images.
- Artistic Intent/Mood Keywords: Go beyond basic emotions. "Ethereal glow," "gritty realism," "dreamlike quality," "melancholic atmosphere," "vibrant and energetic," "solitary and reflective." These aren't just descriptions; they're emotional directives.
- Time and Environment Modifiers: "Golden hour light," "moonlit night," "rainy city street," "foggy morning," "snowy landscape," "desert sunset." These dramatically influence the lighting, colors, and overall ambiance.
For example, a prompt like "A majestic stag standing in a clearing, wide-angle vista, golden hour light filtering through ancient trees, ethereal glow, rule of thirds composition, --ar 16:9" uses both descriptive language and specific parameters to create a highly directed, visually stunning scene. By becoming adept at using these contextual cues and commands, you'll find yourself not just generating images, but truly directing the AI to bring your most intricate visions to life. It's the difference between merely asking for a picture and truly crafting a masterpiece.
Building Your Personal Prompt Library and Workflow
After all this talk about formulas, details, weights, and hidden commands, you might be thinking, "How on earth am I supposed to remember all of this?" And you're right to feel that way! The sheer volume of information, keywords, and techniques can be overwhelming. This is where the concept of building a personal prompt library and developing an efficient workflow becomes not just helpful, but absolutely essential. It transforms the often-chaotic process of AI image generation into a streamlined, productive, and truly creative endeavor.
Many people treat prompting as a one-off task, typing something new every time. This leads to inconsistency, wasted time, and the frustrating rediscovery of what worked previously. A structured approach, however, allows you to capture your learning, reuse successful elements, and rapidly iterate on ideas. Think of it as creating your own personal "cookbook" of AI recipes, ensuring that your most delicious creations can be replicated and refined at will. This is truly the ultimate AI Image Generation Tips and Tricks for long-term success.
Curating Your Go-To Prompts and Snippets
The first step in building a prompt library is to start saving what works. Every time you generate an image that you absolutely love, don't just admire it – dissect the prompt that created it.
- Categorize by Style: Create folders or tags for different styles you frequently use: "Photorealistic," "Anime," "Watercolor," "3D Render," "Concept Art," etc. Within these, save your most effective foundational prompts. For instance, if you often generate images for a blog, you might have a category for Best AI Image Generator for Blog Images that includes your go-to prompts for featured images.
- Break Down into Snippets: Identify reusable phrases or "snippets" that you use repeatedly. These could be:
- Lighting conditions: "cinematic lighting, dramatic shadows, volumetric fog, golden hour"
- Camera settings: "shot on Canon EOS R5, 85mm f/1.4, shallow depth of field"
- Quality modifiers: "8K resolution, ultra-detailed, hyperrealistic, award-winning photography"
- Mood descriptors: "ethereal, serene, ominous, vibrant, energetic"
- Negative prompts: "ugly, deformed, extra limbs, blurry, low quality, watermark"
- Use a Simple System: A plain text file, a dedicated spreadsheet, a Notion database, or even a simple document in Google Docs can work wonders. What matters is that it's easily accessible and searchable. I personally use a Notion page, with toggle lists for different categories and nested pages for specific types of images.
- Add Notes and Learnings: Crucially, don't just save the prompt. Add notes about what worked, what didn't, and why. "This prompt works best with –v 6 and a stylize value of 750" or "Avoided distorted hands with this negative prompt." This meta-information is where the real learning happens.
This systematic approach prevents you from constantly reinventing the wheel. If you want a photorealistic image, you don't start from scratch; you pull from your "Photorealistic" folder and swap in your new subject and setting.
Developing an Iterative and Documented Workflow
A robust workflow ensures consistency and efficiency. It’s about more than just typing a prompt; it's about a systematic process of ideation, generation, analysis, and refinement. This is particularly important for professionals or anyone using AI for client work, as consistency and quality are paramount.
- Start with a Core Concept: Begin with the fundamental idea (Subject, main action).
- Build with Formulas: Apply a core formula like "Subject-Style-Setting-Details."
- Iterate Incrementally: Generate a few initial images. Analyze the results. What's missing? What's wrong? What's almost perfect?
- Refine with Modifiers: Add specific details, adjust lighting, introduce camera angles, or try different stylistic influences.
- Utilize Advanced Techniques: If issues persist, apply weights to emphasize elements or use negative prompts to remove unwanted features. This is where your knowledge of How to Get Better AI Image Results truly pays off.
- Document Everything: For every successful image, save the prompt, the parameters used, and even the seed number (if available). Save a few of the best variations. For failed attempts, note what you tried and why it didn't work. This is the essence of How to Build a Reusable Prompt Library.
- Learn from Others: Explore communities, prompt-sharing websites, and tutorials. See what others are doing and adapt their successful formulas to your own style. However, always experiment and make them your own to avoid generic results.
By adopting this disciplined approach, you’ll not only become more efficient but also more creatively potent. Your prompt library will grow into a powerful asset, a testament to your learning and a springboard for future, even more spectacular AI-generated creations. The goal is to move beyond mere experimentation and into a realm of intentional, repeatable, and outstanding image generation.
Disclaimer
The information provided in this article is for general informational and educational purposes only. While we strive to offer accurate and up-to-date guidance on AI image prompting, the field of artificial intelligence is rapidly evolving. The performance, features, and optimal prompting techniques for various AI image generators can change frequently. Always refer to the official documentation and community guidelines for the specific AI tool you are using. Results may vary based on the model version, parameters, and the quality of your input.