AI Image Generation Tips and Tricks
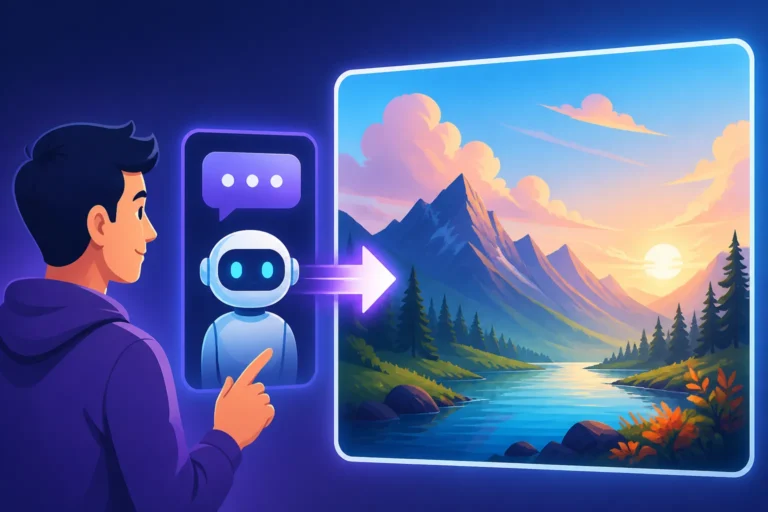
Oh, the sheer frustration of typing out what you think is a perfectly clear prompt, only to be greeted by an AI-generated image that looks absolutely nothing like what you pictured in your head! You're not alone. Many of us have spent countless credits and precious time banging our heads against the wall, wondering why the AI just doesn't "get it." This guide is here to unravel the mystery, offering practical, real-world tips and tricks to transform your AI image generation from a game of chance into a predictable, creative superpower.
Understanding the AI's "Brain" The Basics of Prompting
When you first dive into AI image generation, it can feel like you're talking to a toddler with a paintbrush – sometimes brilliant, often hilariously off-topic. The truth is, AI models don't "understand" concepts in the same way humans do. They process your words, or "tokens," based on vast datasets they've been trained on, associating them with visual patterns. This means that even subtle differences in your phrasing can lead to wildly different outcomes. Getting great results isn't just about what you say, but how you say it, and understanding how the AI is likely to interpret your instructions.
How AI Interprets Your Words
Imagine a colossal digital library where every word, every phrase, is cross-referenced with billions of images. When you type "red car," the AI doesn't picture a specific red car you saw last week; it pulls up a statistical average of all the "red cars" it's ever processed. This average might be a sleek sports car, a vintage sedan, or even a toy car, depending on the weighting and context of other words in your prompt. This is why a prompt like "a beautiful woman" can yield such generic results – the AI is trying to cater to the broadest possible interpretation.
Furthermore, AI models often have hidden biases baked into their training data. If the dataset predominantly features images of "doctors" as men and "nurses" as women, your prompt for a "doctor" might lean towards a male figure unless you explicitly specify otherwise. Becoming aware of these potential biases can help you craft more precise and inclusive prompts. It's not about tricking the AI, but rather guiding it with enough clarity to bypass its statistical averages and hone in on your unique vision. For a deeper dive into crafting effective instructions, you might find our guide on How to Write AI Image Prompts incredibly helpful.
The Anatomy of a Powerful Prompt
Think of a prompt as a recipe for an image. Just like a good recipe lists ingredients, cooking methods, and presentation notes, a powerful AI prompt breaks down the desired image into manageable, descriptive components. It's rarely just one descriptive word; it's a carefully constructed sentence, or even a paragraph, that paints a full picture for the AI. Understanding these components is your first step towards mastery.
A robust prompt typically includes:
- Subject: What is the main focus? (e.g., "a majestic lion," "a steaming cup of coffee").
- Action/Scene: What is the subject doing or where is it located? (e.g., "roaming the savanna at sunset," "on a rustic wooden table").
- Style/Medium: What aesthetic are you aiming for? (e.g., "oil painting," "digital art," "hyperrealistic photo," "anime style").
- Lighting/Atmosphere: How should the scene be lit? What's the mood? (e.g., "golden hour," "dramatic chiaroscuro," "soft ambient light," "gloomy").
- Composition/Camera Angle: How is the scene framed? (e.g., "wide shot," "close-up portrait," "from above," "rule of thirds").
- Color Palette: Specific colors or overall tone (e.g., "vibrant blues and greens," "monochromatic," "pastel shades").
- Details/Modifiers: Any additional specifics to refine the image (e.g., "intricate patterns," "futuristic," "vintage car," "small details").
By systematically adding these layers, you move from a vague idea to a highly detailed instruction. For instance, instead of "dog," you might write: "A fluffy golden retriever puppy, playfully chasing a butterfly in a sun-drenched meadow, whimsical watercolor style, soft pastel colors, close-up shot, shallow depth of field, warm morning light." This level of detail leaves far less to the AI's imagination and significantly increases your chances of getting something closer to your vision.
Common Pitfalls and How to Avoid Them
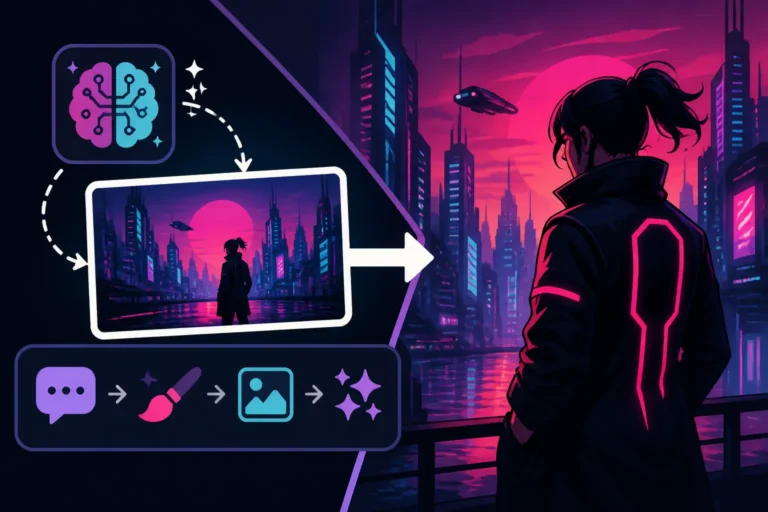
Even with a good understanding of prompt structure, it's easy to fall into common traps. One of the biggest pitfalls is vagueness. Prompts like "cool picture" or "pretty landscape" are too open-ended, guaranteeing generic, uninspired results. The AI simply doesn't know what "cool" or "pretty" means to you. Always strive for concrete descriptions. If you want a "cool picture," describe why it's cool: "a cyberpunk city street at night, neon reflections on wet asphalt, flying cars, rainy atmosphere."
Another common mistake is contradictory terms. Asking for "a bright dark room" or "a tiny giant" will confuse the AI, leading to nonsensical or blended results that satisfy neither instruction. Be mindful of conflicting adjectives or stylistic choices. Similarly, over-complication can be an issue. While detail is good, a prompt that's an entire paragraph of disjointed ideas can sometimes dilute the AI's focus. Prioritize the most important elements and build outward. Avoid expecting the AI to magically infer your unstated desires. For more tailored guidance, check out the Midjourney Prompt Guide or the DALL-E Prompt Guide depending on your tool of choice, as each platform has its own nuances.
Mastering the Art of Iteration and Refinement
Rarely does a perfect image spring forth from a single, initial prompt. The real magic of AI image generation lies in iteration – the process of generating, analyzing, and refining. Think of it as a sculptor working with clay; you start with a rough form and gradually chip away and add details until you reach the final masterpiece. This iterative approach saves credits, reduces frustration, and ultimately leads to far superior results than simply trying to nail it in one go.
Starting Broad and Nailing the Core Concept
The temptation is often to dump every single detail you can think of into your first prompt. Resist this urge! A more effective strategy is to begin with a broad, yet clear, core concept. This helps the AI establish the fundamental elements of your image without getting bogged down by specifics too early. For example, if you want to create an image of a medieval knight, start with something like: "A medieval knight, standing in a castle courtyard."
Generate a few images with this basic prompt. Look at the general composition, the style the AI defaulted to, and the overall feel. Does it capture the essence you're going for? Maybe the castle looks too modern, or the knight's armor isn't quite right. By starting simply, you can quickly assess if the AI is on the right track before investing time and effort into adding intricate details. This "funnel" approach — starting wide and gradually narrowing down — is crucial. It's like sketching the outline of a drawing before you fill in the colors and textures.
Incremental Changes for Better Results
Once you have a baseline image that's somewhat aligned with your vision, the key is to make incremental changes. This means adjusting only one or two elements of your prompt at a time and generating new variations. For instance, if your knight's armor isn't quite right, you might change "A medieval knight" to "A medieval knight in shining plate armor." Generate again. Observe the difference. Did it improve? Or did it introduce something undesirable?
This methodical approach allows you to learn exactly which prompt elements influence which aspects of the image. If you change five things at once, and the image improves, you won't know which specific change caused the improvement. This learning process is invaluable. Keep a simple log or even just a mental note of the changes you make and the results they yield. It builds your intuition for how the AI responds to different keywords and phrases. Maybe "shining plate armor" gives you the look you want, but you decide you prefer "a battle-worn knight in chainmail armor" instead. Each step refines your understanding and moves you closer to your ideal outcome.
Leveraging Variations and Seeds
Most advanced AI image generators offer features like "variations" or the ability to use a "seed" number. These are incredibly powerful tools for refinement. When you get an image that's almost perfect, instead of rewriting the entire prompt, you can often ask the AI to generate variations of that specific image. This keeps the core composition and elements intact while subtly changing details, colors, or angles. It's like asking an artist to draw the same scene again, but with a slightly different brushstroke or perspective.
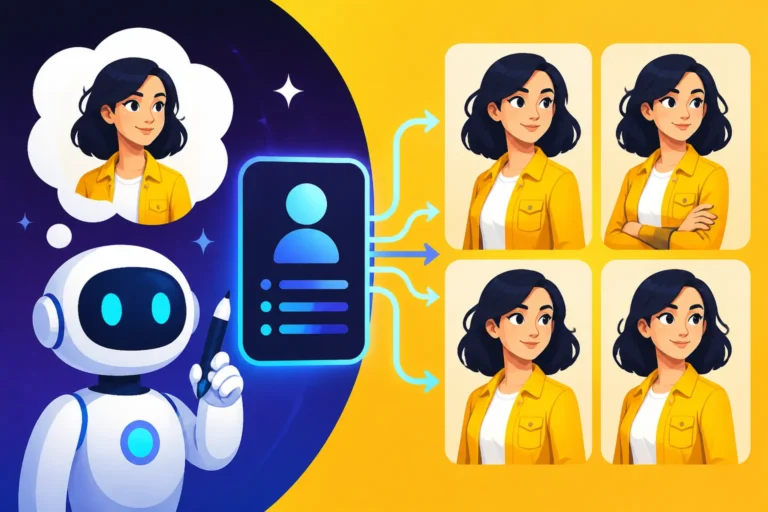
Seeds, on the other hand, are unique identifiers for a specific image generation process. If you generate an image and love its general layout but want to tweak a tiny detail in the prompt, you can often use the same seed along with your revised prompt. This often allows the AI to generate an image that's very similar to the original, but incorporates your small change more effectively. It’s particularly useful when you're trying to achieve How to Prompt for Consistent Characters or objects across a series of images. Experiment with both variations and seeds to see how they can accelerate your refinement process, allowing you to zero in on perfection without starting from scratch every time.
Injecting Style and Artistic Flair
Beyond simply describing what's in the picture, the true artistry in AI image generation comes from guiding how that picture looks. The style, the lighting, the composition – these elements transform a basic scene into something evocative, unique, and truly compelling. Don't just generate images; generate art.
Exploring Different Artistic Mediums and Styles
The digital canvas of AI is boundless, capable of mimicking virtually any artistic medium or style you can imagine. Are you envisioning a classic oil painting with rich textures, or a vibrant, cel-shaded anime character? Perhaps a detailed pixel art scene, or a sleek, futuristic 3D render? The specific keywords you use here are paramount.
Consider these examples:
- Traditional Art:
oil painting, watercolor, charcoal sketch, pastel drawing, acrylic art, woodblock print, fresco, mosaic - Digital Art:
digital illustration, vector art, 3D render, pixel art, low poly, voxel art, concept art, matte painting - Photography:
photorealistic, cinematic still, documentary photography, macro photography, wide-angle shot, long exposure, drone photography - Artistic Movements:
impressionistic, surrealism, cubism, art deco, steampunk, cyberpunk, rococo, baroque - Genre-Specific:
anime style, cartoon network style, comic book art, children's book illustration, manga
Don't be afraid to combine styles for unique effects, like "a futuristic cityscape in the style of an oil painting" or "a whimsical forest scene, digital illustration with watercolor elements." Experimentation is key to discovering new aesthetics. A detailed guide on How to Write Prompts for Photorealistic Images can help you get started with one of the most popular styles.
Controlling Lighting and Atmosphere
Lighting is perhaps the single most impactful element for setting the mood and atmosphere of your image. It can transform a mundane scene into something dramatic, serene, or mysterious. The AI is highly responsive to lighting cues, so use them to your advantage.
Think about:
- Time of Day:
golden hour, dawn, twilight, midnight, midday sun - Light Source:
studio lighting, natural light, moonlight, candlelight, neon glow, spotlight, volumetric lighting - Qualities of Light:
soft light, harsh light, dappled light, ethereal glow, lens flare - Atmospheric Effects:
fog, mist, rain, dust motes, god rays, smoke
For instance, "a tranquil Japanese garden, golden hour, soft ambient light, a subtle mist rising from the pond" will create a vastly different image than "a tranquil Japanese garden, harsh midday sun, sharp shadows." The right lighting can add depth, emotion, and realism. It's one of the quickest ways to elevate your AI art from generic to captivating.
Directing Composition and Camera Angles
Just like a film director or a photographer, you can guide the AI on how to frame your shot. Composition dictates how elements are arranged within the frame, and camera angles influence the viewer's perspective and emotional connection to the image. This level of control is often overlooked but is crucial for professional-looking results.
Consider terms like:
- Shot Types:
wide shot, close-up, medium shot, extreme close-up, full body shot, portrait shot - Angles:
low angle (worm's eye view), high angle (bird's eye view), dutch angle (tilted horizon), eye-level shot - Framing:
rule of thirds, leading lines, negative space, symmetrical composition, asymmetric composition, depth of field (shallow/deep) - Perspective:
cinematic, panoramic, isometric view, overhead shot
If you want a detailed view of a character's face, you'd specify "close-up portrait." If you want to show the vastness of a landscape, "epic wide shot" would be appropriate. Combining these with lighting and style creates truly stunning results. For example: "A lone adventurer gazing at a colossal dragon in the distance, epic wide shot, silhouetted against a setting sun, cinematic fantasy art." This ensures not just what is in the image, but how it's presented, dramatically enhancing its impact.
Advanced Prompting Techniques
Once you've mastered the basics of subject, style, and composition, it's time to unlock the truly powerful tools in your AI prompting arsenal. These advanced techniques allow for a much finer degree of control, helping you steer the AI away from unwanted elements and towards highly specific creative visions.
The Power of Negative Prompts
Negative prompts are your secret weapon for telling the AI what not to include in your image. It’s like telling a chef, "Make me a sandwich, but no pickles!" This is especially useful for mitigating common AI artifacts or guiding the image away from undesired interpretations. If you're tired of seeing blurry backgrounds when you want sharpness, or strange extra limbs on your characters, negative prompts are your answer.
The syntax for negative prompts varies slightly between different AI tools. In Midjourney, you'd use --no [unwanted elements]. For other platforms, you might find a dedicated negative prompt box. Common uses include:
- Removing unwanted objects:
--no text, watermark, signature - Fixing common AI flaws:
--no blurry, distorted, ugly, extra limbs, bad anatomy, deformed, mutated - Adjusting image quality:
--no low quality, jpeg artifacts, pixelated
For instance, if you're trying to create a realistic portrait but the AI keeps adding strange smudges or overly artistic interpretations, you could use a negative prompt like: "photorealistic portrait of a young woman –no painting, blurry, low resolution, bad hands." This explicitly tells the AI to avoid those elements, significantly cleaning up your output. Learning How to Use Negative Prompts can dramatically improve the cleanliness and precision of your generated images.
Using Weights and Emphasis
Sometimes, certain elements of your prompt are more important than others. You might want a "cat and dog" image, but you want the cat to be the dominant focus. This is where weights or emphasis come in. These techniques allow you to assign varying degrees of importance to different keywords or phrases within your prompt, nudging the AI to prioritize certain concepts over others.
Again, the exact syntax depends on the AI tool. In some, you might use parentheses or colons to assign weights. For example, (cat:1.5) and (dog:0.5) would make "cat" 1.5 times more important than "dog." Other tools might use a different method, such as putting more important words earlier in the prompt or repeating them.
Consider a scenario where you want a "serene forest path with dappled sunlight." If the "serene" aspect isn't coming through strongly enough, you might rephrase to ((serene)):1.2 forest path, dappled sunlight. By increasing the weight of "serene," you're telling the AI to put more emphasis on generating an image that embodies tranquility. This technique is fantastic for fine-tuning the balance of elements in complex prompts and ensuring your most critical instructions are heard loud and clear.
Image-to-Image and ControlNet Concepts
Beyond text-based prompting, the world of AI image generation offers even more sophisticated control through image-to-image prompting and tools like ControlNet, particularly within platforms like Stable Diffusion. These techniques allow you to use an existing image as an input, guiding the AI's generation process with visual context rather than just textual descriptions.
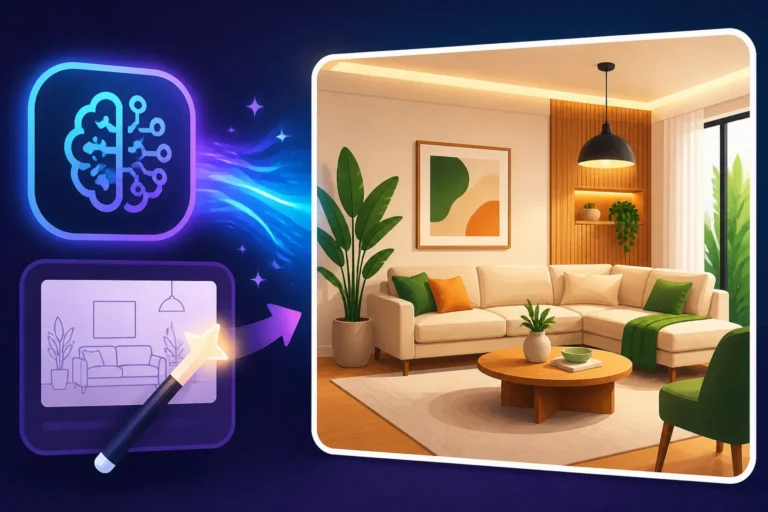
Image-to-Image (Img2Img): With Img2Img, you upload a base image, and the AI uses it as a stylistic or compositional reference. You can then add a text prompt to transform that image, maintaining certain aspects of the original. For example, you could upload a rough sketch of a character and prompt the AI to "render this sketch as a photorealistic superhero." The AI would use your sketch for the pose and composition, but apply the "photorealistic superhero" style. This is incredibly useful for creative iteration, consistency, and turning basic visual ideas into polished art.
ControlNet (in Stable Diffusion): ControlNet takes image-based control to another level. It allows you to specify precise structural or compositional information from an input image to guide the AI. You can extract things like pose data (e.g., from a human figure), depth maps, or even edge detection, and then use that information to generate entirely new images that adhere to the original's structure. For artists and designers, this offers unprecedented control over character poses, architectural layouts, and maintaining visual consistency across a series. While it requires a bit more technical setup, especially if running Stable Diffusion locally, the results are phenomenal for those who need precise control. Learning about these advanced features can drastically expand your creative capabilities, making your AI image tool less of a random generator and more of a co-creative partner.
Troubleshooting Common AI Image Problems
Let's be honest, AI image generation isn't always smooth sailing. We've all seen those images that are almost perfect, except for that one glaring flaw. The good news is, many common issues have identifiable causes and, more importantly, effective troubleshooting strategies. You don't have to live with weird hands or illegible text!
Fixing Distorted Anatomy and Awkward Hands
This is probably one of the most persistent and universally frustrating problems in AI image generation. You get a beautiful portrait, and then… seven fingers on one hand, or limbs bending at impossible angles. It's enough to make you throw your keyboard across the room! The AI struggles with complex anatomical structures because its training data, vast as it is, often doesn't contain perfectly labeled, consistent examples of hands and human poses from every conceivable angle.
Here are some strategies to combat this:
- Specificity in Prompts: Be extremely detailed about the pose or action. Instead of "person standing," try "person standing with arms crossed, hands clearly visible and relaxed, fingers naturally curved."
- Negative Prompts are Your Friend: This is where
bad anatomy, deformed, extra limbs, missing limbs, ugly, mutated hands, malformed hands, fused fingers, too many fingers, too few fingerscomes in. Be exhaustive with what you don't want. - Generate More Variations: Sometimes, it's a numbers game. Generate many images and cherry-pick the ones with acceptable anatomy.
- Focus on Faces/Headshots: If hands aren't critical, frame your shot to exclude them. "Close-up portrait" or "headshot" naturally avoids this issue.
- Image-to-Image / ControlNet (Advanced): For critical poses, starting with a reference image of a human pose (a "pose reference") and using Img2Img or ControlNet can guide the AI to generate anatomically correct figures. This is how pros often achieve consistent and correct anatomy.
Improving Text Rendering and Legibility
Oh, the dreaded "AI-gibberish." Asking an AI to render text in an image often results in garbled, nonsensical squiggles that look like an alien language. This is because AI models are primarily trained on visual data, not on linguistic understanding within an image context. They learn to draw letter-like shapes but often don't comprehend their meaning or proper formation.
However, there's hope, and some tools are much better than others:
- Specialized Tools: If text in images is crucial for you, consider tools specifically designed for it, like Ideogram. Ideogram excels at generating legible, stylish text within images, often with impressive accuracy. It’s definitely worth exploring if this is a frequent need.
- Simpler Prompts: For other tools, keep the text short and simple. A single word or a very short phrase is more likely to be rendered somewhat legibly than a full sentence.
- Generate and Overlay: The most reliable method for precise text is a two-step process: generate the image with the desired style and composition, leaving a blank space for text. Then, use a dedicated image editing software (like Photoshop, Canva, or even simple online editors) to overlay your text with perfect clarity and font choice.
- Negative Prompts: Use
--no text, typography, letters, wordsif you want to avoid any accidental text generation in your background or other elements. - Clear Contrast: Ensure your prompt specifies good contrast for any intended text areas, even if you plan to add it later. "A smooth, dark wall for text overlay" can help. For more insights into tools that handle text well, you might look into Best AI Image Generator for Text.
Achieving Consistency Across Multiple Images
Creating a series of images with a consistent character, style, or environment is one of the toughest challenges for current AI models. The AI treats each prompt as a new request, even if the phrasing is almost identical. Getting that same "person," "house," or "stylistic feel" across multiple generations can feel like herding digital cats.
Strategies to maximize consistency:
- Character/Object Reference: If your AI tool supports it (like some versions of Midjourney with Style References or Character References), use an initial generated image of your desired character/object as a reference for subsequent prompts. This gives the AI a visual anchor.
- Detailed Character Sheet Prompts: Create an extremely detailed description of your character, including appearance, clothing, specific features, and personality traits. Use this exact same description in every prompt where you want that character to appear. The more specific, the better. For instance, "A young woman, emerald green eyes, fiery red hair in a messy bun, wearing a distressed leather jacket and ripped jeans, a small silver hoop earring in her left ear, a faint scar above her right eyebrow."
- Seed Locking: If your tool allows, use the "seed" number from a successful initial image. Then, for subsequent images, use that same seed number along with your new prompt details (e.g., changing the background or pose). This tells the AI to start from a similar noise pattern, increasing consistency.
- Style Consistency: Beyond characters, apply a consistent set of stylistic keywords. If you're doing "cyberpunk city, neon glow, wet asphalt, cinematic lighting," use those exact phrases for every image in that series. Avoid deviating.
- Batch Generation and Selection: Generate many images in batches, especially when trying to maintain consistency. You might find a few strong candidates in a larger output.
- In-Painting/Out-Painting (Advanced Editing): For minor inconsistencies, once images are generated, advanced editing techniques like in-painting (to fill in specific areas) or out-painting (to expand the canvas while maintaining style) in tools like Photoshop or Stable Diffusion can help blend and correct issues.
By combining these strategies, you can significantly improve your chances of creating cohesive visual narratives and consistent assets for your projects.
Workflow and Best Practices for Creators
Creating great AI images isn't just about writing good prompts; it's also about establishing an efficient workflow and understanding the broader context of using these powerful tools. Whether you're a seasoned artist or a curious beginner, adopting smart practices can save you time, protect your work, and keep you ahead of the curve.
Organizing Your Prompts and Results
In the early days of AI image generation, many of us just threw prompts into a text file and hoped for the best. But as you generate hundreds, then thousands, of images, you quickly realize how vital organization is. Imagine trying to recreate that perfect setting or character without remembering the exact combination of keywords that made it shine!
- Build a Prompt Library: Start a dedicated document or spreadsheet for your successful prompts. Break it down by categories: character concepts, landscape styles, abstract textures, etc. Include the full prompt, the AI tool used (Midjourney, DALL-E, Stable Diffusion, etc.), any specific parameters or seeds, and a brief description of the outcome.
- Screenshot and Save: Don't just save the final image. Screenshot the image alongside the prompt used to create it. This immediate visual reference makes it easy to revisit and learn. Many AI tools will also embed the prompt data within the image metadata upon download, which is incredibly useful.
- Use Project Folders: Organize your generated images into specific project folders. If you're creating images for a blog post about enchanted forests, keep all related images and prompts in a "Enchanted Forest Blog" folder.
- Version Control: When iterating on a prompt, save different versions. "ForestPrompt_v1," "ForestPrompt_v2_golden_hour," etc. This helps you track your progress and revert if a change didn't work out. Remember, learning from what doesn't work is just as important as learning from what does.
A well-maintained prompt library becomes an invaluable resource, allowing you to quickly replicate styles, characters, or moods, and saving countless hours of re-experimentation.
Ethical Considerations and Commercial Use
The world of AI-generated content is still relatively new, and with its rapid evolution comes a host of ethical questions and legal considerations, particularly concerning commercial use. As a creator, it's your responsibility to be informed.
- Copyright and Ownership: Who owns the images generated by AI? This is a hot topic, and answers vary by jurisdiction and the specific AI tool's terms of service. Some tools grant you full commercial rights to images generated under a paid subscription (e.g., Adobe Firefly offers IP indemnification for commercial users, which is a big deal for businesses). Others might have more restrictive licenses. Always check the terms of service for the AI tool you are using before using images for commercial purposes.
- Disclosure: Is it ethical, or even legally required, to disclose that your images were AI-generated? While regulations are still catching up, many creators choose to disclose AI assistance for transparency, especially in professional contexts.
- Bias and Misinformation: Be aware that AI models can reflect and amplify biases present in their training data. Always review your generated images critically to ensure they don't inadvertently perpetuate harmful stereotypes or generate misinformation, especially if used for news or educational purposes.
- Deepfakes and Impersonation: Never use AI image generation to create deceptive content, deepfakes, or to impersonate individuals without their consent. This area has significant ethical and legal ramifications.
Before launching a product or campaign featuring AI-generated images, a quick check of the AI platform's commercial use policies is essential. For instance, understanding specific details like in the Adobe Firefly Commercial Safety Review can guide your decisions.
Staying Updated with AI Innovations
The AI landscape is moving at lightning speed. What was cutting-edge last month might be standard practice today, and entirely superseded tomorrow. To maximize your output and stay relevant, continuous learning and adaptation are crucial.
- Follow Key Developers and Communities: Keep an eye on announcements from major AI labs and developers like OpenAI (DALL-E, GPT Image), Midjourney, Stability AI (Stable Diffusion), Google (Imagen), and Adobe (Firefly). Join their Discord servers, forums, or official social media channels. These are often the first places new features (like Midjourney V7 updates) and models are announced and discussed.
- Experiment with New Tools: Don't get stuck on just one tool. Periodically explore new AI image generators or updates to existing ones. Each tool has its strengths and weaknesses. One might be great for photorealism, while another excels at unique artistic styles or text generation. You might find that the Best AI Image Generator Overall for you today isn't the best next year.
- Read and Watch Tutorials: The community around AI art is vibrant and generous. There are countless articles, YouTube tutorials, and online courses that delve into advanced techniques, prompt engineering, and workflow optimizations.
- Learn from Others' Prompts: Many AI art communities share prompts alongside their generated images. Analyzing these can be a fantastic way to learn new keywords, structures, and stylistic combinations. Don't just copy; understand why a prompt works.
By staying engaged and continuously experimenting, you'll not only refine your prompting skills but also discover new creative possibilities that keep your work fresh and impactful. This proactive approach ensures you're always leveraging the latest and greatest that AI has to offer.
Practical Examples and a Quick Reference Table
Sometimes, the best way to understand is to see it in action. Let's walk through a common scenario and then provide a handy reference for quick prompting insights.
Step-by-Step Prompt Building Scenarios
Let's imagine you want to create a blog header image for an article about "the future of sustainable energy."
Initial Idea: A wind farm.
Initial Prompt (Too Vague): "Wind farm"
- Result: Generic, possibly low-quality images of wind turbines. No artistic flair.
Step 1: Add Detail and Style
- Thought: I want it to look futuristic and inspiring, maybe with a nice sky.
- Prompt: "Futuristic wind farm, sunset glow, digital painting style, epic wide shot"
- Result: Better, but perhaps the "digital painting" is too smooth, and it lacks atmosphere.
Step 2: Refine Style and Atmosphere
- Thought: I want it to feel more realistic but still artistic, with dramatic clouds.
- Prompt: "Hyperrealistic wind farm at twilight, dramatic volumetric clouds, purple and orange sky, cinematic photography, long exposure"
- Result: Much closer! The lighting and clouds are good, but the turbines still look a bit standard.
Step 3: Introduce Specific Modifiers for Innovation
- Thought: I want the turbines to look more innovative, not just standard ones. Maybe some interesting energy elements.
- Prompt: "Innovative vertical axis wind turbines, sleek futuristic design, at twilight, dramatic volumetric clouds, aurora borealis in the sky, cinematic photography, long exposure, energy flow effects, octane render"
- Result: This is getting exciting! The "vertical axis" and "energy flow" add unique elements, and "aurora borealis" creates a truly inspiring sky. "Octane render" pushes it toward photorealism with a hint of CG polish.
This iterative process, moving from a basic concept to a highly refined vision, is how you unlock the true potential of AI image generation.
Key AI Image Terms and Their Impact
This table summarizes some common prompt elements and their general effects. Use it as a quick reference when you're stuck or looking to add a specific touch to your images.
| Prompt Element Category | Example Terms | Common Impact |
|---|---|---|
| Style/Medium | photorealistic, oil painting, anime |
Dictates the overall aesthetic and visual language. Photorealistic aims for photographic accuracy; oil painting will add brushstrokes and texture; anime will apply a specific character design and color palette. |
| Lighting | golden hour, cinematic lighting, softbox |
Fundamentally changes the mood and appearance. Golden hour adds warmth and long shadows; cinematic lighting implies dramatic, high-contrast scenes; softbox suggests professional, even illumination often used in studios. |
| Composition/Angle | wide shot, close-up, rule of thirds |
Controls what's visible in the frame and how it's arranged. Wide shot captures a large scene; close-up focuses on detail; rule of thirds encourages balanced, aesthetically pleasing placement of elements. |
| Detail/Quality | 4K, 8K, highly detailed, intricate |
Influences the perceived resolution and amount of fine information. Higher resolutions often lead to more refined textures and clearer elements, though they don't magically fix poor base generation. Intricate demands complex patterns or structures. |
| Atmosphere | foggy, rainy, ethereal, moody |
Sets the emotional tone and environmental conditions. Foggy adds obscurity; rainy suggests wetness and reflections; ethereal implies a dreamlike or delicate quality; moody suggests darkness, contemplation, or drama. |
| Camera/Lens | DSLR, anamorphic lens, fisheye lens |
Mimics specific photographic equipment effects. DSLR aims for a professional photo look; anamorphic lens can create wide aspect ratios and unique bokeh; fisheye lens produces a distorted, wide-angle view. |
| Negative Prompts | --no blur, --no ugly, --no watermark |
Explicitly tells the AI what to exclude. Crucial for refining output, removing artifacts, and avoiding unwanted elements like text or disfigured anatomy. Using How to Use Negative Prompts can drastically clean up your images. |
| Weights | (word:1.5), ((word)) |
Emphasizes specific keywords. Increases the AI's focus on the weighted term, making it more prominent or influential in the generation. The exact syntax may vary between tools. |
| Artist/References | by Greg Rutkowski, Artstation |
Guides the AI towards a known artistic style or quality benchmark. Naming specific artists or platforms can significantly influence the aesthetic, though ethical considerations regarding artist attribution should always be kept in mind. |
| Colors | vibrant blues, monochromatic, pastel |
Directly controls the color palette of the image. Vibrant blues will lean into rich, saturated cool tones; monochromatic will restrict colors to shades of one hue; pastel will use soft, desaturated colors. |
This table is a starting point, of course! The true depth comes from experimenting with combinations and seeing how different elements interact. The more you experiment and refine, the more intuitive the process becomes, turning you into a truly effective AI image wizard.
Disclaimer
The information provided in this article is for general informational purposes only and is subject to change as AI technology rapidly evolves. While we strive to offer accurate and up-to-date advice, we make no representations or warranties of any kind, express or implied, about the completeness, accuracy, reliability, suitability, or availability with respect to the website or the information, products, services, or related graphics contained on the website for any purpose. Any reliance you place on such information is therefore strictly at your own risk. Always verify the specific terms of service and commercial use policies for any AI image generation tool you utilize.