How to Inpaint and Edit AI Images
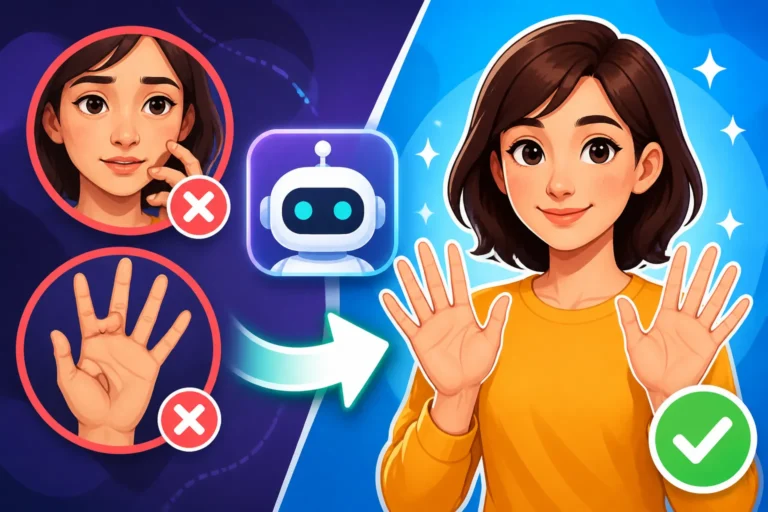
You've just generated an amazing image with your AI tool, one that's almost perfect. But then you zoom in, and there it is: that uncanny extra finger, or the slightly distorted eye, or maybe a distracting background element that just shouldn't be there. It's a common frustration for anyone diving into the world of AI art, where near-perfection often requires a little post-processing magic. This guide is all about equipping you with the know-how to tackle those imperfections head-on, turning almost-perfect AI creations into truly stunning, polished masterpieces through the power of inpainting and strategic editing.
Understanding the Need for Inpainting and Editing
Let's be real, AI image generators are phenomenal. They can conjure entire worlds, characters, and concepts out of thin air with a few words. But they're not infallible. Often, the output needs a bit of tender loving care, a touch of human refinement, to truly shine. This isn't a failure of the AI, nor is it a sign you're doing something wrong with your prompts – it's just part of the process.
The Frustration of Imperfect AI Output
Anyone who's spent more than a few hours with tools like Midjourney, DALL-E, or Stable Diffusion has encountered those quirky imperfections. You might get a character with an extra limb, a subject with subtly mismatched eyes, or hands that look like they belong to an alien. Sometimes, the lighting is off, or an unwanted object appears in the background, drawing attention away from your intended focal point. It can be incredibly frustrating to see a masterpiece-in-the-making marred by these seemingly small but glaring errors. You type in "a serene woman reading a book by a sunlit window," and you get a beautiful scene, but the book is a jumbled mess of garbled text or the woman's face has an unsettling asymmetry. These are the moments when you realize that even with the best prompt in the world, the AI sometimes needs a helping hand to get it just right. The initial output is a fantastic starting point, but rarely the final destination for professional or highly polished work.
Beyond the Initial Generation
Think of the initial AI generation as the rough sketch. It provides the foundational elements, the mood, and the overall composition. But just as a traditional artist wouldn't hand over a rough sketch as a finished piece, we shouldn't always expect the AI's first pass to be client-ready. This is where the real artistry often comes in. Moving beyond the initial generation means embracing an iterative process, where you refine, adjust, and sometimes completely rework specific areas. It’s about taking that raw creative spark and finessing it into a polished jewel. This iterative approach allows you to correct the AI's "mistakes" but also to inject your own vision and artistic choices more deliberately. Maybe the AI gave you a fantastic futuristic city, but you envisioned a flying car in the foreground, or perhaps a different architectural style for one specific building. Editing and inpainting become your digital chisels, allowing you to sculpt the image precisely to your desires, ensuring that the final output truly aligns with your creative brief or personal vision.
Essential Inpainting Techniques for AI Images
Inpainting is a game-changer. It's the magic trick that lets you fix those annoying blemishes or even introduce entirely new elements into specific parts of your AI-generated images without having to regenerate the entire picture from scratch. If you've ever thought, "If only I could just change that one thing," inpainting is your answer.
What is Inpainting and How Does It Work
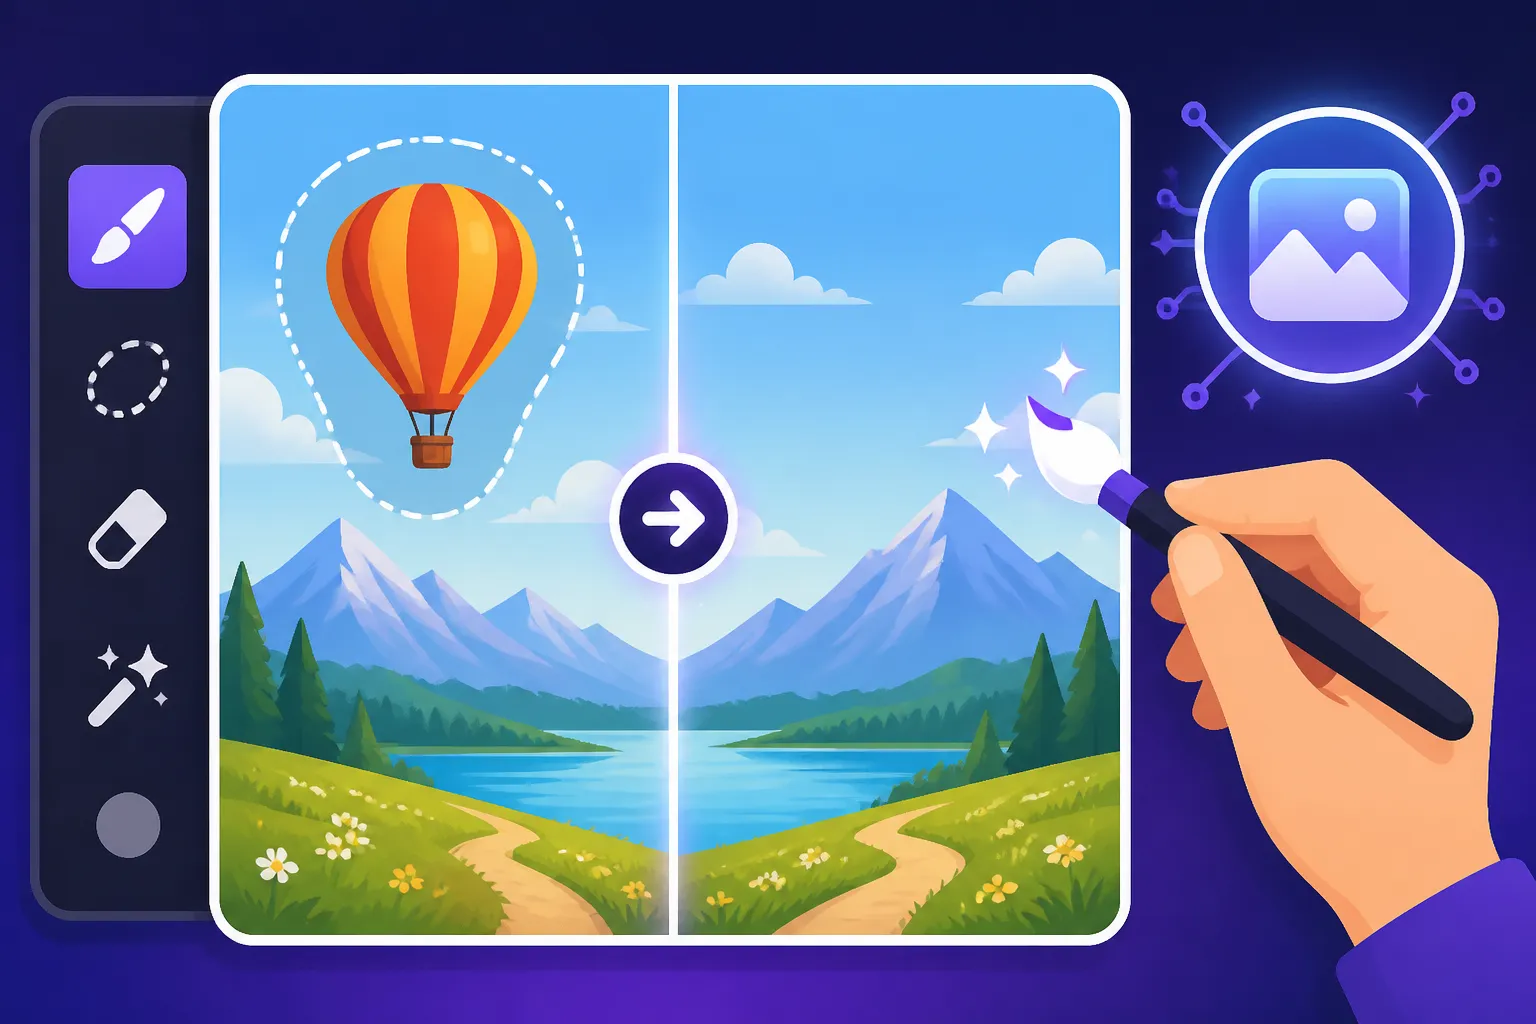
At its core, inpainting is the process of selectively replacing or generating specific portions of an image. Instead of feeding a prompt to the AI and getting a whole new image, you tell the AI, "Hey, see this area I've marked? I want you to replace only that, based on this new prompt, and make it blend seamlessly with the rest of the picture." The "masking" step is crucial here. You essentially draw over the part of the image you want the AI to re-think or re-create. The AI then takes the new prompt you provide, looks at the surrounding pixels (the context outside your masked area), and intelligently fills in the masked region with new content that conceptually and stylistically matches its surroundings.
For example, if you have a person with a strange hand, you'd mask out just the hand. Then, you'd give the AI a prompt like "a realistic human hand with five fingers, holding a cup," and it would attempt to generate a new hand in that specific spot, integrating it into the existing image. Tools like DALL-E 3 (often found within platforms like ChatGPT, as discussed in DALL-E in ChatGPT: How Good Is It) and specialized features in Stable Diffusion or Adobe Firefly excel at this. They use advanced diffusion models to not just paste a new element but to truly repaint the area, making it feel like it was always meant to be there. It’s a delicate dance between your instruction and the AI’s understanding of context.
Step-by-Step Guide to Inpainting
Ready to give it a shot? Here’s a general workflow that applies to most AI image tools offering inpainting capabilities:
-
Choose Your Tool and Upload/Generate: First things first, pick an AI image generator that supports inpainting. Many popular platforms now offer this, often labeled as "edit," "mask," or "inpainting" features. Generate your initial image or upload one you've already created. For instance, if you're working with a more open-source model, a Stable Diffusion Review: Free and Customizable might lead you to discover various web UIs like Automatic1111 that have robust inpainting tabs.
-
Identify the Area to Fix: Look closely at your image. Is it a wonky ear, an object in the wrong place, or an odd color splash? Pinpoint exactly what needs changing. Precision here is key. Trying to fix a tiny detail by masking half the image usually leads to more problems than it solves.
-
Mask the Area Precisely: Most inpainting tools will give you a brush or selection tool. Use it to carefully paint over the exact area you want to replace. If you want to fix a person's eye, only mask the eye, not the entire face. If you're removing a small, distracting bird in the sky, just mask the bird. The smaller and more precise your mask, the better the AI can infer the surrounding context and make a seamless change. Many tools allow you to adjust brush size for finer control.
-
Craft a Targeted Prompt for the Masked Area: This is where your prompt engineering skills come into play again, but this time, it's hyper-focused. The prompt you write for inpainting should describe only what you want to see in the masked area, while also considering how it fits with the unmasked part of the image.
-
Example 1: Fixing a Hand: If a character's hand looks disfigured, your mask covers the hand. Your prompt might be: "a realistic human hand with five fingers, gently holding a delicate teacup, soft lighting, detailed knuckles." Notice how it's specific about the hand and what it's doing, but also implies stylistic consistency ("soft lighting"). This can be a lifesaver when you're trying to How to Fix Extra Fingers in AI Images.
-
Example 2: Removing a Distraction: Mask out an unwanted street sign in a serene landscape. Your prompt could be as simple as: "lush green trees, rolling hills, clear blue sky, natural light." The AI will then attempt to fill that space with what you describe, using the surrounding landscape as a guide.
-
-
Generate and Iterate: Hit the generate button. The AI will process only the masked area. You'll likely get a few options. Review them carefully. Does it blend well? Is the new element correct? If not, don't despair! This is where iteration comes in. Adjust your mask, refine your prompt, or even try a different "seed" if your tool allows for more variation. Sometimes, a slight tweak in wording can make all the difference. Remember, getting good results in painting is often about persistence and refinement.
Advanced Inpainting Strategies
Once you've got the basics down, you can start exploring more sophisticated ways to use inpainting for truly professional results.
Context Awareness and Blending
Different AI models handle "context" differently. Some are incredibly good at understanding the surrounding image and blending the new generation seamlessly, almost like magic. Others might leave a noticeable seam or stylistic mismatch. When choosing your tool, consider its reputation for seamless inpainting. Adobe Firefly, for example, is known for its strong contextual understanding, which is why many commercial users are keen on its capabilities as highlighted in an Adobe Firefly Review for Commercial Use. Experiment with slightly larger or smaller masks to see how the AI interprets the blend boundary. Sometimes, extending the mask just a tiny bit beyond the problem area can help the AI integrate the new content more smoothly.
Prompt Specificity and Negative Prompts
For inpainting, your prompts should be even more specific than for initial generation. You're not guiding a whole scene, but a small, precise intervention. If you want "a small, smooth, grey pebble" on a beach, don't just say "pebble." Add details! Similarly, leverage negative prompts within your inpainting process if your tool supports it. If you're fixing a hand and constantly getting too many fingers, your negative prompt might include bad anatomy, extra fingers, deformed hand. This tells the AI what not to generate in that masked region.
Iterative Inpainting for Complex Fixes
Some problems are too complex for a single inpainting pass. Imagine you have a person with a completely distorted face. Trying to fix the entire face in one go might be overwhelming for the AI. Instead, you might try iterative inpainting:
- First pass: Mask a larger, general area (e.g., the whole face) and prompt for "a symmetrical human face, natural skin texture." This fixes the overall structure.
- Second pass: Zoom in. If an eye still looks off, mask only that eye and prompt for "a bright, realistic brown eye looking forward."
- Third pass: Maybe the mouth isn't quite right. Mask the mouth and prompt for "a gently smiling mouth, realistic lips."
By breaking down a complex problem into smaller, manageable inpainting tasks, you guide the AI more effectively and achieve far better results. This methodical approach can turn seemingly unsalvageable images into gems.
General AI Image Editing and Refinement
Inpainting is fantastic for targeted fixes, but true mastery of AI image creation often involves a broader suite of editing and refinement techniques. These methods go beyond fixing errors; they enhance the overall quality, adapt images for different purposes, and allow for a deeper level of creative control that even the best initial prompt can't always guarantee.
Upscaling and Enhancing Details
Let's face it, sometimes your perfect AI image just isn't big enough, or it lacks that crisp detail you crave for a print or a high-resolution display. AI image generators can sometimes produce images that, while visually appealing, might fall short in pixel density or intricate detailing. This is where upscaling comes in.
Upscalers aren't just stretching pixels like old-school image enlargers; they're intelligent AI models that add detail. They analyze the existing pixels and intelligently generate new ones, interpolating textures, lines, and subtle nuances that weren't originally there, effectively making your image look sharper and more detailed at a larger size. Imagine you've created a stunning abstract background for a website, but at 72 DPI, it looks fuzzy on a Retina display. An AI upscaler can take that image and not only increase its dimensions but also sharpen edges, define colors, and bring out subtle textures, making it truly pop.
Tools like Gigapixel AI, Topaz Photo AI, and dedicated AI upscaling features within platforms (some of which are reviewed in Magnific Upscaler: Worth the Price) are invaluable for this. The process usually involves uploading your image, selecting your desired upscale factor (e.g., 2x, 4x), and letting the AI do its work. The results can be astounding, transforming a decent image into something truly high-definition and professional-grade. This is particularly crucial for designers and marketers who need high-quality visuals for print, large screens, or detailed product mockups.
Outpainting and Expanding Your Canvas
Just as inpainting lets you change specific areas, outpainting lets you expand your image beyond its original boundaries. This is incredibly useful when you love a generated image but it's not quite the right aspect ratio, or you need more background context, or you simply want to add more to the scene.
Outpainting works by taking your existing image and then using AI to intelligently generate new content around it, blending seamlessly. You typically specify the direction or dimensions you want to expand (e.g., extend to the left, make it wider, make it taller) and provide a prompt for the new areas. The AI then looks at the existing image's style, colors, and content, and extends it logically.
Use cases for outpainting are vast:
- Adjusting Aspect Ratios: You generated a fantastic square image, but your blog banner needs a wide landscape format. Outpainting can expand the sides while keeping your central subject intact.
- Adding Context: Your character looks amazing, but the background feels too close or cut off. Outpaint to add a vast, sweeping landscape or a detailed interior behind them.
- Creative Expansion: Perhaps you have a beautiful portrait, but you decide you want to add a sprawling garden around the subject, or turn a close-up of a product into a full lifestyle shot. Outpainting gives you the canvas to do so.
This feature is offered by many of the best AI image generators and allows for incredible creative flexibility. It lets you take an initial creative spark and truly build upon it, tailoring the composition to fit any requirement without losing the essence of the original generation.
Basic Image Adjustments and Post-Processing
Even after inpainting and upscaling, a final pass with traditional image editing adjustments can make a world of difference. Think of these as the final touches that professional photographers and graphic designers use on every image. While AI is powerful, a human eye for aesthetic balance remains paramount.
- Brightness and Contrast: Adjusting these can dramatically alter the mood and clarity of your image. A slight bump in contrast can make an image pop, while lowering brightness can create a more dramatic or somber feel.
- Saturation and Color Correction: AI images can sometimes come out with colors that are too vibrant, too muted, or slightly off-kilter. Fine-tuning saturation can make colors more natural or more punchy. Color correction tools allow you to adjust white balance or shift hues to achieve a desired aesthetic, ensuring the colors are true to your vision or match your brand palette.
- Cropping and Resizing: Beyond outpainting, simple cropping is essential for framing your subject, eliminating dead space, or adapting images for specific platforms (e.g., Instagram stories, YouTube thumbnails). Resizing for web optimization is also crucial to ensure fast loading times.
- Adding Text: While AI tools like Ideogram are getting incredibly good at text rendering, sometimes you need precise control over fonts, placement, and effects. For logos, ad creatives, or blog titles, incorporating text in a dedicated graphic design tool like Adobe Photoshop or even Canva (as discussed in Canva AI Image Generator Review) after generating the image can often yield superior results.
- Blending AI Elements with Traditional Edits: Don't be afraid to mix and match. You might generate a stunning background with AI, then composite a photograph of a product onto it, and then use traditional brushes and filters to blend everything seamlessly. The goal is the best possible image, not strictly an "AI-only" one. This hybrid approach often produces the most compelling and unique visuals.
Choosing the Right Tools and Workflow
Navigating the landscape of AI image editing can feel overwhelming given the sheer number of tools available. The key is to understand your specific needs and integrate these powerful technologies into a workflow that feels natural and efficient for you.
Built-in Editors vs. Dedicated Software
The choice between using the editing features built directly into AI image generators and employing separate, dedicated image editing software often comes down to convenience versus control and power.
Built-in Editors (e.g., in Midjourney, DALL-E, Adobe Firefly):
-
Pros:
- Convenience: The most significant advantage is that you're already in the environment where you generated the image. There's no need to download, switch applications, and re-upload. This streamlines the workflow significantly, especially for quick fixes.
- Seamless Integration: These tools are designed to work perfectly with their own generated images, often resulting in very smooth inpainting and outpainting that matches the original style and lighting remarkably well.
- Ease of Use for Beginners: Often, the interfaces are more intuitive and less intimidating for those new to image editing. For example, Is Midjourney Good for Beginners covers how its Discord-based workflow and web app's edit features are becoming more user-friendly.
-
Cons:
- Limited Functionality: While good for AI-specific tasks like inpainting or outpainting, they typically lack the comprehensive toolsets of professional editing software. You won't find advanced layer management, complex color grading options, or intricate selection tools.
- Less Creative Control: If you want to drastically alter an image, blend multiple elements, or apply sophisticated filters, you'll quickly hit the limitations of built-in editors.
Dedicated Software (e.g., Adobe Photoshop, GIMP, Krita, dedicated Stable Diffusion UIs):
-
Pros:
- Unparalleled Control: These programs offer a vast array of tools for every conceivable editing task: layers, masks, adjustment curves, sophisticated selection tools, filters, and more. If you need pixel-level precision or artistic freedom, this is where you'll find it.
- Flexibility: You can combine AI-generated elements with photos, illustrations, and vector graphics from other sources.
- Non-Destructive Editing: Many professional tools allow for non-destructive edits, meaning you can always revert to an earlier state without permanently altering the original pixels.
- Customization: Platforms like Stable Diffusion, especially when run locally with UIs like Automatic1111, allow for immense customization with ControlNet, LoRAs, and custom models, as detailed in Stable Diffusion Pros and Cons for Creators. This gives you an unparalleled level of technical and creative control over the editing process, far beyond what any built-in tool can offer.
-
Cons:
- Steeper Learning Curve: These tools can be complex and overwhelming for newcomers.
- Requires Switching Applications: It adds a step to your workflow – generate in one app, download, open in another, edit, save, then maybe re-upload.
- Cost: Professional software like Adobe Photoshop comes with a subscription fee.
Ultimately, the best approach might be a hybrid one. Use the built-in editors for quick AI-specific fixes (like a minor inpainting job), and then export to a dedicated editor for extensive post-processing, color grading, compositing, or when you need Best AI Image Tools with the Best Editing.
Developing an Iterative Editing Workflow
Effective AI image editing is rarely a one-shot deal. It's an iterative process, much like traditional art or design. Developing a systematic workflow will save you time and dramatically improve your final results.
-
Start Broad, Then Refine: Begin with the largest, most obvious problems first. If the entire composition is off, use outpainting to expand or reshape it. If a main subject has major anatomical issues, tackle those first with general inpainting. Once the big issues are addressed, move to finer details like subtle facial features, specific textures, or small background elements. Trying to fix a tiny detail when the overall image is still flawed is inefficient.
-
Save Versions Regularly: This cannot be stressed enough. As you make significant changes, save different iterations. Use clear file names (e.g., "Original_Image.jpg," "Image_V1_InpaintedHand.jpg," "Image_V2_Upscaled.jpg"). This provides a safety net, allowing you to revert to an earlier stage if a particular edit goes sideways or if you decide a previous version was actually better. Version control is crucial for any creative project.
-
A/B Testing Edits: Sometimes, you're not sure which edit looks best. For instance, you might have two different inpainting attempts for a character's hair. Generate both, save them, and compare side-by-side. If you're working on a commercial project, even better – get feedback from colleagues or clients. This objective comparison helps you make informed decisions.
-
When to Regenerate vs. When to Edit: This is a key decision point. If an image is fundamentally flawed (e.g., the core composition is completely wrong, the style is totally off, or there are too many major errors), it's often more efficient to go back to the drawing board and refine your initial prompt (How to Write AI Image Prompts can help here) and regenerate a new batch of images. Trying to salvage a deeply flawed image through extensive editing can be a time sink. However, if the image is 80-90% there, with just a few specific imperfections, then editing (inpainting, upscaling, color correction) is definitely the way to go. Learn to recognize when an image is a keeper for editing and when it's best to start fresh.
Practical Scenarios and Brand Integration
Let's look at how these techniques play out in real-world situations, especially for businesses and content creators.
Scenario 1: A Blogger Needing Consistent Imagery
Imagine a lifestyle blogger creating a series of posts on "home organization hacks." They want a consistent visual style across all their blog images. They generate an initial image of a minimalist living room for their first post. For subsequent posts, they might use inpainting to:
- Change small details on a bookshelf (e.g., swap a plant for a picture frame) to subtly vary the scene for different articles.
- Update a piece of art on the wall without regenerating the entire room.
- Remove a distracting element (like a forgotten coffee cup) that doesn't fit the "organized" theme.
They might also use outpainting to adapt the main image to different aspect ratios for Pinterest pins or Instagram stories, all while maintaining the core visual identity. This approach significantly speeds up content creation while ensuring brand consistency.
Scenario 2: A Marketer Creating Ad Creatives
A digital marketer needs multiple versions of an ad creative for an A/B test. They have a fantastic AI-generated image of a model using their product.
- Outpainting: They use outpainting to create wider versions of the image, adapting it for different banner ad sizes (e.g., a vertical mobile ad vs. a horizontal display ad) without losing the product or model.
- Inpainting: For the A/B test, they want to test different product colors. They use inpainting to mask just the product and re-prompt for "the same product, now in a vibrant sapphire blue finish." They can repeat this for several color variations.
- Refinement: Finally, they take the inpainting results into Adobe Photoshop to add precise text overlays with calls-to-action and logo placement, ensuring the brand elements are sharp and perfectly aligned.
This iterative process allows them to quickly generate diverse ad creatives from a single base image, test what resonates with their audience, and ultimately drive better campaign performance. Many cutting-edge AI image generators for marketers now integrate features that facilitate such workflows, understanding the demanding needs of branding and advertising.
Here's a quick comparison of editing capabilities across common AI image tools:
| Feature | Midjourney (Web App) | DALL-E (ChatGPT) | Stable Diffusion (UIs) | Adobe Firefly | Leonardo AI |
|---|---|---|---|---|---|
| Inpainting | Yes | Yes | Excellent | Excellent | Good |
| Outpainting | Yes | Yes | Excellent | Excellent | Good |
| Upscaling (built-in) | Yes | Yes | Excellent | Yes | Yes |
| Style/Variations | Excellent | Good | Excellent | Good | Good |
| Control Over Edits | Moderate | Moderate | High (via ControlNet) | High | High |
| Learning Curve | Medium | Easy | High | Easy-Medium | Medium |
| Focus | Artistic | General Purpose | Customization | Commercial | Game Art |
This table highlights that while many tools offer basic inpainting and outpainting, their strengths and the level of control they provide can vary significantly, influencing your workflow and final output quality. For deeper insights into specific tools, you might find articles like Leonardo AI Review or Flux Review: Pros, Cons, and Pricing useful.
Disclaimer
The information provided in this article is for general guidance and informational purposes only. The field of AI image generation and editing is rapidly evolving, and tool features, capabilities, and best practices may change frequently. Always refer to the most up-to-date documentation and terms of service for any specific AI tool you use.