How to Prompt for Print-Ready Resolution
It's incredibly frustrating, isn't it? You spend time crafting the perfect AI image, it looks absolutely stunning on your screen, crisp and vibrant. Then you send it to the printer, or worse, to a professional printing service, and the result is… pixelated, blurry, or just plain off. It feels like the magic of AI vanishes the moment ink hits paper. This guide is here to walk you through exactly how to prompt your AI image generators to create visuals that are truly ready for print, saving you from that all-too-common disappointment.
Understanding Print-Ready Resolution
Before we even dive into specific prompts, it's crucial to understand why your screen-perfect images might fail in print. It's not just about the number of pixels; it's about how those pixels translate to a physical medium. Many creators, myself included, have learned this the hard way, thinking a large image meant a print-ready one.
What "Print-Ready" Really Means
When designers and printers talk about "print-ready," they're referring to images that have sufficient detail and resolution to be reproduced clearly and sharply on a physical surface. The key difference here is between PPI (Pixels Per Inch) and DPI (Dots Per Inch). Your screen displays images in PPI, typically at 72 PPI for web content. This is great for digital viewing, but it's a completely different beast when it comes to printing.
For physical prints, we're usually talking about DPI. A standard photographic print, like an 8×10 or a greeting card, almost always requires 300 DPI for optimal sharpness. Larger prints, like posters or banners viewed from a distance, might get away with 150-200 DPI. The problem arises when your AI generates an image that is, say, 1024×1024 pixels at 72 PPI. If you try to print that at 300 DPI, it ends up being a tiny image, or stretched and pixelated if forced to a larger size. You need a much larger pixel dimension overall to achieve that 300 DPI for a decent print size. For example, an 8×10 inch print at 300 DPI needs to be 2400×3000 pixels. That's a huge jump from a typical AI output.
Common Pitfalls of AI Image Generation for Print
Most AI image generators, by default, are optimized for speed and digital display. This means they often output images in resolutions that are perfect for a blog post, social media graphic, or website banner, but woefully inadequate for print. You might get an image that's 1024×1024 or 1920×1080 pixels, which is fantastic for screens, but print that same image larger than a business card and you'll likely see a muddy mess.
Another common issue is the "AI look" that becomes more apparent under scrutiny. On a small screen, minor imperfections, fuzzy edges, or subtle distortions in details might go unnoticed. But when blown up for print, these flaws become glaringly obvious. Think of an AI-generated hand with an extra finger or slightly off-kilter perspective—it might be okay digitally, but on a large print, it’s a distraction. Compressed file formats, inherent in many AI workflows, can also introduce artifacts that appear fine online but degrade print quality. The key is to start with a high-quality, high-resolution source image from the AI, rather than trying to salvage a low-res one later.
Prompting Strategies for Higher Resolution Output
Now that we understand the 'why', let's get into the 'how'. The good news is that many AI models are becoming smarter, and with the right nudges in your prompts, you can significantly improve your chances of getting print-ready results straight out of the gate.
Specifying Resolution and Detail in Your Prompts
The most direct way to tell an AI you want a high-quality image for print is to simply ask for it. Incorporate terms related to resolution, detail, and quality directly into your prompts. Don't be shy; the more explicit you are, the better the AI can interpret your intent. Think of it as laying the groundwork for a masterpiece, not just a quick sketch.
For instance, instead of just "a serene landscape," try something like "a serene landscape, 4K resolution, ultra-detailed, sharp focus, fine art print quality, suitable for large format printing." You can even push it further with "8K resolution" or "cinematic detail." While the AI might not generate a true 8K image every time, these keywords instruct the model to prioritize detail and clarity over speed or general aesthetic. It forces the AI to consider the intricate textures, lighting, and elements that contribute to a high-fidelity image. This strategy is essential, whether you're using a tool like Midjourney, DALL-E, or Stable Diffusion. For more specific guidance on different platforms, check out our articles on the Midjourney Prompt Guide, DALL-E Prompt Guide, and the Stable Diffusion Prompt Guide.
Emphasizing Detail and Texture
Beyond just numerical resolution, the quality of the detail is paramount for print. A high-resolution image with blurry, indistinct elements is still a poor print. Your prompts should encourage the AI to render intricate textures, sharp edges, and a sense of depth that will hold up when magnified. This isn't just about making the image bigger; it's about making it richer in information.
Consider adding descriptors like "razor-sharp focus," "intricate patterns," "fine fabric texture," "photorealistic skin texture," "detailed brushstrokes," or "every leaf defined." For architectural scenes, you might ask for "weathered stone texture" or "intricate carved details." If you're creating images of food, "dew drops on fresh fruit, glistening texture" can make a massive difference. These phrases push the AI to generate more granular information within the image itself, rather than just upscaling existing, simpler pixels. This attention to minute elements is a cornerstone of prompting for photorealistic images, ensuring that your AI creations possess the depth and realism needed for professional printing.
Utilizing Aspect Ratios and Upscalers for Print Optimization
Getting a high-resolution image is only half the battle. The other crucial part is ensuring it fits your desired print dimensions without awkward cropping or stretching. This is where understanding aspect ratios and leveraging post-generation tools comes into play.
Choosing the Right Aspect Ratio for Print
One of the most overlooked aspects of preparing AI images for print is the aspect ratio. Printers work with standard paper sizes: A4, A3, 8×10, 11×14, 16×20, and so on. If your AI generates a perfect square image (1:1 aspect ratio) and you try to print it as an 8×10 (4:5 aspect ratio), you'll inevitably have to crop either the top/bottom or the sides, potentially ruining your composition. It's far better to specify the desired aspect ratio in your initial prompt.
Most AI tools allow you to set an aspect ratio (e.g., --ar 16:9 in Midjourney, or choosing a preset in DALL-E). Knowing the common aspect ratios for print sizes can save you a ton of headaches. Here's a quick guide:
| Common Print Size | Aspect Ratio | Examples of Use |
|---|---|---|
| 4×6, 8×12, 12×18 | 2:3 | Standard photos, postcards |
| 5×7 | 5:7 | Smaller photo prints, greeting cards |
| 8×10, 16×20 | 4:5 | Common portrait sizes, framed art |
| 11×14 | 11:14 | Medium wall art, specific photo sizes |
| A4 (210x297mm) | ~1:1.41 (√2) | Documents, smaller posters, international standard |
| A3 (297x420mm) | ~1:1.41 (√2) | Posters, larger documents, international standard |
| 16×9, 1920×1080 | 16:9 | Digital screens, wide landscapes (can be cropped for print) |
By starting with the correct aspect ratio, you ensure your composition fills the print area naturally, reducing the need for destructive cropping later. You can delve deeper into mastering this with guides like How to Prompt for Different Aspect Ratios.
The Role of Upscalers and Post-Processing
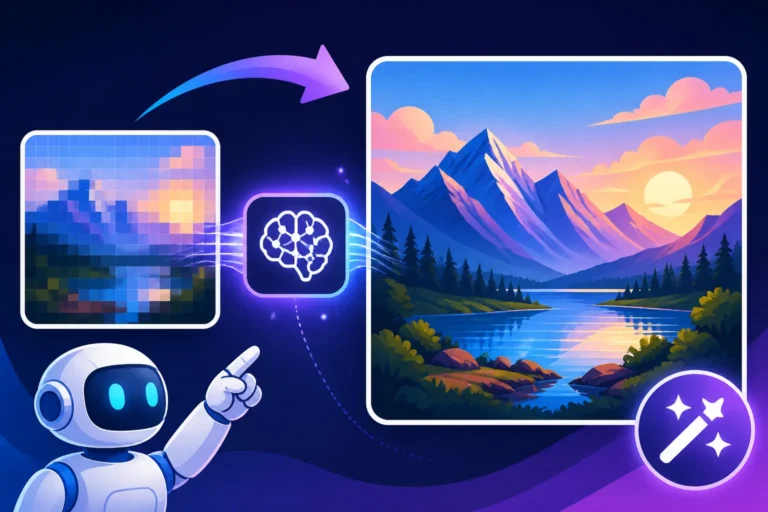
Let's be realistic: even with the best prompts, AI models might not always spit out a 300 DPI, 24×36 inch poster at native resolution. This is where upscaling tools become invaluable. An upscaler's job is to intelligently increase the pixel dimensions of your image without just stretching pixels (which leads to blurriness). Modern AI-powered upscalers use sophisticated algorithms to add detail and sharpness during the enlargement process, making smaller images viable for larger prints.
Think of upscaling as a crucial final step. You want to generate the best possible base image from your initial prompt—one that already has good detail, composition, and minimal artifacts. Then, you pass this high-quality base through an upscaler. Tools like Gigapixel AI, Topaz Photo AI, or even built-in upscaling features in some AI image generators can significantly boost the resolution. Some dedicated AI upscalers, like Magnific AI, are particularly powerful at regenerating details and increasing resolution, making them essential for print preparation. If you're wondering about investing in one, our review, Magnific Upscaler: Worth the Price, offers an in-depth look.
However, a word of caution: upscalers can only do so much. If your initial AI output is very low resolution or full of artifacts, even the best upscaler will struggle to create a truly pristine print-ready image. It's always best to aim for the highest native resolution and detail in your initial prompts, then use upscalers to refine and super-size the already good work.
Here’s a quick overview of how some popular AI tools handle upscaling, either natively or through recommended workflows:
| AI Image Generator | Native Upscaling Capabilities | Recommended Workflow for Print-Ready |
|---|---|---|
| Midjourney | Built-in upscalers (U buttons), Vary (Subtle/Strong), Zoom out | Generate variations with high-detail prompts, use U buttons, then send to external upscaler. |
| DALL-E | Generally generates good resolution, inpainting/outpainting for expansion | Focus on descriptive prompts for detail, use outpainting to expand canvas, then potentially external upscaler. |
| Stable Diffusion | Requires specific models/workflows (e.g., img2img, ControlNet, dedicated upscaler models) | Generate with higher resolution checkpoints, use built-in scripts or external upscalers (e.g., Fooocus, InvokeAI). |
| Adobe Firefly | Generally higher base resolution, generative fill for expansion | Leverage "Generative Expand" for larger canvases, then export at high quality. Check its Adobe Firefly Commercial Safety Review for usage rights. |
| Leonardo AI | Multiple upscalers (Upscale HD, Creative Upscale) | Start with "HD Resolution" in settings, use Creative Upscale, then export. Review Leonardo AI Free Tier Review for options. |
| Ideogram | Primarily focused on text integration, good base resolution | Emphasize "high-quality," "detailed" in prompts, then rely on good native resolution for print. See Ideogram Review: Best for Text in Images. |
| Bing Image Creator | Basic generation, usually outputs ~1024×1024 | Best for conceptualization, then use a dedicated upscaler for print. |
Preparing Your AI Image for Professional Printing
Even after you've prompted diligently and upscaled your image, there are a few more steps to consider if you're serious about professional-grade prints. These involve understanding file formats, color profiles, and the iterative process of getting it just right.
Iteration and Refinement for Print Quality
Generating the perfect image for print with AI is rarely a one-shot deal. It's an iterative process that often involves generating many variations, carefully selecting the best one, and then refining your prompts based on what worked and what didn't. This is where your critical eye comes in. Don't be afraid to generate dozens, even hundreds, of images. The beauty of AI is that it's fast and relatively inexpensive (compared to hiring a photographer or illustrator for every concept).
Focus on details that are critical for print: sharp edges, clear textures, correct anatomy (if applicable), and balanced composition. If you notice recurring flaws, adjust your negative prompts or try different stylistic modifiers. For example, if you're consistently getting blurry backgrounds when you want sharpness throughout, add "sharp focus throughout" to your prompt. If you're struggling with hands or faces, try prompting for "perfect hands, symmetrical face, no distortions" or using a dedicated model known for anatomical accuracy. For general troubleshooting, our guide on How to Fix Bad AI Image Results can be a lifesaver. Remember, a good print starts with a great digital file.
Understanding Color Profiles and File Formats
Once your image is perfectly generated and upscaled, the final hurdle for print is often color management and file format. Most AI image generators work in the RGB color space (Red, Green, Blue), which is ideal for digital displays. However, professional printers often prefer or require images in the CMYK color space (Cyan, Magenta, Yellow, Key/Black), which is the standard for subtractive printing.
While many print shops can convert RGB to CMYK for you, doing it yourself in a tool like Adobe Photoshop or GIMP gives you more control over how the colors shift. Be aware that some vibrant RGB colors may appear slightly duller or shift when converted to CMYK, as the CMYK gamut (range of colors) is typically smaller than RGB. Always do a test print if possible, or request a proof from your printer.
Regarding file formats, avoid JPEG for final print submissions if possible, especially if you've done any significant editing or upscaling. JPEG uses lossy compression, meaning it discards some image data every time you save it, which can degrade quality over time. For print, opt for lossless formats like PNG or TIFF. PNG is great for images with transparency, while TIFF is a robust format widely used in professional printing due to its ability to store high-quality image data without compression artifacts. By exporting your meticulously crafted, high-resolution AI images in these formats, you're giving your print provider the best possible source material to work with, ensuring that your vision truly comes to life on paper.
Disclaimer
The information provided in this article is for general guidance and informational purposes only. While we strive to offer accurate and up-to-date advice regarding AI image generation for print-ready resolution, the field of AI is rapidly evolving. Specific features, pricing, and capabilities of AI tools can change frequently. Always consult the latest documentation from your chosen AI image generator and, for professional printing, communicate directly with your print service provider about their specific requirements and recommendations.