How to Remove Objects from AI Images
It's incredibly frustrating, isn't it? You've spent precious time crafting the perfect prompt, run it through your favorite AI image generator, and there it is: almost perfect. A stunning landscape, a unique character, or a compelling product shot – but wait, what's that in the corner? A random power line, an extra finger, or a distracting background element that just shouldn't be there. You're left wondering if you have to start all over, or worse, ditch the image entirely. Don't fret! This comprehensive guide will walk you through exactly how to seamlessly remove unwanted objects from your AI-generated images, saving your creative vision and your sanity.
Understanding the Challenge of Object Removal in AI Images
Before we dive into the "how-to," it's super important to understand why removing objects from AI images isn't always as simple as hitting "delete" in a traditional photo editor. When an AI generates an image, it's essentially "baking" all the elements onto a single canvas. It's not like you have separate layers for the foreground, background, and those pesky distractions.
The Pixel Problem and How AI Sees Images
Think of it like this: when you paint a picture with traditional paints, everything becomes part of that one canvas. If you want to remove a tree you painted, you can't just lift it off; you have to paint over it, carefully trying to match the background behind it. AI images work in a very similar way. The generative process creates a unified block of pixels. So, when you tell an AI to remove an object, it doesn't have a "memory" of what was behind that object. Instead, it has to intelligently guess and generate new pixels to fill that void, based on the surrounding context and any instructions you give it.
This is where the magic (and sometimes the frustration) of inpainting comes in. You're not erasing; you're essentially asking the AI to creatively redraw a section of the image while trying to keep it consistent with the rest. If you've ever tried to fix bad AI image results that had odd limbs or features, you know that AI can be both brilliant and baffling at times. The key is guiding it effectively.
Common Scenarios for Object Removal
So, what are the typical situations where you'll find yourself needing to perform a little AI surgery? It's more common than you think!
- Distracting Background Elements: This is probably the most frequent one. You've generated a gorgeous portrait, but there's a rogue lamppost sticking out of their head, or a strange blob of color in the background. Or maybe you're creating a product shot, and there's an unintentional shadow or an obscure item lurking in the frame. These are prime candidates for removal to ensure your main subject truly shines.
- Unwanted Watermarks or Signatures: While it's crucial to be ethical and respect intellectual property (never remove watermarks from images you don't own or haven't licensed!), sometimes AI tools might accidentally embed their own subtle watermarks or you might want to clean up an image that had a logo you no longer need. For your own generated images, it's perfectly fine to clean these up.
- Preparing an Image for a Specific Use Case: Let's say you've got an amazing AI image of a coffee cup, but you need it on a plain white background for an e-commerce listing. Instead of trying to prompt for a perfectly isolated object from scratch (which can be difficult), it's often easier to generate the cup with a background, then remove the background entirely to create a clean, transparent asset. This makes the image much more versatile for various marketing materials or website graphics.
- Fixing AI "Artifacts": Oh, those notorious AI glitches! Extra fingers, mutated limbs, mismatched eyes, or just plain weird, unidentifiable objects that the AI threw in for good measure. Inpainting is your best friend here, allowing you to isolate and attempt to regenerate only the problematic area. Learning how to effectively prompt for realistic faces can help minimize these issues from the start, but edits are often still necessary.
Inpainting and Outpainting: Your Primary Tools
When it comes to removing objects from AI images, two techniques stand out as your absolute primary tools: inpainting and outpainting. They sound similar, but they tackle slightly different problems, and understanding both will give you immense control over your AI artwork.
The Inpainting Process Step-by-Step
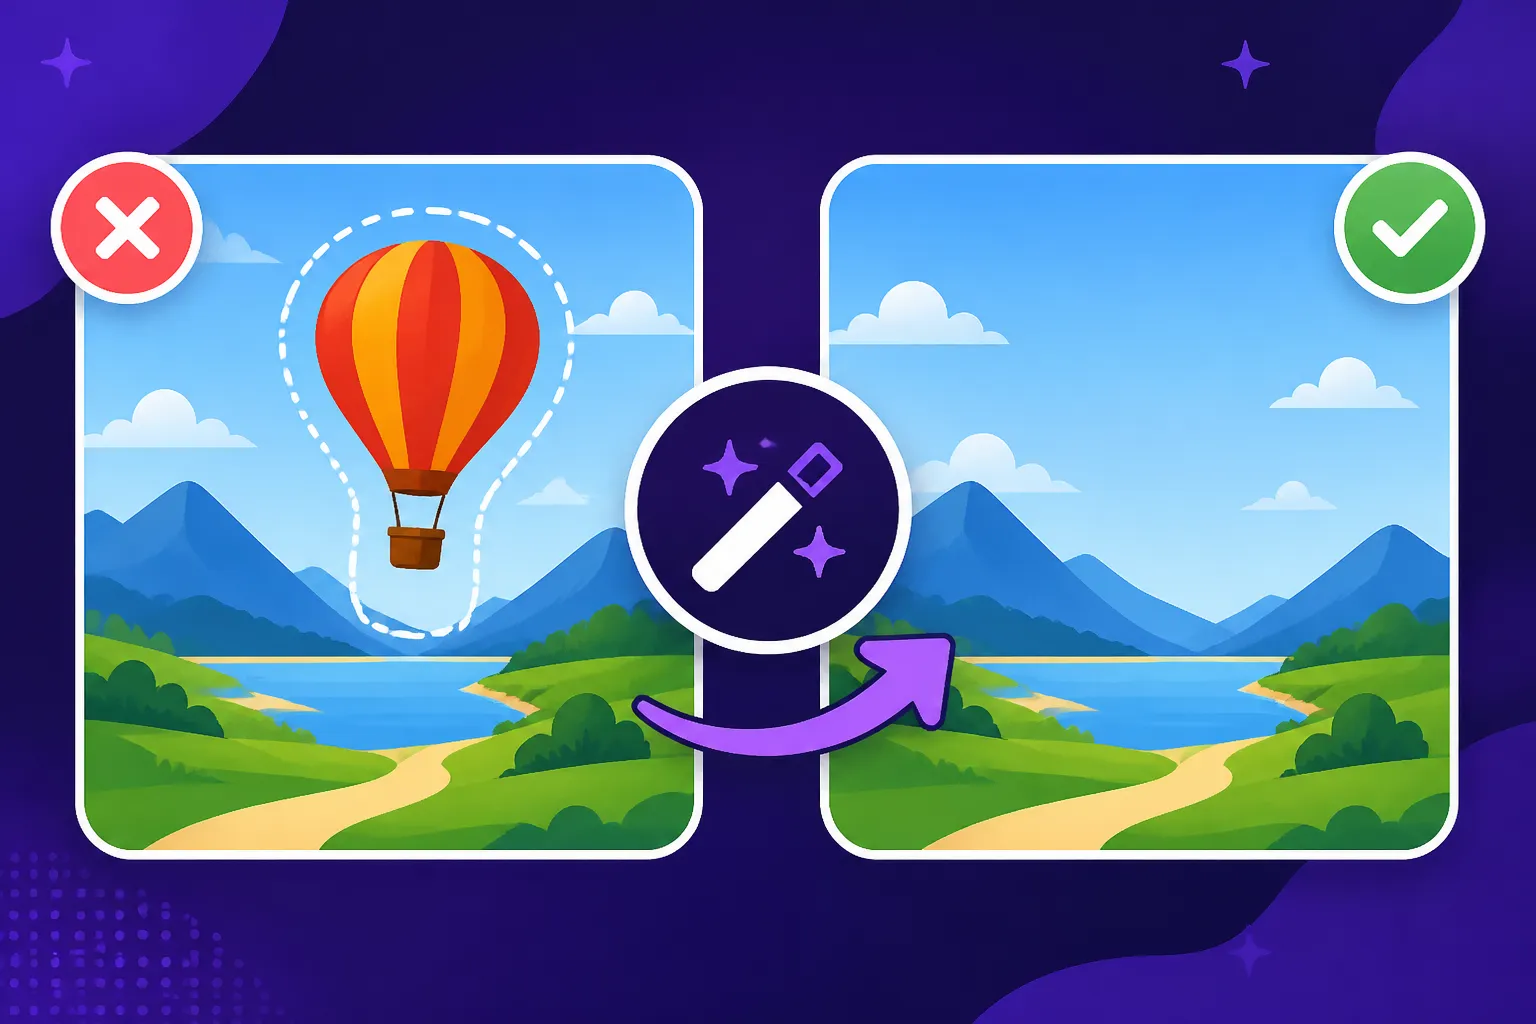
Inpainting is like having a digital eraser that doesn't just delete, but intelligently fills in the erased area with new, contextually relevant content. It's truly a game-changer for cleaning up your images.
Step 1: Choose Your Tool
First things first, you need an AI image tool that offers robust inpainting capabilities. Many of the popular generators have integrated this feature directly into their interfaces.
- Adobe Firefly: This is a fantastic option, particularly if you're already in the Adobe ecosystem. Its "Generative Fill" feature is incredibly intuitive. You simply brush over the area you want to remove, and Firefly seamlessly generates new content. It's often touted for its commercial safety, which is a huge plus. If you're wondering, "Is Adobe Firefly worth it?", for inpainting alone, it can be! You can check out our Adobe Firefly Review for Commercial Use for more details.
- DALL-E (especially via ChatGPT/Copilot): OpenAI's DALL-E, particularly when accessed through a conversational interface like ChatGPT Plus or Microsoft Copilot, has excellent object removal features. You can literally tell it, "Remove the red car from the street," and it will attempt to do so.
- Playground AI: A popular free and freemium tool, Playground AI offers inpainting as a core feature. It's user-friendly and great for beginners looking to experiment. Our Playground AI Review dives deeper into its capabilities.
- Krea AI: Known for its real-time generation and enhancement features, Krea AI also provides tools for refining images, including object removal. If you like fast iteration, you might find Krea AI Review helpful.
- Stable Diffusion (with specialized UIs like Automatic1111): For those who prefer a more hands-on, customizable approach, Stable Diffusion offers powerful inpainting masks and models. While it has a steeper learning curve, it provides unparalleled control, especially with advanced UIs like Automatic1111 where you can fine-tune every aspect of the repair.
Step 2: Upload Your Image
Once you've chosen your tool, the first common step is to upload the image you want to edit. Most platforms have a clear "upload" or "import" option.
Step 3: Select the Unwanted Object
Now comes the "erasing" part. Your chosen tool will likely have a brush or selection tool. You'll need to carefully "paint over" or "lasso" the object you want to remove. Precision is key here. Try not to select too much of the surrounding background, but make sure you get the entire object. If you leave bits of the object behind, the AI might try to interpret those remnants rather than generating a completely new background.
Step 4: Craft Your Inpainting Prompt
This is arguably the most crucial step. Simply selecting an area and hitting "generate" might result in a blurry mess or a random patch of color. You need to tell the AI what should replace the object you're removing, or what the background should look like in that specific area.
- Be Specific: Instead of just leaving the prompt blank or saying "remove object," describe the background.
- Bad Prompt Example: (selected a person on a beach) [No prompt] or remove person. (Result: might be a sandy patch that doesn't blend).
- Good Prompt Example: (selected a person on a beach) "seamless continuation of sandy beach, gentle waves, sunny sky." (Result: much better chance of blending perfectly).
- Consider the Context: If you're removing a car from a city street, your prompt should mention "city street, wet pavement after rain, reflections of neon signs." If you're removing a stray animal from a forest scene, describe "dense forest undergrowth, dappled sunlight, fallen leaves."
- Match Lighting and Style: Try to incorporate elements of the original image's lighting and artistic style into your inpainting prompt. If the original image has a "cinematic, dramatic lighting" feel, use those descriptors.
Understanding how to write AI image prompts is foundational here, as is delving into a comprehensive Midjourney prompt guide or DALL-E prompt guide if those are your tools. The better you describe your desired outcome, the happier you'll be with the result.
Step 5: Generate and Iterate
Once your area is selected and your prompt is refined, hit that generate button! Most tools will give you a few variations to choose from. Don't expect perfection on the first try. It’s an iterative process.
- Review and Refine: Look closely at the generated area. Does it blend seamlessly? Does it match the existing textures, colors, and lighting?
- Adjust Prompt: If it's not quite right, tweak your inpainting prompt. Add more details, remove confusing words, or try a different approach.
- Re-select: Sometimes, the issue isn't the prompt, but the selection. If the new content looks "cut off" or unnatural, try expanding or shrinking your selection area slightly and re-generating.
- Multiple Passes: For complex removals, you might need to do several small inpainting passes rather than one large one. Remove one part of the object, then another, letting the AI fill in progressively.
Harnessing Outpainting for Seamless Extensions
While inpainting focuses on filling within a selected area, outpainting (sometimes called "generative expand" or simply "extend") is about expanding the canvas beyond the original borders and having the AI fill that new space. How does this help with object removal?
Imagine you have a product shot, and there's a distracting object very close to the edge of the frame. Inpainting might struggle to create enough "new" background because there isn't much context around it. In such cases, you can:
- Expand the Canvas: Use your tool's outpainting feature to make the image wider or taller, creating empty space around the problematic object.
- Prompt for Extension: Describe what the extended background should look like.
- The Object Vanishes (Almost): As the AI extends the image, it often pushes the unwanted object out of the frame or provides enough new, clean background that you can then easily inpaint any remaining tiny bits. This technique gives the AI more room to "breathe" and generate a cohesive new scene.
Outpainting is also fantastic for changing aspect ratios or creating more negative space around your subject, giving you more flexibility for text overlays or graphic design. It's a powerful companion to inpainting, allowing for much more significant compositional changes.
Advanced Techniques and Considerations for Object Removal
Sometimes, basic inpainting and outpainting might not cut it, especially when dealing with highly complex backgrounds, intricate patterns, or needing to replace an object with something entirely new and specific. That's when you might need to pull out some more advanced tricks or combine AI with traditional editing.
Utilizing Reference Images and Control Structures
For truly challenging object removals or replacements, giving the AI a visual example can be far more effective than relying solely on text prompts.
- Image-to-Image Prompting: Some advanced AI tools, or specific workflows within open-source models like Stable Diffusion, allow you to provide a reference image as part of your prompt. For example, if you want to remove a bookshelf and replace it with a brick wall, you could provide a reference image of the type of brick wall you envision. The AI then uses this visual information to guide its generation within the inpainting mask. This significantly improves the accuracy and consistency of the newly generated area.
- ControlNet in Stable Diffusion: If you're diving into the world of Stable Diffusion, ControlNet is an incredibly powerful extension. It allows you to provide various "control maps" (like depth maps, Canny edge detection, or segmentation maps) alongside your prompt. For object removal, you could generate a depth map of your original image, then apply an inpainting mask over the object. By keeping the depth map consistent, ControlNet can help ensure the AI generates a background that respects the original scene's spatial relationships, preventing flat or distorted replacements. This level of control is why many professionals find Stable Diffusion still worth learning for its customization.
Layering and External Editing for Finesse
Let's be real: AI is amazing, but it's not always perfect. There will be times when the AI gets most of the way there, but leaves behind a subtle smudge, an awkward edge, or a slightly mismatched texture. This is where combining the power of AI with traditional photo editing software becomes invaluable.
- Traditional Photo Editors (Photoshop, GIMP, Affinity Photo): Tools like Adobe Photoshop have long been the gold standard for image manipulation. Once you've done the heavy lifting of object removal with AI inpainting, you can bring the image into Photoshop for final touch-ups.
- Clone Stamp Tool: Perfect for seamlessly replicating textures and patterns from one area of the image to another to cover up small imperfections.
- Healing Brush & Spot Healing Brush: Excellent for blending out minor blemishes or artifacts left by the AI.
- Content-Aware Fill: While not as sophisticated as AI inpainting, Photoshop's built-in Content-Aware Fill can sometimes offer a quick fix for smaller, simpler removals or for filling in areas that the AI struggled with.
- Masking and Layering: For more complex situations, you might duplicate parts of the background from another area of the image, paste them onto a new layer, and then use masks to blend them perfectly over the removed object's area.
- Combining Methods: Think of it as a workflow:
- AI for Initial Removal: Use your preferred AI image generator (like Adobe Firefly or DALL-E) to perform the primary object removal using inpainting. Get it as close to perfect as you can.
- Human for Finesse: Export the AI-edited image and open it in a traditional editor. Carefully zoom in and use the cloning, healing, and blending tools to clean up any remaining inconsistencies. This two-stage approach often yields the most professional-looking results.
- When to Outsource: If you're working on a high-stakes project, like images for a major marketing campaign or a client's website, and you lack the time or advanced editing skills, don't hesitate to outsource the final cleanup to a professional retoucher. Their expertise can elevate your AI-generated images to commercial-grade quality, making sure they truly are the best AI image generator for commercial use for your specific needs.
Practical Tips and Troubleshooting Common Issues
Even with the best tools and techniques, AI object removal can throw curveballs. Here are some practical tips and how to troubleshoot the most common headaches.
Strategies for Tricky Removals
Not all objects are created equal when it comes to removal. Some are a breeze, others are a nightmare.
- Small, Isolated Objects: These are generally the easiest. A small bird in a vast sky, a single leaf on a clean table. The AI has plenty of surrounding context to draw from. Just select precisely and give a simple prompt like "clear sky" or "smooth table surface."
- Large, Central Objects: These are much harder. Removing a person from the center of a crowded street scene is tough because the AI has to invent a lot of background detail. Break it down! Try removing parts of the person first, then the remaining bits. Be extremely descriptive in your prompts about the surrounding environment.
- Objects Near Faces or Complex Textures: Hands, faces, intricate patterns, or highly detailed natural elements (like tangled branches or rocky terrain) are challenging. AI often struggles with anatomical accuracy, so removing an object that's touching a hand might result in a wonky hand regeneration. Again, try smaller selections. Focus on removing the object around the face, then making a very small selection on the face if necessary, with a prompt emphasizing "natural skin texture" or "smooth cheek."
- Color and Lighting Mismatches: You removed an object, but the new background patch looks brighter, darker, or has a different color cast. This is usually a prompt issue. In your inpainting prompt, explicitly describe the desired lighting ("soft morning light," "dramatic shadows," "overcast diffuse light") and color ("warm golden tones," "cool blue hues"). You might also need to use a traditional editor for color grading adjustments.
- Maintaining Consistency: The goal is for the removal to be invisible. If the AI is generating repetitive patterns or textures that don't match the original image, try adding more variety to your prompt (e.g., "diverse wildflowers," "unique stone textures"). For achieving consistent results across images, especially for character design or branding, always save your successful prompts and possibly use seeds if your tool allows for reproducible generations.
Ethical Considerations and Best Practices
As with any powerful tool, AI image editing comes with responsibilities.
- Respect Copyright and Intellectual Property: This is paramount. Never use AI image removal tools to strip watermarks from copyrighted images you haven't licensed. Doing so is illegal and unethical. Your focus should be on cleaning up your own AI creations or images for which you have explicit rights.
- Transparency and Honesty: If you're using AI image removal for journalistic purposes, scientific illustrations, or any context where factual accuracy is important, you must disclose that the image has been altered. Even for creative projects, it's often a good practice to be transparent about your use of AI tools. This builds trust with your audience.
- Not Replacing Reality: While AI can do amazing things, remember its purpose. It's a creative tool. Using it to fundamentally alter reality in a misleading way (e.g., removing evidence from a photograph to fabricate a scene) is irresponsible. Use your judgment and ensure your edits serve a positive, creative, or informational purpose without deception. For creators, this technology is fantastic for things like how to make AI images for social media graphics or how to make AI logos for a business, but always be mindful of the broader implications.
Comparing Object Removal Features in Popular AI Image Generators
To help you decide which tool might be best for your object removal needs, here's a quick comparison of some popular options:
| Feature | Adobe Firefly (Generative Fill) | DALL-E (via ChatGPT/Copilot) | Playground AI | Stable Diffusion (Advanced UIs) | Krea AI |
|---|---|---|---|---|---|
| Ease of Use | Excellent (brush & prompt) | Very good (conversational) | Good (brush & prompt) | Advanced (masking & prompt) | Good (brush & prompt) |
| Control Level | High | Moderate | Moderate | Very High (ControlNet, models) | Moderate |
| Prompt Flexibility | High | High | High | Very High | High |
| Output Quality | Excellent | Very good | Good to Very good | Excellent (with expertise) | Good to Very good |
| Speed | Fast | Moderate | Fast | Varies (local vs. cloud) | Very Fast |
| Cost | Freemium/Subscription | Subscription (ChatGPT Plus) | Freemium/Subscription | Free (local) / Subscription (cloud) | Freemium/Subscription |
| Best For | Commercial work, quick edits | Conversational workflow | Beginners, quick experiments | Advanced users, maximum control | Fast iteration, enhancement |
As you can see, each tool has its strengths. If you're just starting out and want a user-friendly experience with solid results, tools like Adobe Firefly or Playground AI are excellent. For maximum control and deep customization, especially if you're comfortable with a steeper learning curve, Stable Diffusion is hard to beat. If you're looking to explore more options, consider checking out our guide on the best AI image generators ranked.
Ultimately, removing objects from AI images is an essential skill for anyone serious about leveraging generative AI for their creative projects. It allows you to refine, perfect, and truly make these images your own. With the right tools, a good prompt, and a bit of patience, you'll be cleaning up your AI masterpieces in no time.
Disclaimer
The information provided in this article is for general informational purposes only and does not constitute professional advice. While AI image generation tools offer incredible capabilities, users should always exercise ethical judgment, respect intellectual property rights, and comply with all applicable laws and regulations when creating and using AI-generated content.