Stable Diffusion Prompt Guide
Ever found yourself staring at a blank prompt box in Stable Diffusion, wondering why your brilliant idea for a "futuristic cityscape at sunset" keeps yielding abstract blobs or confusing mishmashes? It's a common frustration, and honestly, it can feel like you're trying to speak a secret language. Getting Stable Diffusion to truly understand your vision requires more than just a few keywords; it demands a nuanced approach to prompting. This guide is here to demystify the process, helping you craft prompts that consistently generate stunning, high-quality images that align perfectly with what you have in mind.
Understanding the Basics of Stable Diffusion Prompts
Diving into Stable Diffusion can feel a bit like learning to paint with a brand-new set of brushes, except your brushes are words and the canvas is an AI. The first hurdle many people encounter is that the AI doesn't think like a human. It processes language based on its training data, recognizing patterns and associations. So, a prompt that sounds poetic to you might be entirely meaningless or lead to unexpected results for the AI. It's about finding that sweet spot between descriptive language and AI-friendly keywords.
What Makes a Good Prompt
A good Stable Diffusion prompt isn't necessarily long, but it is precise and intentional. Think of it like giving instructions to a very talented but very literal artist who has an infinite library of images in their head. You wouldn't just say "make a picture," right? You'd describe the subject, the style, the mood, the colors – everything that brings your vision to life. The same goes for AI. The best prompts break down complex ideas into manageable, descriptive chunks that the AI can easily interpret. This often means being surprisingly specific about details you might otherwise take for granted, like the angle of light or the texture of a surface.
It's also crucial to remember that context matters. If you simply write "dog," you might get anything from a cartoon beagle to a photorealistic German Shepherd. But if you add "a fluffy golden retriever puppy playing in a sunlit field, golden hour, bokeh, hyperrealistic, octane render," you've given the AI a much clearer picture. The magic happens when you layer these descriptive elements, building up a rich tapestry of details that guide the AI toward your desired outcome. This layered approach helps the model narrow down its vast knowledge base to something truly specific and high-quality.
The Core Components of a Stable Diffusion Prompt
Every effective Stable Diffusion prompt is essentially a recipe, and like any good recipe, it has core ingredients. While you can certainly get by with just a subject, truly mastering the art of prompting means understanding these components and how they interact. The fundamental structure often includes a subject, actions or details about the subject, the environment or setting, a desired style, and quality enhancers. Think of it as painting by numbers, but with words!
Let's break them down:
- Subject: This is the main focus of your image. It could be a person, an animal, an object, or even a concept. Be as specific as possible. Instead of "car," try "vintage muscle car."
- Action/Details: What is your subject doing? What are its key characteristics? "Running through a forest," "wearing a red cloak," "with glowing eyes." These details animate your subject.
- Environment/Setting: Where is this happening? "In a dense jungle," "on a bustling city street at night," "inside a cozy cottage." Setting the scene provides crucial context.
- Artistic Style/Medium: How do you want it to look? This is where you can infuse creativity. Options range from "oil painting," "digital art," "anime," "photorealistic," to specific artists like "by Van Gogh" or "in the style of Studio Ghibli."
- Lighting/Color/Mood: These elements profoundly impact the feel of your image. "Soft volumetric lighting," "neon glow," "sepia tones," "eerie atmosphere," "vibrant colors."
- Quality Enhancers: These are often technical terms that tell the AI to aim for a higher fidelity or specific rendering quality. Examples include "8k, ultra-detailed, intricate, sharp focus, cinematic lighting, octane render, unreal engine." These aren't just buzzwords; they genuinely influence the output quality.
By consciously structuring your prompts with these components in mind, you'll move beyond random generations and start creating images with intention. For instance, imagine you want a medieval knight. Instead of just "knight," you might say, "A stoic medieval knight, standing atop a rugged mountain peak, dawn light, dramatic clouds, fantasy art, highly detailed armor, volumetric fog." This comprehensive approach leaves little to chance, ensuring the AI has a clear understanding of your vision.
Crafting Your Initial Prompt: The Foundation
When you're first getting started with Stable Diffusion, the sheer number of options and parameters can be overwhelming. It's easy to get lost in the weeds before you've even defined the core of your image. The trick is to start simple, build a strong foundation, and then layer on complexity. Think of it as sketching before you start adding color and fine details. A well-constructed basic prompt is far more effective than a convoluted one that tries to do too much at once.
Subject and Main Action
The absolute bedrock of any good prompt is a clear definition of your subject and what it's doing. Without this, the AI has no central anchor point and will likely generate something unfocused or ambiguous. It's like writing a story without a main character or plot – it just won't make sense. Don't be afraid to be straightforward here. This isn't the place for poetic ambiguity; it's the place for declarative statements.
For example, if you want an image of a cat, don't just say "cat." Be specific about the breed and its primary action. "A fluffy Persian cat, curled up sleeping." Or perhaps, "A sleek Siamese cat, stalking a butterfly in a garden." These simple additions immediately create a mental picture for the AI to build upon. Remember, the AI interprets words based on patterns in its training data. "Persian cat" triggers very different visual data than "Siamese cat." The "curled up sleeping" or "stalking a butterfly" provides the essential context that differentiates a static image from one that tells a mini-story. This initial specificity lays the groundwork for all subsequent details you'll add, ensuring the AI starts on the right track and doesn't veer off course into irrelevant imagery.
Describing Environment and Setting
Once you have your subject and its action firmly established, the next crucial step is to define the environment or setting. This gives your image a sense of place and atmosphere, moving it beyond a floating object in empty space. The environment sets the scene and often dictates the overall mood, lighting, and color palette of the final image. A subject in a forest will look very different from the same subject in a futuristic city.
Consider the interplay between your subject and its surroundings. If your prompt is "A red sports car," that's fine. But if you add "speeding down a winding coastal highway at sunset," you've introduced a dynamic environment that instantly elevates the image. The "coastal highway" suggests waves, cliffs, and open roads, while "sunset" implies warm, dramatic lighting and long shadows. Or, for a more serene image, "a lone cabin nestled deep in a snowy forest, northern lights overhead." Here, "snowy forest" brings in textures and colors, and "northern lights" specifies a celestial backdrop that transforms the entire scene. The environment isn't just a background; it's an integral part of the narrative your image tells. Thinking about these elements early on helps the AI generate a cohesive and believable scene, avoiding the disjointed feeling that can sometimes plague less structured prompts.
Adding Artistic Style and Medium
This is where you truly start to define the aesthetic of your image and can express your creative vision. The artistic style and medium tell Stable Diffusion how to render your subject and environment. Are you aiming for something that looks like a photograph, a painting, a cartoon, or a 3D render? The choices here are vast and can dramatically alter the output. Skipping this step can lead to generic or default styles that might not align with your intentions. Many users find that experimenting with different art styles is one of the most rewarding aspects of using AI image generators. For those looking for diverse options, comparing various tools can be helpful, for instance, a guide on Midjourney vs DALL-E: Which Is Better.
You can be incredibly specific here. "Impressionist oil painting," "pixel art," "cyberpunk illustration," "steampunk schematic," "cinematic photography," "concept art by Artgerm," or "in the style of Japanese woodblock print." Each of these terms invokes a distinct visual language from the AI's training data. For instance, if your base prompt is "A dragon flying over a castle," adding "fantasy art, highly detailed, by Frank Frazetta" will yield a dramatically different result than adding "children's book illustration, watercolor, whimsical." Remember, the AI has absorbed millions of images across various artistic disciplines. By specifying a style, you're giving it a strong filter through which to process your other descriptive elements, ensuring that the final image reflects a consistent artistic direction.
Advanced Prompting Techniques for Fine-Tuning
Once you've got the hang of crafting solid foundational prompts, you'll inevitably hit a point where you want more control, more precision, and fewer unexpected elements. This is where advanced prompting techniques come into play. These methods allow you to guide Stable Diffusion with a much finer hand, eliminating unwanted artifacts and pushing the boundaries of what's possible with text-to-image generation. It's about turning good images into great ones.
Using Negative Prompts to Refine Results
One of the most powerful and often overlooked tools in your Stable Diffusion arsenal is the negative prompt. While your main prompt tells the AI what you want to see, the negative prompt tells it what you absolutely don't want. This is incredibly useful for correcting common AI quirks, preventing unwanted elements, or steering clear of stylistic choices that might detract from your image. It’s like telling your literal artist friend, "Paint a cat, but definitely no dogs and please don't make it look like a cartoon."
Common frustrations include images with distorted hands, blurry faces, extra limbs, watermarks, low quality, or just an overall 'ugly' aesthetic. These are perfect candidates for negative prompts. A good general negative prompt might include terms like: (low quality, worst quality, bad anatomy, bad hands, extra fingers, blurry, ugly, deformed, text, watermark, signature, jpeg artifacts). By clearly stating these undesirable traits, you instruct the AI to actively avoid them during the generation process. For example, if you're trying to create a photorealistic portrait and keep getting blurry features, adding blurry, low resolution, out of focus to your negative prompt can significantly improve clarity. This is particularly useful when aiming for high fidelity in images, much like when exploring Flux for Photorealism: Honest Review. It refines your output by actively suppressing common pitfalls, leading to cleaner, more focused, and higher-quality results.
Here's a quick table of common negative prompt terms and what they combat:
| Negative Prompt Term | What it Combats |
|---|---|
low quality, worst quality |
Generic poor image quality, lack of detail |
bad anatomy, extra limbs |
Distorted body parts, incorrect number of limbs |
bad hands, extra fingers |
Common AI issue with malformed hands |
blurry, out of focus |
Lack of sharpness, unintentional blur |
ugly, deformed, disfigured |
Unpleasant or grotesque features |
text, watermark, signature |
Unwanted text, logos, or artist signatures |
jpeg artifacts, noise |
Compression artifacts, digital noise |
monochrome, grayscale |
Prevents black and white if color is desired |
cartoon, anime |
Avoids illustrative styles if realism is key |
Controlling Image Composition with Parameters
Beyond just words, Stable Diffusion offers numerical parameters that give you direct control over the generation process, allowing you to fine-tune the composition and overall structure of your image. These aren't just arbitrary numbers; they directly influence how the AI interprets your prompt and builds the visual. Understanding and manipulating these parameters is key to moving beyond serendipitous results and achieving consistent, deliberate compositions.
One of the most frequently used parameters is --aspect or --ar, which controls the aspect ratio of your image. Whether you need a square image for Instagram, a vertical one for a phone wallpaper, or a wide cinematic shot, setting the aspect ratio accurately from the start is essential. Common values include 1:1 (square), 9:16 (vertical), 16:9 (horizontal), or 3:2. For example, if you want a striking landscape, a majestic mountain range at sunrise, detailed clouds, epic lighting --ar 16:9 will ensure a wide-screen format. Without this, the AI might default to a square or a less suitable ratio, cropping your vision.
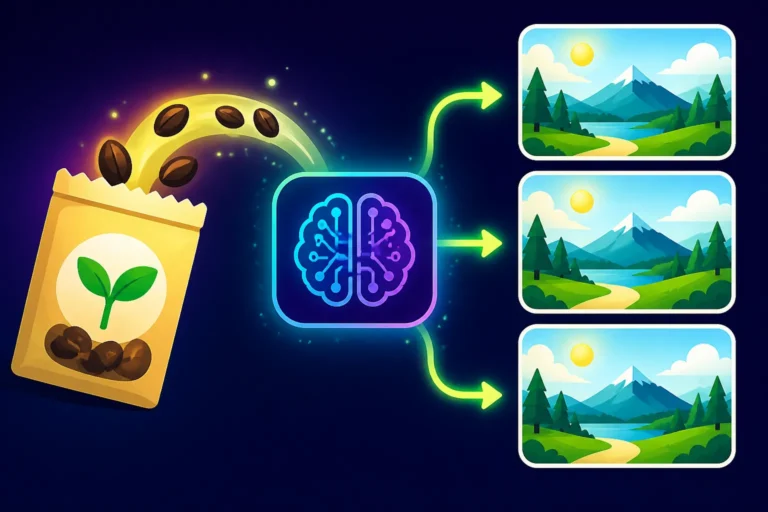
Another critical parameter is the seed number. While not strictly composition, the seed determines the initial noise pattern from which the image is generated. If you find an image you love and want to create variations while keeping the core composition, using the same seed number with slightly altered prompts is invaluable. This allows for controlled experimentation and helps maintain continuity across a series of images, which is vital for character consistency or thematic collections. For deeper dives into such features, understanding a tool like Stable Diffusion Review: Features, Pricing, and Quality can be beneficial. Learning to leverage these parameters transforms you from a casual user into a master architect of your AI-generated worlds.
Incorporating Specific Lighting and Camera Angles
To truly make your AI-generated images pop and evoke a specific mood, you need to go beyond just "bright" or "dark." Specifying lighting conditions and camera angles adds a layer of professionalism and narrative depth that generic prompts simply can't achieve. This is where you become the director and the cinematographer, guiding the AI to set the scene exactly as you envision it. The type of light, its direction, and the camera's perspective can completely transform the perception of your subject.
Consider the difference between "a person walking" and "a person walking through a misty forest at dawn, illuminated by soft golden light from behind, shot with a wide-angle lens, low angle perspective." The second prompt paints a vivid picture, suggesting a sense of mystery and epic scale. Terms like "cinematic lighting," "volumetric lighting," "rim light," "backlight," "god rays," "neon glow," "studio lighting," or "golden hour" all evoke distinct visual effects. Similarly, camera angles like "close-up," "wide shot," "dutch angle," "worm's eye view," or "bird's eye view" dictate the viewer's perspective and can dramatically change the emotional impact of the image. For instance, a "worm's eye view" of a towering skyscraper enhances its grandeur, while a "close-up" on a character's face intensifies emotion. By meticulously describing these elements, you instruct the AI to create images that aren't just scenes, but carefully composed works designed to tell a visual story, capturing nuances that resonate with the viewer.
Achieving Specific Aesthetic Goals
The beauty of Stable Diffusion lies in its versatility. It's not just for generating random pretty pictures; it's a powerful tool for achieving very specific aesthetic goals, whether you're aiming for hyperrealism or a highly stylized artistic expression. The key is knowing how to phrase your prompts to consistently hit that target. This section delves into crafting prompts for distinct visual outcomes, ensuring your AI output matches your artistic intent.
Prompts for Photorealistic Images
Generating images that look indistinguishable from real-world photographs is often considered the holy grail for many AI art enthusiasts. It's a tricky balance, requiring a combination of highly descriptive text and specific quality enhancers. The frustration often comes from getting results that look "too AI" or lack the natural imperfections that make real photos believable. To get truly photorealistic images, you need to think like a photographer and include details they would consider.
Start with the basics: photorealistic, photography, real photo, candid shot. Then, layer on technical photography terms. Consider the type of camera lens or equipment: shot on Canon EOS R5, 50mm f/1.8 lens, telephoto lens, wide-angle lens. Detail the lighting: natural light, harsh sunlight, softbox lighting, studio lighting, dappled light, volumetric light, rim lighting, dramatic shadow. Describe depth of field: shallow depth of field, bokeh, sharp focus, hyper-detailed. Mention film characteristics or post-processing: cinematic film grain, film stock, color grading, vfx, raw photo, unedited. For instance, A bustling street market in Marrakech, vibrant colors, photorealistic, shot on a Sony Alpha 7 IV, 35mm lens, f/2.8, shallow depth of field, golden hour, street photography, ultra detailed, award winning photography is a powerful prompt that leaves little room for ambiguity. Avoiding generic terms and embracing technical photography jargon can elevate your images from digital art to stunning, lifelike photographs.
Generating Different Art Styles
Stable Diffusion is a chameleon when it comes to art styles. Its training data includes vast archives of art from every conceivable genre and era. This means you can command it to generate images in styles ranging from classical paintings to modern digital art, and everything in between. The challenge is knowing the right terminology to consistently invoke the specific aesthetic you desire, as subtle wording changes can lead to vastly different outcomes.
To generate a particular art style, you need to use precise keywords that describe both the medium and the movement or artist. Don't just say "painting"; specify "oil painting," "watercolor," "acrylic on canvas," or "gouache." For movements, try "impressionism," "surrealism," "Art Deco," "Baroque," "Cubism," or "pop art." If you're a fan of a particular artist, you can even reference them directly: "in the style of Hayao Miyazaki," "by Vincent van Gogh," "inspired by Alphonse Mucha," or "concept art by Greg Rutkowski." For example, if you want a whimsical fantasy scene, A magical forest with glowing flora, fireflies, whimsical, children's book illustration, watercolor painting, vibrant colors, by Mary Blair will produce a specific, charming aesthetic. For a more technical look, futuristic city skyline, flying cars, cyberpunk, neon lighting, digital painting, highly detailed, by Simon Stålenhag evokes a very different, gritty sci-fi feel. The trick is to combine these descriptive elements to guide the AI towards the artistic vision you hold in your mind. This focused approach is key to developing images for various creative applications, making it easier to conceptualize images for things like Best AI Image Generator for Album Art.
Ensuring Consistent Characters and Details
One of the biggest headaches for creators using AI image generators is maintaining consistency across multiple images, especially when it comes to characters or specific details. It's frustrating when your main character suddenly changes their outfit, hair color, or even their facial features between generations. While no method is 100% foolproof in Stable Diffusion (without advanced techniques like ControlNet or LoRAs, which we'll touch on later), there are prompting strategies that can significantly improve your chances of maintaining a cohesive visual narrative.
The core principle here is extreme specificity and repetition. When describing a character, include every significant detail you want to remain consistent: "A young woman with long, wavy auburn hair, emerald green eyes, a small freckle on her left cheek, wearing a deep blue trench coat and black leather boots." Don't just say "woman"; describe her distinguishing features down to the freckle. When you generate subsequent images, copy and paste this exact description for the character. Even minor changes can cause the AI to interpret it as a different entity.
Beyond physical traits, consistently describe their clothing, accessories, and even their demeanor. If your character carries a distinctive locket or has a specific pose, include that in every prompt. Using a seed number is also incredibly helpful for maintaining a baseline. Once you get an image with a character you like, use that image's seed number for future generations. For example: A young woman with long, wavy auburn hair, emerald green eyes, a small freckle on her left cheek, wearing a deep blue trench coat and black leather boots, walking through a rainy city street --seed 12345. For the next image, you might keep the character description and seed, but change the setting: A young woman with long, wavy auburn hair, emerald green eyes, a small freckle on her left cheek, wearing a deep blue trench coat and black leather boots, sitting in a cozy cafe, drinking coffee --seed 12345. This approach helps the AI anchor to the core elements of the character, making minor adjustments without completely redesigning them.
Troubleshooting Common Prompting Issues
It's inevitable: no matter how good your prompts are, sometimes Stable Diffusion will throw you a curveball. Distorted faces, extra fingers, garbled text, or just plain weird interpretations of your input are common occurrences. Don't worry, you're not alone in these frustrations! Learning how to troubleshoot and course-correct is an essential part of becoming proficient with AI image generation. It's like debugging code, but for art.
Dealing with Distorted Faces and Hands
Ah, the infamous AI hands and faces! This is perhaps one of the most common and exasperating issues users face. AI models, despite their incredible capabilities, often struggle with the intricate details and subtle nuances of human anatomy, especially hands. They frequently appear malformed, with extra fingers, missing digits, or twisted proportions. Faces can sometimes look uncanny, blurry, or merge with backgrounds. This isn't a reflection of your prompting skills, but a known limitation that can often be mitigated.
The first line of defense against distorted faces and hands is, as always, the negative prompt. Explicitly adding terms like bad anatomy, extra limbs, deformed hands, bad hands, blurry face, ugly face, distorted features can significantly reduce their occurrence. Think of it as a quality control filter. Beyond that, increasing the sampling steps (the number of iterations the AI takes to refine the image) can sometimes help, as it gives the model more time to iron out irregularities.
Another strategy is to be extremely specific about the pose or action involving hands or faces. Instead of just "a person waving," try "a person gently waving with five fingers clearly visible on their right hand." While the AI still might struggle, this added detail gives it more information to work with. If a close-up on hands isn't critical, consider generating images where hands are obscured or not the main focus. For portraits, emphasizing quality enhancers like masterpiece, ultra detailed, sharp focus, professional photography, studio lighting can encourage the AI to prioritize facial fidelity. Sometimes, generating multiple variations and picking the best one, or using an inpainting tool (if available in your Stable Diffusion UI) to fix specific areas post-generation, becomes necessary.
Fixing Garbled Text and Unwanted Elements
Garbled text is another recurring nightmare for AI image creators. While some advanced models are getting better at rendering text, Stable Diffusion (especially older versions) often struggles with coherent lettering, producing meaningless squiggles or distorted characters. Similarly, unwanted elements—random objects, strange artifacts, or unexpected background details—can pop up and ruin an otherwise perfect image. These issues often arise because the AI is better at recognizing visual patterns than it is at linguistic precision or understanding human intent behind object placement.
To combat garbled text, the simplest solution is often to avoid expecting the AI to generate legible text directly within the image. If you need specific text, it's almost always better to generate the image without text and then add the text in an external image editor (like Photoshop or Canva). If you absolutely must try for in-image text, use strong emphasis (e.g., (text: "Hello World":1.5)) if your UI supports it, and include text, watermark, writing, signature in your negative prompt to remove any unwanted text. For tools specifically good at text, a guide on Ideogram Review: Best for Text in Images might be useful.
For unwanted elements, the negative prompt is again your best friend. If you keep getting trees in your cityscape, add trees to your negative prompt. If random objects are appearing, try clutter, random objects, unnecessary elements. Sometimes, simplifying your main prompt and gradually adding elements one by one can help identify which specific terms might be causing the unwanted additions. For instance, if "a vibrant garden" results in a random gnome, try "a vibrant garden, no gnomes." Additionally, adjusting the CFG scale (Classifier Free Guidance) can sometimes help. A lower CFG scale (e.g., 5-7) makes the AI follow your prompt less strictly, potentially reducing unwanted interpretations, while a higher scale (e.g., 10-15) makes it adhere more closely, which can be a double-edged sword if your prompt is ambiguous.
Refining Overly Generic or Abstract Outputs
It's frustrating when you type in a seemingly clear prompt, only to get an image that's bland, generic, or so abstract it bears little resemblance to your vision. This often happens when your prompt lacks sufficient detail, leaving too much room for the AI's default interpretations, or when the terms you're using are too broad. The AI doesn't know what you mean by "beautiful landscape" unless you give it specifics. It's like asking someone to draw a "nice picture" – what exactly is "nice"?
To refine overly generic outputs, the solution lies in adding more specific descriptive layers. Instead of "a city," try "a futuristic megalopolis with neon lights and flying vehicles at night." Every word adds nuance. Think about the five senses and emotions you want to evoke. What kind of atmosphere? What time of day? What specific textures or colors? For example, if "a person reading a book" is too dull, try A thoughtful woman with spectacles, engrossed in an ancient leather-bound book by a crackling fireplace, warm firelight, cozy atmosphere, sepia tones, hyperrealistic painting.
For abstract outputs, it's often a matter of reining in ambiguous terms or ensuring there's a strong, concrete subject. If your prompt includes terms like "concept," "idea," or very philosophical concepts without a strong visual anchor, the AI might default to abstract patterns. Focus on tangible objects, actions, and environments. If you do want an abstract image, be precise about the type of abstraction you're looking for: geometric abstract art, fluid art, cubist painting, digital abstract, vibrant colors, dynamic lines. Sometimes, if an image remains stubbornly generic, a fresh start with a completely new prompt structure might be more effective than endlessly tweaking a problematic one. Remember, the AI is a pattern-matching engine; the more distinct and vivid patterns you describe, the better your results.
Beyond Basic Prompts: Advanced Features and Workflows
Once you've mastered the art of detailed prompting and troubleshooting, you might feel ready to push Stable Diffusion even further. The platform offers a suite of advanced features and workflows that go beyond simple text-to-image generation, providing unprecedented control and creative possibilities. These tools are often what truly differentiate hobbyists from professional AI artists.
Utilizing Seeds for Reproducibility
One of the most powerful yet often underutilized features in Stable Diffusion for maintaining control and consistency is the seed number. Every time Stable Diffusion generates an image, it starts with a random "seed" of noise, which then evolves into your final picture based on your prompt. Think of it as the initial blueprint or genetic code for that specific image. By default, this seed is randomized for each new generation, which is why even with the same prompt, you'll get slightly different results.
However, if you find an image you particularly like, you can often retrieve its seed number from the generation details. By using this exact same seed along with your prompt, Stable Diffusion will start from the exact same initial noise pattern, allowing you to reproduce that image almost identically. This is invaluable for several scenarios:
- Iteration and Refinement: You generated a character you love, but the background isn't quite right. Keep the seed and character description, then adjust only the background elements in your prompt.
- Creating Variations: You have a great base image, and you want to see slight variations in style, color, or minor details. Keep the seed, make small tweaks to your prompt, and generate new versions.
- Debugging: If a prompt isn't working as expected, using a fixed seed helps you see how specific prompt changes affect the output consistently, rather than introducing random noise variations.
To use a seed, simply add --seed [number] to your prompt. For example: A lone astronaut on Mars, desolate landscape, red dust, dramatic lighting, high detail --seed 123456789. Next time, you can alter "desolate landscape" to "lush alien jungle" but keep the seed to see how the astronaut adapts to the new environment while retaining a similar pose and composition. This level of reproducibility turns AI generation from a random lottery into a much more predictable and controllable creative process, essential for consistent branding or storytelling.
Exploring ControlNet and LoRAs
For those truly dedicated to precise control and customization, Stable Diffusion offers advanced extensions like ControlNet and LoRAs (Low-Rank Adaptation). These tools represent a significant leap beyond mere text prompting, allowing users to guide the AI with image inputs, specific styles, or even human poses. The frustration with text-only prompts often stems from the inability to dictate exact layouts or maintain specific character attributes, and these tools address exactly that.
ControlNet is a neural network model that adds extra conditions to Stable Diffusion, enabling users to exert spatial control over image generation. Instead of hoping the AI positions things correctly, you can feed it a reference image that dictates pose, depth, edges, segmentation, or even normal maps. For example, if you want a character in a specific pose, you can upload a stick figure drawing or a photo of a human model. ControlNet will then use that pose as a blueprint while generating the image based on your text prompt. This is revolutionary for artists, designers, and animators who need precise control over character actions and scene layouts. Popular ControlNet models include:
- OpenPose: Controls human poses, hands, and faces.
- Canny: Guides generation based on edge detection from an input image.
- Depth: Uses depth maps to control 3D structure.
- Segmentation: Reconstructs images based on semantic segmentation masks.
LoRAs (Low-Rank Adaptation) are a different beast. These are small, lightweight add-on models that can be "trained" on a small dataset of images to teach Stable Diffusion a specific style, character, or object. Think of them as custom vocabulary packs for the AI. If you want to consistently generate images of a specific person, a unique art style (like a particular anime aesthetic or watercolor technique), or a custom object, training a LoRA for it can deliver incredible results. They allow for highly personalized outputs that would be nearly impossible to achieve with text prompts alone. For creators aiming for distinct visual identities, exploring options like Recraft Review for Vector Art might also align with these advanced customization needs. Both ControlNet and LoRAs, while requiring a bit more technical setup and understanding, unlock a whole new dimension of creative control, transforming Stable Diffusion into an incredibly powerful and versatile art creation studio.
Iterating and Refining Your Prompting Process
Even with all the tools and techniques at your disposal, perfecting an AI-generated image is rarely a one-shot deal. It's a continuous cycle of experimentation, observation, and refinement – an iterative process that truly hones your "prompt engineering" skills. The frustration often comes from thinking you need to get it perfect on the first try, but the reality is that the best results come from a willingness to adjust and learn.
Think of it as sculpting. You start with a basic block (your initial prompt), then you rough out the main forms (adding style, environment), and finally, you refine the details (negative prompts, parameters, ControlNet). Each step builds on the last. When you generate an image, don't just judge it on whether it's "good" or "bad." Instead, ask:
- What works well in this image?
- What doesn't work?
- What specific prompt element caused the desirable (or undesirable) outcome?
- How can I adjust the prompt to fix what's wrong or enhance what's right?
Perhaps the lighting is off, or the character's expression isn't quite right. Go back to your prompt and make a small, targeted change. For instance, if you said dramatic lighting and it's too dark, try bright dramatic lighting. If the character looks too young, add mature woman or aged gracefully. It's a process of tiny adjustments, observing the impact, and continually learning how the AI interprets your words. Keeping a prompt journal can be incredibly helpful – noting down prompts that worked, the corresponding seeds, and what you learned from each iteration. This systematic approach ensures that you're not just blindly trying new words, but actively building a robust understanding of how to communicate effectively with Stable Diffusion, leading to increasingly impressive and consistent results over time. This continuous learning is also crucial when evaluating if options like Is Stable Diffusion Still Worth Learning are right for you.
Real-World Applications and Practical Tips
Stable Diffusion is far more than just a creative outlet for generating cool images. It's a powerful tool with a myriad of practical applications across various industries and personal projects. Understanding how to leverage it for specific use cases can unlock new efficiencies and creative possibilities. The frustration often comes from not knowing how to translate artistic vision into practical, actionable assets. Let's explore some common real-world uses and practical advice.
Creating Images for Blog Posts and Social Media
For bloggers, content creators, and social media managers, constantly needing fresh, engaging visuals can be a huge time sink and expense. Stock photos can be generic or costly, and custom photography is often out of budget. This is where Stable Diffusion shines, offering a fast and cost-effective way to generate unique, on-brand imagery. The key is to craft prompts that are tailored for visual storytelling and platform requirements. To create high-quality blog or social media graphics, using a tool that delivers on aesthetics is important, and for those exploring various options, considering what makes for the Best AI Image Generator for Blog Images can be a good starting point.
When prompting for blog post images, think about the article's theme and desired mood. If you're writing about "mindfulness," a prompt like A serene woman meditating in a tranquil forest at sunrise, soft bokeh, warm light, digital painting, calm, peaceful, blog header image would be perfect. Always consider the ideal aspect ratio for blog headers (often horizontal, like 16:9 or 3:2). For social media graphics, specificity around the platform is crucial. For Instagram, aim for 1:1 (square) or 4:5 (vertical) aspect ratios. Focus on visuals that are eye-catching and clearly convey a message. For a post about "healthy recipes," try A vibrant bowl of fresh salad, colorful vegetables, healthy eating, food photography, top-down view, bright lighting, instagram post. Adding empty space for text to your prompt can also be a game-changer, instructing the AI to leave room for overlays you'll add later in Canva or Photoshop. This ensures your generated image is a functional canvas, not just a standalone piece of art.
Designing Product Mockups and Marketing Graphics
Businesses, especially small businesses and e-commerce sellers, face the constant challenge of producing professional-looking product photos and engaging marketing graphics without a massive budget for photography studios or graphic designers. Stable Diffusion offers an incredible solution for generating high-quality product mockups and diverse marketing assets, allowing for rapid prototyping and endless variations. For those specifically focused on product visualization, understanding how to use AI Images for Print on Demand or How to Create AI Product Photos for Free can be immensely valuable.
To create convincing product mockups, you need to be very precise. Start by describing the product clearly: A sleek, minimalist smartphone, white ceramic back, centered on a light wooden table. Then, add context and desired qualities: soft studio lighting, shallow depth of field, product photography, commercial advertisement, high resolution, no text, clean background. You can even specify background environments: A natural cosmetic bottle on a mossy forest floor, soft natural light, bokeh, earthy tones, product photography. For marketing graphics, think about your target audience and the message. If you're promoting a fitness app, consider A diverse group of people exercising in a modern gym, dynamic action shot, vibrant colors, motivational, social media ad, high contrast. Use negative prompts to ensure cleanliness: watermark, text, blurry, messy. The ability to quickly generate multiple variations of a product shot (e.g., different angles, backgrounds, lighting) means you can A/B test marketing creatives with unprecedented ease, identifying what resonates best with your customers without costly photoshoots.
Developing Character Concepts for Creative Projects
For artists, game developers, writers, or anyone embarking on a creative project that requires original characters, Stable Diffusion can be an invaluable tool for rapid character concept development. Instead of spending hours sketching, you can generate dozens of unique character ideas in minutes, exploring different styles, outfits, and personalities. The frustration of staring at a blank page hoping for inspiration can be significantly reduced by using AI as a brainstorming partner.
When developing character concepts, start by describing the core aspects: gender, age, ethnicity, and general archetype. A fierce female warrior, elven features, long silver hair, holding a glowing sword. Then, layer on clothing, armor, accessories, and personality traits: wearing intricate leather armor with glowing runes, confident expression, standing in a magical forest, fantasy art, cinematic lighting, highly detailed, concept art. Don't forget art style: anime character design, comic book art, realistic portrait, 3D render, pixel art.
To explore variations, you can keep the core description consistent and change specific elements. For instance, A fierce female warrior, elven features, long silver hair, wearing intricate leather armor with glowing runes, confident expression, standing in a magical forest, fantasy art, cinematic lighting, highly detailed, concept art can be modified to ...wearing heavy plate armor with dragon scale details... or ...wielding a magical staff, wise expression.... Utilizing the seed number (as discussed earlier) is crucial here for maintaining a consistent base while experimenting with changes. This iterative process allows you to quickly visualize numerous possibilities for your characters, helping you refine their appearance and ensure they fit perfectly within your creative world, saving countless hours in the initial design phase. This technique is also powerful when trying to answer questions like How to Make AI Game Assets.
Disclaimer
The information provided in this guide is for general informational purposes only and is based on the current understanding and capabilities of Stable Diffusion and AI image generation technology. The field of AI is rapidly evolving, and specific features, functionalities, and best practices may change over time. Users are encouraged to stay informed about updates and to always review the terms of service and usage policies of any AI tool they utilize, especially concerning commercial use and intellectual property rights.