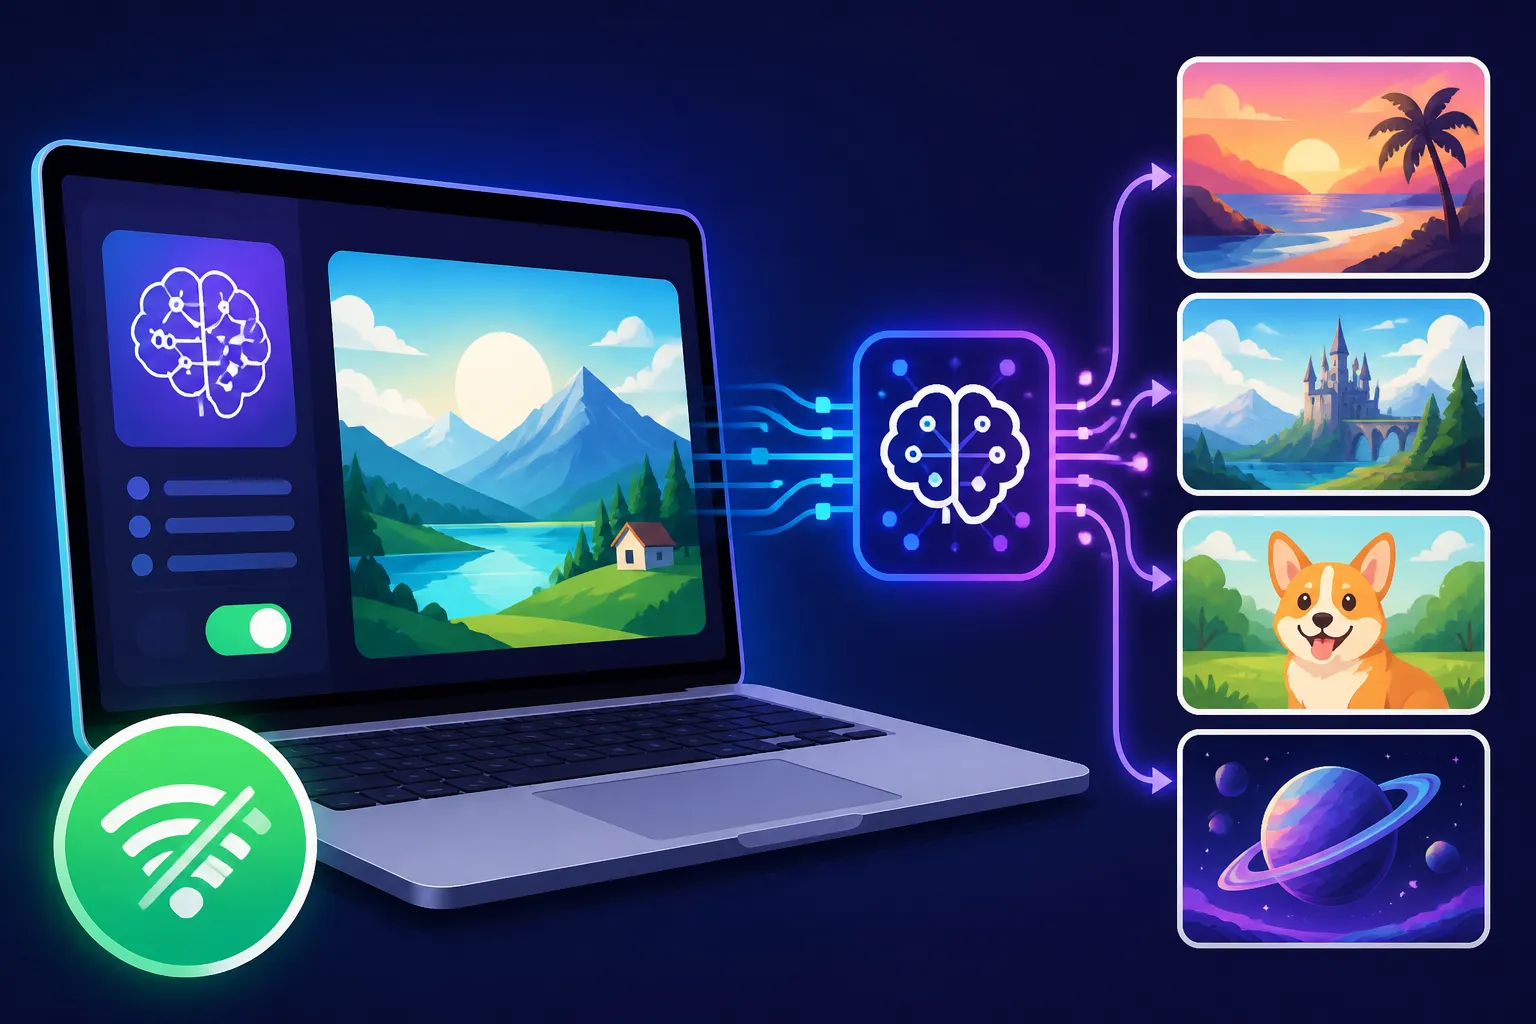
How to Run AI Image Models Free Locally
The world of AI image generation is absolutely fascinating, but let's be honest, those subscription fees and credit limits for cloud-based tools can really start to add up, especially if you're a prolific creator. Plus, there's always that niggling feeling about privacy and the sheer control you give up when your creative process is entirely in someone else's hands. This guide is here to free you from those constraints, walking you through everything you need to know to set up and run powerful AI image models right on your own computer, giving you boundless creative freedom without the recurring costs or data concerns.
Why Go Local? Understanding the Benefits and Downsides
When you start exploring AI image generation, the convenience of online platforms like Midjourney or DALL-E is undeniable. You just type, click, and poof, images appear. But for many, that convenience comes with a hidden cost: a lack of true ownership and escalating expenses. Moving your AI image generation local, to your own machine, can feel like taking the reins back, offering a host of compelling advantages that are hard to ignore once you experience them.
Unrestricted Creative Freedom and Cost Savings
Imagine generating hundreds, even thousands, of images without ever glancing at a credit counter or worrying about hitting a daily limit. That's the primary appeal of local AI. Once your setup is configured, the only "cost" is your electricity bill and the initial hardware investment. You're no longer bound by tiers like "basic," "standard," or "pro" that dictate how many images you can create or how fast they generate. This unlimited access encourages experimentation and iteration, crucial for refining your prompts and developing unique styles. For those who frequently generate images for projects, content creation, or just personal artistic exploration, the savings over time are significant, easily dwarfing the upfront hardware expense. Think about it: an investment in a good GPU today can pay for itself in saved subscription fees over a year or two.
Enhanced Privacy, Control, and Customization
Running AI models locally means your data, your prompts, and your generated images never leave your machine unless you choose to upload them. This is a huge win for privacy-conscious users or those working on sensitive projects. You're not relying on third-party servers, which means less risk of data breaches and more peace of mind. Beyond privacy, local setups offer an unparalleled level of control. You can tinker with every conceivable parameter, install custom models (called "checkpoints"), add extensions for specific functionalities like pose control (hello, ControlNet!), or fine-tune models to your exact aesthetic. This level of customization allows you to carve out a truly unique artistic workflow that's simply not possible with most locked-down cloud services. You're the master of your AI domain, not just a guest user.
The Trade-offs: Hardware, Technical Skill, and Time
Of course, going local isn't without its challenges. The biggest hurdle for many is the hardware requirement. AI image models, especially the more advanced ones, are power-hungry beasts, particularly when it comes to your computer's Graphics Processing Unit (GPU). You'll need a relatively modern, powerful GPU with ample Video RAM (VRAM) to achieve decent speeds and generate higher-resolution images. This can be a significant upfront investment if your current machine isn't up to snuff. Beyond hardware, there's a learning curve. Setting up Python, Git, and the various components of an AI image generation environment requires a degree of technical comfort. It's not usually a click-and-install process, though it has become much simpler over time. You'll need to be patient, follow instructions carefully, and be prepared to troubleshoot if things don't go perfectly on the first try. Finally, there's the initial setup time. While not insurmountable, it will take a few hours to get everything installed and running optimally.
Essential Hardware and Software Requirements
Before you even think about downloading any AI models, you need to ensure your computer has the muscle to run them efficiently. This isn't just about having a fast computer; it's about having the right kind of hardware. Think of it like trying to tow a heavy trailer – a powerful truck (GPU) is more important than a sleek sports car (CPU) for that specific task.
The Powerhouse: Your Graphics Processing Unit (GPU)
When it comes to local AI image generation, your GPU is the undisputed king. Specifically, you'll be looking at NVIDIA GPUs. While AMD cards are making progress, the vast majority of AI frameworks and tools are heavily optimized for NVIDIA's CUDA platform, making them the de facto standard.
- VRAM is Paramount: This isn't just about how fast your GPU is, but how much dedicated memory it has. VRAM (Video RAM) dictates the size and complexity of the images you can generate, as well as the batch size (how many images you can generate simultaneously).
- Minimum Entry (4-6GB VRAM): You can technically run basic models like Stable Diffusion 1.5 with this, but it will be slow, and generating larger images or using more complex settings will likely lead to "out of memory" errors. Expect longer generation times and limited capabilities.
- Recommended (8GB+ VRAM): This is the sweet spot for most hobbyists and even many professionals. An NVIDIA RTX 3060 with 12GB VRAM or an RTX 4060 Ti with 16GB VRAM are excellent mid-range choices. With 8GB+, you can comfortably run Stable Diffusion XL (SDXL) models, generate higher resolutions, and experiment with more advanced features like ControlNet without too much frustration.
- Professional/Enthusiast (16GB+ VRAM): If you're serious about speed, high-resolution outputs, and running multiple complex models or extensions, a card like an RTX 4080 (16GB), RTX 4090 (24GB), or even an older RTX 3090 (24GB) will provide a smooth, fast experience. This level of VRAM allows for rapid iteration and significantly less waiting.
Operating System and Core Software Components
While your GPU does the heavy lifting, your operating system and a few crucial software components lay the groundwork for everything to run.
-
Operating System Choices:
- Windows 10/11: This is the most common and often easiest platform for setting up local AI, especially with user-friendly interfaces like Automatic1111's Stable Diffusion WebUI. Many tutorials are written with Windows users in mind.
- Linux (Ubuntu, Pop!_OS, etc.): For more technically inclined users, Linux offers superior performance and stability for AI workloads, as well as greater flexibility. However, the setup might require a bit more command-line knowledge.
- macOS (Apple Silicon): While older Intel Macs are largely out of the picture due to GPU limitations, newer Macs with Apple Silicon (M1, M2, M3 chips) are surprisingly capable of running Stable Diffusion models. They leverage Apple's Metal Performance Shaders (MPS) for acceleration. Setup differs significantly from NVIDIA-based systems, but performance can be quite good for their power consumption.
-
Essential Software Dependencies:
- Python: This is the programming language that most AI models and their user interfaces are built upon. You'll need a specific version, usually Python 3.10.x or 3.11.x, as newer versions might not be fully supported by all components. It's critical to install the correct version and add it to your system's PATH during installation.
- Git: This version control system is used to download and update the AI software from repositories like GitHub. It's a small, quick install but absolutely necessary.
- NVIDIA Drivers (for NVIDIA GPUs): Ensure your NVIDIA drivers are up-to-date. Outdated drivers are a common source of errors and performance issues. You can download these directly from NVIDIA's website.
Here's a quick reference table for hardware considerations:
| Component | Minimum (Barely Functional) | Recommended (Good Experience) | Enthusiast (Best Performance) | Notes |
|---|---|---|---|---|
| GPU | NVIDIA GTX 1660 Super or similar | NVIDIA RTX 3060 (12GB) / RTX 4060 Ti (16GB) | NVIDIA RTX 4080 (16GB) / RTX 4090 (24GB) | VRAM is crucial. AMD cards have limited support. |
| VRAM | 4-6GB | 8-12GB | 16GB+ | More VRAM allows larger images and faster generation. |
| RAM | 16GB | 16-32GB | 32GB+ | Important for overall system stability, less critical than VRAM. |
| Storage | 100GB Free SSD | 200GB+ Free SSD | 500GB+ Free SSD | Models and generations take up significant space. SSD is essential for speed. |
| Operating System | Windows 10/11, Linux, macOS (Apple Silicon) | Windows 10/11, Linux, macOS (Apple Silicon) | Windows 10/11, Linux, macOS (Apple Silicon) | Choose based on comfort level and hardware. |
| CPU | Any modern Quad-Core | Intel i5/Ryzen 5 (6+ cores) | Intel i7/Ryzen 7 (8+ cores) or better | Less critical than GPU, but a faster CPU helps with non-GPU tasks. |
Choosing Your Local AI Image Model: Stable Diffusion
While there are many excellent AI image generators out there, when it comes to running models locally and freely, Stable Diffusion stands head and shoulders above the rest. It's the open-source hero that has truly democratized AI art.
Why Stable Diffusion is the Go-To for Local Generation
Unlike proprietary models like Midjourney or DALL-E, which are largely closed-source and run exclusively on their creators' servers, Stable Diffusion is designed to be run anywhere. This open-source nature means a vibrant community constantly develops new models, tools, and extensions, making it incredibly flexible and powerful. The core "Stable Diffusion" model isn't just one thing; it's a foundation upon which countless variations, fine-tunes, and specialized models have been built. This ecosystem is what makes it so robust for local use. You can dive into its capabilities more deeply by checking out our Stable Diffusion Review: Free and Customizable article.
Understanding Stable Diffusion Models and Checkpoints
At its heart, Stable Diffusion relies on "checkpoints" or "models." These are large files (often several gigabytes) that contain the learned knowledge of the AI.
- Stable Diffusion 1.5 (SD 1.5): This was the original breakthrough model that many still use. It's lightweight, relatively fast on lower-end hardware, and has a massive collection of fine-tuned models built upon it. It's excellent for more stylized or artistic outputs.
- Stable Diffusion XL (SDXL): This is the next generation, offering significantly improved image quality, better photorealism, and a more intuitive prompting experience. SDXL requires more VRAM (typically 8GB minimum, 12GB+ recommended for best results) and is slower than SD 1.5 on the same hardware, but the quality jump is often worth it.
- Fine-tuned Models: This is where the magic really happens with Stable Diffusion. Community members and researchers take a base model (like SD 1.5 or SDXL) and train it further on specific datasets to excel at certain styles, subjects, or aesthetics. You can find models for anime, photorealism, specific art styles, character generation, and more. Websites like Civitai are treasure troves for these custom models. These allow you to achieve incredible results that are highly tailored to your creative vision. For creators, understanding these options can make all the difference, as discussed in Stable Diffusion Pros and Cons for Creators.
Step-by-Step Guide to Setting Up Stable Diffusion WebUI (Automatic1111)
Okay, let's get down to business! The most popular and user-friendly way to run Stable Diffusion locally is through a web interface called Automatic1111 (often just referred to as A1111). It's a feature-rich, open-source project that bundles everything you need into a relatively easy-to-manage package. This is arguably the best "free AI image generator that actually works" at a professional level.
1. Install Prerequisites
First things first, let's make sure your system has Python and Git ready to go.
-
Python Installation:
- Go to the official Python website (python.org).
- Download Python version 3.10.x or 3.11.x (e.g., Python 3.10.11 or 3.11.9). Avoid Python 3.12 for now, as many AI tools don't fully support it yet.
- Crucially, during installation, make sure to check the box that says "Add Python to PATH" or "Add python.exe to PATH". This step is often overlooked and causes most installation issues.
- Complete the installation. Open your command prompt (CMD on Windows) and type
python --version. You should see the installed Python version.
-
Git Installation:
- Go to git-scm.com/downloads.
- Download and run the installer for your operating system.
- You can generally accept all the default options during installation.
- Open your command prompt and type
git --version. You should see the installed Git version.
2. Download Automatic1111 WebUI
Now that your prerequisites are in place, let's grab the Automatic1111 WebUI.
- Choose a location on your hard drive where you want to install Stable Diffusion (e.g.,
C:\StableDiffusion). Make sure it's on an SSD for better performance. - Open your command prompt or PowerShell.
- Navigate to your chosen directory using the
cdcommand (e.g.,cd C:\StableDiffusion). - Run the following Git command to clone the Automatic1111 repository:
git clone https://github.com/AUTOMATIC1111/stable-diffusion-webui.git - This will create a new folder named
stable-diffusion-webuiin your chosen directory.
3. Download a Stable Diffusion Model Checkpoint
The Automatic1111 WebUI is just the interface; it needs a model to generate images.
- Head over to Hugging Face or Civitai. For beginners, a good starting point is the official Stable Diffusion XL Base model (search for "Stable Diffusion XL Base 1.0" on Hugging Face) or a popular general-purpose SDXL model from Civitai.
- Download the
.safetensorsor.ckptfile. These files are typically several gigabytes in size. - Once downloaded, place this model file into the
stable-diffusion-webui\models\Stable-diffusionfolder within your Automatic1111 installation directory.
4. Launch the WebUI for the First Time
This step will install all the necessary Python libraries and launch the interface.
- Navigate into your
stable-diffusion-webuifolder. - Find the
webui-user.batfile (on Windows). Right-click and choose "Edit" (or open with Notepad). - Optional but Recommended: Inside the
webui-user.batfile, find the lineset COMMANDLINE_ARGS=. You can add arguments here to optimize performance or add features.- For NVIDIA GPUs with 8GB-12GB VRAM, adding
--xformersand--autolaunchis a good idea. Xformers speeds up generation and reduces VRAM usage slightly. Autolaunch will open the web interface in your browser automatically. - If you have less than 8GB VRAM (e.g., 6GB), consider
--medvramor even--lowvramto prevent out-of-memory errors, though this will significantly slow down generation. - So, a common line might look like:
set COMMANDLINE_ARGS=--xformers --autolaunch
- For NVIDIA GPUs with 8GB-12GB VRAM, adding
- Save the
webui-user.batfile. - Double-click
webui-user.batto run it. - The first time you run it, it will download and install all the required Python libraries. This can take a while (5-20 minutes, depending on your internet speed and system). It will look like a lot of text scrolling in the command prompt.
- Once everything is installed, a local web server will start, and if you used
--autolaunch, your browser will automatically open tohttp://127.0.0.1:7860/, which is your Stable Diffusion WebUI!
5. Your First Image Generation
Congratulations, you're ready to create!
- In the WebUI, ensure your downloaded model is selected from the dropdown menu at the top left (it usually defaults to the last one loaded or the first one found).
- In the large text box labeled "Prompt," type what you want to see. Be descriptive! For example:
a highly detailed oil painting of an astronaut riding a majestic space whale through a nebula, cinematic lighting, hyperrealistic, octane render, 8k. Check out our How to Write AI Image Prompts guide for more tips. - In the "Negative prompt" box below it, type things you don't want to see. For example:
blurry, bad quality, low resolution, extra limbs, ugly, deformed. - Adjust "Sampling steps" (20-30 is a good starting point) and "CFG Scale" (7-9 is typical).
- Set "Width" and "Height" (e.g., 1024×1024 for SDXL, 512×512 or 768×768 for SD 1.5).
- Click the big "Generate" button!
- Watch the magic happen in the command prompt window (where it shows progress) and then see your image appear in the WebUI.
Optimizing Your Local Setup for Performance
Running AI models on your own hardware means you're in charge of getting the best performance out of your system. A few tweaks can make a significant difference in generation speed and the quality of your output.
Managing VRAM Usage and Generation Speed
VRAM is your most precious resource. Knowing how to manage it can prevent frustrating "out of memory" errors and keep your generations running smoothly.
-
Command-Line Arguments: As mentioned during the setup, adding specific arguments to your
webui-user.batfile can directly influence VRAM usage and speed.--xformers: This is highly recommended for NVIDIA users. It's an optimized attention mechanism that significantly speeds up generation and reduces VRAM consumption.--medvram: If you have 8GB of VRAM and are running into issues with larger images or SDXL, this can help. It trades a slight performance hit for lower VRAM usage.--lowvram: For GPUs with less than 8GB VRAM (e.g., 4GB or 6GB), this is often essential to prevent crashes. Generations will be noticeably slower.--no-half-vae: Sometimes needed if you encounter color issues with certain models, as it forces the VAE (Variational AutoEncoder) to use full precision, but it uses more VRAM.
-
Batch Size and Resolution: These two settings directly impact VRAM and generation time.
- Batch Size: Generating multiple images at once (e.g., batch size 4) can be more efficient than generating them one by one. However, each image in the batch demands VRAM, so if your VRAM is limited, keep your batch size small (1 or 2).
- Resolution: Higher resolutions naturally require more VRAM and take longer. If you're struggling, start with smaller resolutions (e.g., 512×512 for SD 1.5 or 1024×1024 for SDXL) and then use an upscaler later if you need larger images. The WebUI has built-in upscalers under the "Extras" tab.
Understanding Samplers, Steps, and Their Impact
These settings within the WebUI are crucial for the aesthetic quality and speed of your images. Experimentation is key, but here's a general idea.
- Sampling Steps: This controls how many iterations the AI takes to refine the image. More steps generally lead to more detailed and higher-quality images, but they also take longer.
- Typical Range: 20-30 steps is often a good balance for most samplers. Going above 40-50 usually yields diminishing returns and just adds to generation time.
- Samplers (Sampling Methods): These are different algorithms the AI uses to progressively denoise the image. Each sampler has a unique "feel" and can perform differently with various models and prompts.
- Fast & Good: Euler a, DPM++ 2M Karras, DPM++ SDE Karras are popular choices for speed and quality.
- Slower & Often More Detailed: DDIM, PLMS.
- Experiment with different samplers for the same prompt to see how they influence the final image. Some models work better with specific samplers, so community recommendations (e.g., on Civitai) are valuable.
Beyond Basic Generation: Expanding Your Local AI Capabilities
One of the greatest advantages of running Stable Diffusion locally with Automatic1111 is the incredible extensibility. You're not limited to just typing a prompt; you can achieve precise control, implement unique styles, and enhance your images far beyond what most basic cloud services offer.
Unleashing Precision with ControlNet
Have you ever generated an amazing image, but the pose or composition was just slightly off? Or wished you could use a reference image to guide your AI's output? That's where ControlNet comes in. It's an extension for Automatic1111 that allows you to provide additional "control maps" to guide the image generation process.
- How it Works: ControlNet takes an input image (like a stick figure, a depth map, a Canny edge detection, or even a human pose skeleton) and uses it to constrain the AI's output. For instance, you can sketch a crude outline of a scene, and ControlNet will ensure the generated image adheres to that composition.
- Use Cases:
- Pose Control: Take a photo of yourself in a specific pose, feed it to ControlNet (using the OpenPose preprocessor), and generate a new character in that exact pose. Invaluable for consistent character generation.
- Composition Transfer: Use a Canny edge map of a photograph to recreate the same composition with entirely different subjects and styles.
- Depth-Based Generation: Give it a depth map, and it will generate an image respecting the 3D structure of the original scene.
- Integrating ControlNet truly transforms Stable Diffusion into a powerful artistic tool, moving beyond simple text-to-image to image-to-image with incredible precision. Many creators consider it essential, and it's covered in more detail in our How to Use ControlNet in Stable Diffusion guide.
Mastering Custom Styles with LoRAs and Textual Inversion
While checkpoints define the overall style and capabilities of a model, LoRAs (Low-Rank Adaptations) and Textual Inversion are smaller, more focused files that inject specific styles, characters, or objects into your generations without needing to download a whole new multi-gigabyte checkpoint.
- LoRAs (Low-Rank Adaptations): These are incredibly popular for adding specific visual styles or character traits. A LoRA might be trained on a particular artist's work, a clothing style, or even a specific character's appearance.
- How to Use: You download a LoRA file (often a few megabytes to hundreds of megabytes) and place it in your
stable-diffusion-webui\models\lorafolder. Then, you simply add its trigger word and a weight to your prompt, like<lora:my_lora_name:0.8>, to influence the generation. - Benefits: LoRAs allow you to blend and stack different styles, giving you an almost infinite palette of creative options.
- How to Use: You download a LoRA file (often a few megabytes to hundreds of megabytes) and place it in your
- Textual Inversion (Embeddings): These are even smaller files that teach the AI new concepts or specific visual tokens through a few example images. They often target very specific elements, like a unique artistic signature or a particular object.
- How to Use: Download the embedding file (usually a few kilobytes) and place it in your
stable-diffusion-webui\embeddingsfolder. Then, use its assigned keyword in your prompt. - Benefits: Excellent for adding subtle, consistent elements or styles that are difficult to prompt for directly.
- How to Use: Download the embedding file (usually a few kilobytes) and place it in your
- These tools empower you to truly personalize your AI output and are fundamental for getting specific results. You can learn more about them in our article on How to Use LoRAs in Stable Diffusion.
Refining Your Creations: Upscaling, Inpainting, and Outpainting
Once you've generated an image you love, you often want to make it bigger, fix small imperfections, or even expand its borders. Automatic1111 offers robust features for all of these.
- Upscaling: The "Extras" tab in the WebUI is dedicated to upscaling. You can feed your generated image into it, choose an upscaling algorithm (like ESRGAN, R-ESRGAN, or Lanczos), and dramatically increase its resolution without losing detail, or even adding more detail where none existed. This is essential for getting print-ready images or high-resolution assets for your projects. You can delve deeper into this with our guide on How to Upscale AI Images.
- Inpainting: This allows you to select a specific area of an image and regenerate only that part based on a new prompt, while keeping the rest of the image consistent. Want to change the color of a shirt, add glasses to a face, or fix a weird-looking hand? Inpainting is your tool. You simply mask the area, provide a prompt for what you want in that area, and generate.
- Outpainting: The opposite of inpainting, outpainting lets you extend the canvas beyond the original image boundaries and fill the new area with generated content that seamlessly blends with the existing image. This is fantastic for expanding a scene, changing aspect ratios, or creating panoramic views from a single central image. Our guide on How to Edit AI Images with Inpainting covers these techniques in depth.
By embracing these advanced features and continuously exploring the vast Stable Diffusion ecosystem, you'll unlock an incredible level of creative control and push the boundaries of what you can achieve with AI art, all from the comfort and privacy of your own local machine.
Disclaimer
The information provided in this guide is for general informational purposes only. While we strive for accuracy and practical advice, the field of AI technology is rapidly evolving. Hardware specifications, software requirements, and installation steps may change over time. Always refer to the latest official documentation for specific software and ensure you understand the terms of use for any models or tools you download. Running AI models locally requires a certain level of technical proficiency, and we are not responsible for any issues or damages that may arise from following these instructions.