How to Combine Multiple AI Images
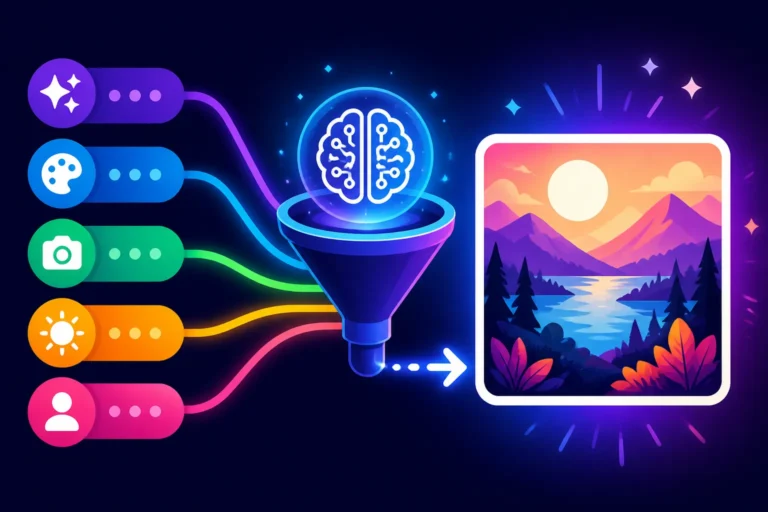
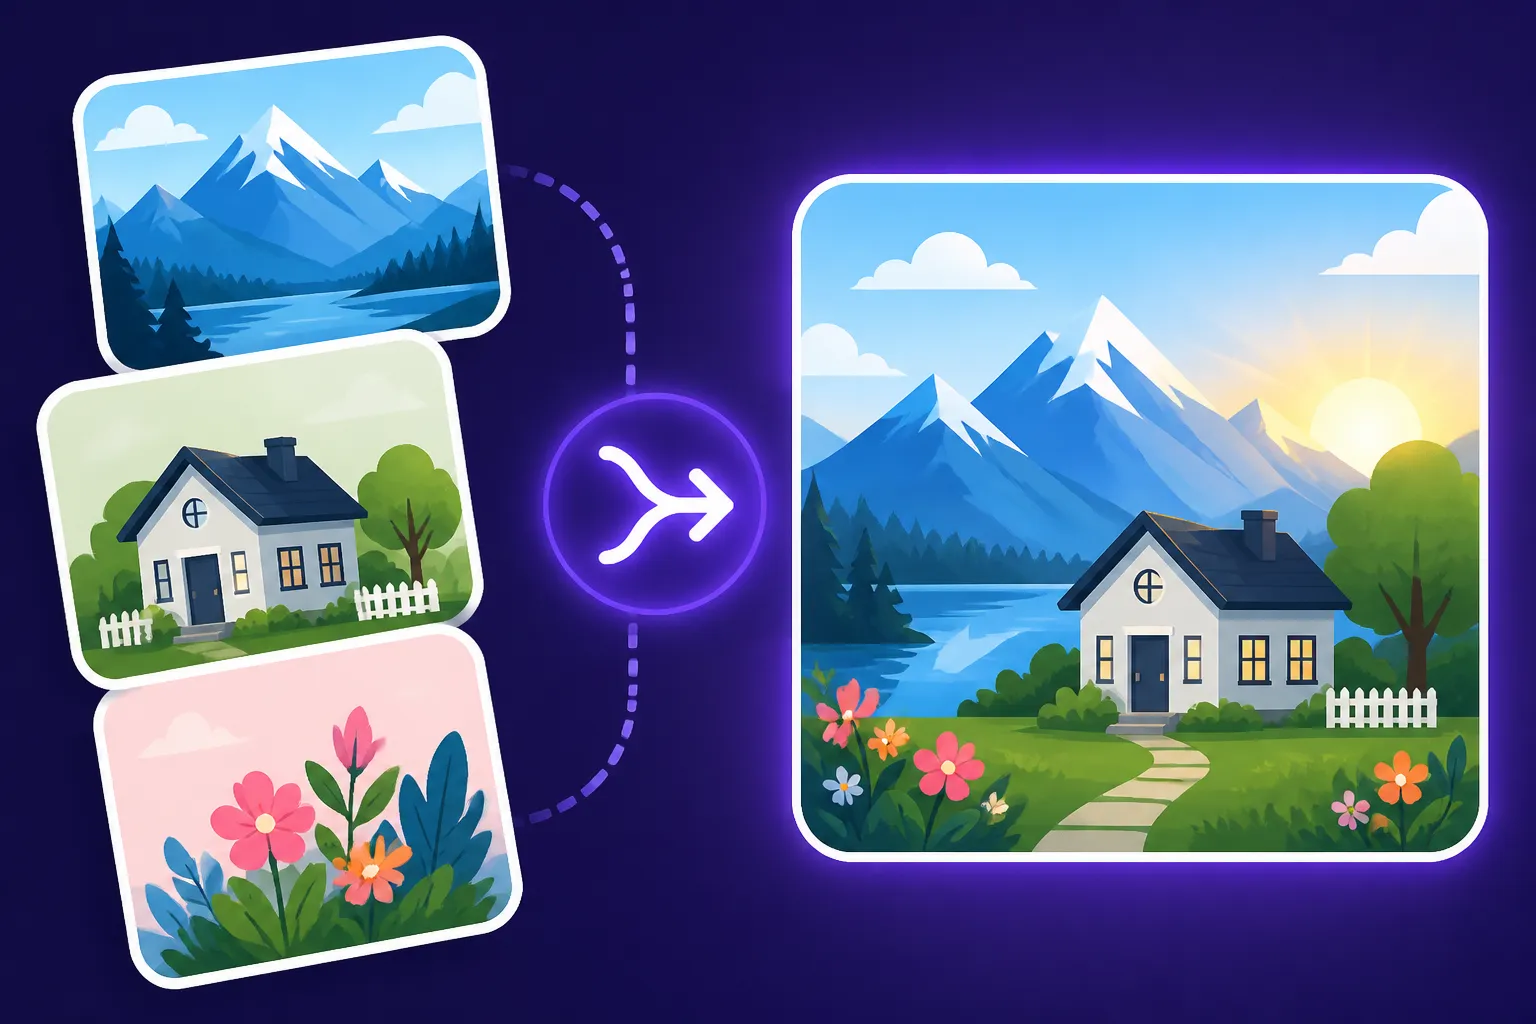
Let's be honest, we've all been there: you've generated a bunch of amazing AI images, each perfect in its own way, but none quite capture the entire vision you have in your head. Maybe you love the character from one image and the background from another, or you need to combine several elements to tell a more complex story. Trying to get the AI to spit out that one perfect, intricate scene can feel like pulling teeth, leaving you frustrated and wondering if you're stuck. But what if you could take the best parts of multiple AI creations and stitch them together seamlessly? This guide is here to walk you through exactly how to combine multiple AI images, turning disparate pieces into a cohesive masterpiece.
The Power of Image Composition and Why It Matters
When you’re deep into the world of AI image generation, it's easy to get caught up in crafting the "perfect prompt" that will generate the ultimate, all-encompassing image. But often, the real magic happens when you embrace the iterative nature of AI and the power of traditional graphic design principles. Combining images isn't a sign of failure in prompting; it's a strategic move that significantly expands your creative toolkit. It's about taking control back from the algorithm and truly becoming the director of your visual narrative.
Overcoming AI Limitations with Combined Images
Let's face it, current AI image generators, as powerful as they are, still have their quirks and limitations. You might ask for "a majestic dragon flying over a medieval castle at sunset with a knight on horseback in the foreground," and get a fantastic dragon, a decent sunset, but a knight that looks like he's melting into his horse. Or perhaps the castle is perfect, but the dragon just isn't quite right.
This is where combining images becomes your secret weapon. Instead of wrestling with a single, overly complex prompt trying to get everything perfect at once, you can break it down. Generate a stunning dragon separately, get that epic castle just right, and then find or create the perfect knight. By isolating elements, you allow the AI to focus its processing power on fewer variables, often leading to higher quality results for each individual component. Then, it's up to you to bring them together. This approach is especially useful when the AI struggles with specific compositions, or when you need very distinct subjects that tend to get mashed together in a single generation. It’s like being able to tell a story with multiple perfect actors instead of one actor trying to play all the roles with varying degrees of success.
Achieving Creative Control and Specificity
Think of it like this: when you're directing a photoshoot, you don't just point and shoot one giant scene. You capture individual portraits, close-ups of details, wide shots of the environment, and then painstakingly choose the best ones to tell your story. Combining AI images offers a similar level of meticulous control. You might want a specific vintage aesthetic for your foreground object, but a more futuristic, ethereal vibe for your background. Trying to cram all those conflicting styles into one prompt can result in a confusing mess.
By generating elements with separate prompts, you can fine-tune each to your exact specifications. Perhaps you use Midjourney for its artistic flair on a character, then switch to an alternative like Adobe Firefly for a background with strong commercial safety features, and then use Ideogram for crisp text overlays. You're not beholden to one tool's strengths or weaknesses for the entire image. This flexibility means you can achieve a level of specificity and creative vision that is incredibly difficult, if not impossible, with a single prompt alone. It truly puts you in the driver's seat, letting you curate the best of the best from various generations or even different tools. Learning How to Write AI Image Prompts effectively for individual elements is the first step towards this granular control.
Crafting Cohesive Visual Narratives
For content creators, marketers, or anyone building a brand, maintaining a consistent visual identity is paramount. Imagine you're illustrating a series of blog posts or creating social media graphics. You need recurring characters, consistent branding elements, or a specific atmospheric mood across multiple visuals. Relying solely on single prompts for each image can lead to frustrating inconsistencies—a character's outfit changes, the lighting shifts dramatically, or the overall style wavers.
Combining images allows you to create a library of approved elements. You can generate a consistent protagonist, a set of branded icons, or a versatile background scene, and then layer them together in different configurations for each piece of content. This strategy is vital for projects requiring a cohesive visual narrative, like a children's book, a series of product mockups, or an advertising campaign. Instead of hoping the AI remembers your specific character design every time, you generate that character once (or a few variations), and then compose them into new scenes. This approach enables you to How to Create a Visual Identity with AI that feels professional and unified across all your outputs.
Practical Methods for Blending AI-Generated Images
Alright, now that we're clear on why combining images is such a game-changer, let's dive into the how. There are several paths you can take, ranging from traditional photo editing software to more integrated AI-driven tools. The best method often depends on the complexity of your desired blend and your comfort level with different software.
Layer-Based Editing in Traditional Software
This is arguably the most powerful and versatile method for combining AI images, and it’s the workflow that seasoned graphic designers have relied on for decades. Tools like Adobe Photoshop, GIMP (a fantastic free, open-source alternative), or Affinity Photo are built for this kind of work. The core concept is layers: each image element exists on its own separate layer, allowing you to manipulate it independently without affecting other parts of your composition.
Here's a basic breakdown of the workflow:
- Import Your Images: Open a new document in your chosen software. Then, import all the AI-generated images you want to combine, placing each on a new layer. You'll see them stacked on top of each other in the layers panel.
- Position and Scale: Select each layer and use the transformation tools (often Ctrl/Cmd+T) to move, rotate, and scale your elements. Get them roughly where you want them in the final composition. Remember to maintain aspect ratios to avoid distortion!
- Masking for Seamless Integration: This is where the magic happens. Instead of erasing parts of an image (which is destructive), you use layer masks. A layer mask is essentially a hide-and-seek game:
- Add a layer mask to the layer you want to blend.
- Select the mask (it will appear as a white thumbnail next to your image thumbnail in the layers panel).
- Use a black brush to paint over areas of the image you want to hide.
- Use a white brush to reveal areas you previously hid.
- Use a gray brush for semi-transparency.
- This non-destructive approach means you can always go back and refine your blend without starting over.
- For example, if you have a character on one layer and a background on another, you’d mask out the original background from the character layer to make it appear on top of your new background.
- Blending Modes: Explore different blending modes (e.g., Multiply, Screen, Overlay, Soft Light) in your layers panel. These modes change how the colors of one layer interact with the colors of the layers beneath it. For instance, "Multiply" can simulate shadows, while "Screen" can simulate highlights or glowing effects. Experimentation is key here to find the perfect synergy.
- Adjustments and Color Matching: Once your elements are roughly placed and masked, the critical next step is to make them look like they belong together. This involves color correction and tone matching. Use adjustment layers (Curves, Levels, Color Balance, Hue/Saturation) applied non-destructively to individual elements or the entire composition to unify the colors, contrast, and lighting. We'll delve deeper into this in the next section.
- Refinement: Zoom in. Look for harsh edges, inconsistent lighting, or elements that look "pasted on." Use subtle brushes on your masks, soft gradients, or even a bit of subtle airbrushing to smooth transitions. Sometimes, adding a new empty layer and painting subtle shadows or highlights can dramatically improve realism.
This method offers unparalleled control, making it a favorite for professionals. You can learn a lot by exploring resources on general photo manipulation and digital compositing, as the principles translate perfectly to AI art.
Inpainting and Outpainting in AI Tools
While layer-based editing is powerful, some AI image generators are beginning to offer integrated features that allow for image manipulation within the AI environment itself. Inpainting and Outpainting are two such techniques that can be incredibly useful for blending or expanding AI images.
- Inpainting: This technique allows you to select a specific area of an image and instruct the AI to regenerate or fill in that area based on a new prompt, or to seamlessly blend an existing element into it. For example, if you have two distinct AI images – one of a futuristic city and another of a flying vehicle – you could potentially inpaint the flying vehicle directly into the city image. You'd mask out a section of the sky in the city image and then prompt the AI to fill that space with your flying vehicle, often with impressive blending capabilities. Tools like DALL-E, Midjourney (with certain features), Stable Diffusion (especially with ControlNet and various models), and Leonardo AI often provide robust inpainting options. The advantage here is that the AI attempts to match the style, lighting, and texture, making the blend feel more organic.
- Outpainting: Conversely, outpainting allows you to extend the canvas of an existing image beyond its original borders, with the AI intelligently filling in the new space. While not strictly "combining" in the sense of two distinct images, it’s useful when one of your AI images has a perfect subject but an incomplete background. You can outpaint to create more room for other elements or simply to give the scene more context, which then makes it easier to layer another element on top without awkward cropping.
These AI-native methods are often faster for simpler blends or for integrating small elements. However, they might not offer the same pixel-level control as traditional editing software. It’s a trade-off between speed/ease and precision. You can explore How to Edit AI Images with Inpainting for a more detailed look at this powerful capability.
AI Compositing and Image Manipulation Tools
Beyond the in-built features of generative AI platforms, a new breed of AI-powered compositing tools is emerging. These tools often leverage AI to simplify complex tasks like background removal, subject extraction, and intelligent blending.
Think of tools like ClipDrop, which offers features like "CleanUp" (removing unwanted objects), "Relight" (changing lighting of a scene), and "Image Upscaler" (enhancing resolution), which can all contribute to a smoother composite. Some platforms are also experimenting with features that allow you to simply "drag and drop" elements, with AI automatically trying to adjust lighting, shadows, and perspective to make them fit. While still evolving, these tools aim to democratize complex image manipulation, making it accessible even for those without extensive Photoshop experience. They can be particularly useful for quickly prototyping ideas or for less critical social media graphics.
Utilizing Reference Images and Iterative Prompting
While this isn't a direct "combination" method in the post-generation sense, it's a powerful pre-combination strategy. You can use reference images—either photos or previously generated AI art—to guide your generative AI tool to create images that are designed to be combined. Many AI image generators allow you to upload an image and then prompt based on its style, composition, or subject matter.
For example, if you want to combine a character and a background, you could first generate your character, then use that character image as a reference while prompting for a background that specifically complements its lighting and perspective. This makes the subsequent manual blending much easier. Or, you could upload a sketch of your desired composite and ask the AI to render it, essentially using the AI as an intelligent "painter" over your composition guide. Learning How to Use Reference Images in Prompts can significantly reduce the amount of post-processing needed. This approach allows you to iterate on your initial vision, guiding the AI more closely to a result that is ready for minimal blending work.
Essential Techniques for Seamless Blending
Now, let's talk about turning a collection of cut-and-paste images into something truly harmonious. The devil is in the details, and these techniques are what separate a Frankenstein's monster of images from a truly integrated composition. Many people rush through this stage, only to find their combined images look fake or disjointed. Patience and attention to detail here will pay off immensely.
Mastering Layer Masks and Blending Modes
We touched on this earlier, but it's worth reiterating the absolute importance of layer masks. They are the non-destructive backbone of any good composite. Instead of using an eraser tool, which permanently deletes pixels, a layer mask allows you to selectively hide or reveal parts of a layer. This means you can always go back and fine-tune your edges, even after saving and reopening your project.
- Refining Edges: The hardest part of masking is often achieving realistic edges, especially for complex subjects like hair, fur, or intricate foliage. Use a soft-edged brush with varying opacities to blend seamlessly. For very fine details, techniques like "Refine Edge" or "Select and Mask" in Photoshop can work wonders, automatically detecting complex boundaries.
- Feathering: Adding a slight feather to your mask can soften hard edges, making one element blend more gently into another, mimicking natural depth of field or atmospheric effects.
- Gradient Masks: Instead of just painting with black and white, use gradient fills on your masks to create smooth transitions between elements, perfect for blending horizons or merging skies.
Beyond masks, blending modes are your artistic toolkit. Each mode applies a different mathematical formula to how the pixels of one layer interact with those beneath it.
| Blending Mode | Effect | Common Use Cases |
|---|---|---|
| Normal | Default; pixels of top layer simply obscure lower layers | Standard overlay |
| Multiply | Darkens; good for shadows, deep colors | Adding realistic shadows, darkening colors, merging ink lines |
| Screen | Lightens; good for highlights, glowing effects | Creating glows, lightening dark areas, combining light sources |
| Overlay | Increases contrast, preserves base and blend colors | Enhancing contrast, adding texture, colorizing (with desaturated base layer) |
| Soft Light | Similar to Overlay but softer | Subtle contrast enhancement, gentle color adjustments, general blending |
| Color | Applies hue and saturation of blend layer, luminosity of base | Colorizing black and white images, changing object colors while retaining texture |
| Luminosity | Applies luminosity of blend layer, hue/sat of base | Adjusting brightness without affecting color, contrast adjustments |
Experiment with these. For example, if you’re adding an AI-generated muzzle flash to a weapon, a "Screen" or "Linear Dodge (Add)" mode would likely be ideal. If you're adding a texture to a surface, "Overlay" or "Soft Light" often works well.
Color Matching and Tone Adjustment
This is arguably the most critical step for making disparate elements look like they belong in the same world. Even perfectly masked elements will look jarring if their colors, lighting, and overall tone don't match.
- White Balance and Color Temperature: Are both images cool (blueish) or warm (yellowish)? Use Color Balance or Photo Filter adjustment layers to shift the overall color cast of one element to match the other.
- Lighting Direction and Intensity: Observe where the light source is coming from in your background image. Does it match the lighting on your foreground object? If not, you'll need to manually adjust shadows and highlights. For example, if the background has light coming from the top-left, but your character is lit from the front, you might need to paint in some subtle shadows on the character's right side to integrate them.
- Contrast and Brightness: Use Curves or Levels adjustment layers to match the dynamic range. If one image is very vibrant and high-contrast, while the other is muted and flat, they'll clash. Apply adjustments to individual layers until they feel harmonious.
- Atmospheric Haze: If your background features a distant landscape, it will likely have some atmospheric haze (a slight desaturation and lightening of colors). Your foreground elements should reflect this if they are meant to be far away, or appear crisp if they are close. Adding a subtle, semi-transparent layer of color (matching the haze) on top of the distant elements can help.
Sometimes, a single "master" adjustment layer applied to all layers at the very end can help unify the entire image, giving it a final, cohesive look. Remember, the goal is not to make them identical, but to make them believable as part of the same scene. You might also want to refer to How to Fix Bad AI Image Results if your initial generations have significant color issues.
Perspective and Scale Consistency
Nothing breaks the illusion faster than an object that’s clearly out of scale or perspective with its surroundings. Imagine placing a skyscraper-sized teacup in a forest or a tiny person next to a massive door.
- Vanishing Points and Horizon Lines: For realistic composites, try to identify the vanishing points and horizon line in your background image. All elements you add should adhere to this perspective. If the background is shot from a low angle, your added elements should also appear as if viewed from a low angle.
- Scale Reference: When scaling objects, think about real-world proportions. If you're putting a car on a road, make sure it's not the size of a matchbox car or a monster truck unless that's your specific artistic intent. Using reference photos of similar objects can be immensely helpful.
- Distortion and Skew: Sometimes, simple scaling isn't enough. You might need to use distortion, perspective, or skew tools in your editor to subtly adjust an element so its lines align with the perspective of the background. This is particularly useful for things like floors, walls, or objects receding into the distance.
These adjustments can be tricky and often require a keen eye for detail. Take breaks and look at your image with fresh eyes, or even ask a friend for their opinion on whether something looks "right."
Adding Realistic Shadows and Highlights
Once your elements are correctly scaled and color-matched, the final touch for realism is adding believable shadows and highlights. These ground your objects in the scene and make them interact with the environment's light source. Without them, objects will float unnaturally.
- Shadow Location: Where would the shadows fall given the light source in your background? If the light is from the top right, shadows should stretch to the bottom left of your added object.
- Shadow Hardness and Color: Shadows aren't just black blobs. They take on the color of the ambient light and become softer and less defined as they get further from the object. Create a new layer for shadows (often set to "Multiply" blending mode with reduced opacity), paint in rough shapes, and then blur them with a Gaussian blur filter. Adjust the color of the shadow to reflect the scene's ambient light (e.g., slightly blue for an outdoor scene).
- Contact Shadows: These are the darkest, hardest shadows directly where an object touches a surface. They are crucial for making an object feel like it's actually resting on something. Paint a small, dark, and hard-edged shadow right under the object, and then apply a very slight blur.
- Reflective Lighting/Highlights: Don't forget how light bounces! If your object is shiny and near a bright, colorful wall, it might pick up some of that reflected color. Similarly, adding subtle highlights (on a new layer set to "Screen" or "Soft Light") where the scene's primary light source would hit your object can enhance realism.
- Dodge and Burn: These tools (or adjustment layers like Curves with masks) allow you to subtly lighten (dodge) or darken (burn) specific areas of an image. Use them sparingly to sculpt light and shadow on your combined elements, making them feel more three-dimensional within the new scene.
Perfecting shadows and highlights is an art in itself. Many artists spend years honing this skill. Start simple, focus on the most obvious shadows, and gradually build up complexity. Combining these techniques will lead to AI art that truly stands out, making it look less "AI-generated" and more like a carefully crafted piece. If you're finding that your initial AI outputs are already lacking realism, check out tips on How to Make AI Images Look Less AI.
Recommended Tools for Combining Your AI Art
Choosing the right tools for combining your AI images is as important as understanding the techniques. While the principles of masking, blending, and color correction remain the same, the ease of use and advanced features vary wildly between platforms. Here’s a look at some popular options, from professional suites to more accessible online editors.
Professional Image Editing Suites
These are the heavy hitters, offering the most control and a vast array of features. They come with a steeper learning curve but pay dividends in terms of quality and flexibility.
- Adobe Photoshop: The industry standard for graphic design and photo manipulation, and for good reason. Photoshop offers unparalleled layer management, masking tools, advanced blending modes, and a robust suite of adjustment layers. Its content-aware fill and generative fill (powered by Adobe Firefly) can even help with initial blending or filling gaps. If you're serious about creating high-quality composites from your AI images, investing time in learning Photoshop is a must. The subscription model makes it accessible, though it's a recurring cost.
- Affinity Photo: A powerful, one-time purchase alternative to Photoshop, Affinity Photo boasts many of the same core features: professional layer support, non-destructive editing, advanced masking, and robust photo manipulation tools. It’s often praised for its performance and user-friendly interface. For artists and designers looking for a Photoshop-level tool without the subscription, Affinity Photo is an excellent choice.
- GIMP (GNU Image Manipulation Program): This is the best free and open-source option for professional-grade image editing. GIMP offers comprehensive features for layers, masks, blending modes, color adjustments, and more. While its interface might feel a bit dated compared to Photoshop or Affinity Photo, it is incredibly powerful and capable of producing high-quality composites. It's perfect for those on a budget or who prefer open-source software.
These tools are ideal when you're aiming for a polished, professional result, especially for commercial use cases or print-ready files. They provide the pixel-level control needed for intricate blending.
Online and AI-Assisted Editors
For quicker edits, less complex blends, or for users who aren't ready to dive into professional software, online and AI-assisted editors offer a more accessible entry point.
- Canva AI Image Editor: While primarily known for graphic design templates, Canva has integrated AI features, including some basic image editing capabilities. You can upload your AI-generated images, use its background remover, and layer elements. It's fantastic for quickly assembling social media graphics or blog images with a drag-and-drop interface, though it lacks the advanced masking and blending modes of professional software. It's a great option if you need to quickly integrate AI images into presentations or marketing materials. Is Canva AI Good Enough for Pros, maybe not for complex composites, but definitely for simple ones.
- Photopea: Often dubbed a "free Photoshop clone" that runs in your web browser, Photopea is remarkably capable. It supports layers, masks, blending modes, and a wide array of Photoshop-compatible features. It's an excellent choice if you need robust editing capabilities but don't want to install software or pay for a subscription. The learning curve is similar to Photoshop, but the accessibility is unmatched.
- ClipDrop by Stability AI: This suite of AI-powered tools offers impressive individual functionalities that can aid in combining images. Its "Remove Background" is excellent for isolating subjects, "Relight" can help match lighting, and "Image Upscaler" can boost resolution before combining. While not a full-fledged compositing tool itself, its utilities can significantly streamline the prep work for blending elements in another editor.
- Magnific AI: This is a fantastic tool to consider before combining or as a final step. Magnific AI excels at upscaling and adding incredible detail to images. If your AI-generated elements are a bit soft or lack high-frequency detail, running them through Magnific AI can give you a much richer canvas to work with, making the final composite look much more polished and photorealistic. While not a blending tool, it contributes immensely to the quality of the final blend by enhancing the source material. For more details, check out Best AI Image Upscalers and How to Use Them.
Here's a quick comparison of these tools for combining AI images:
| Feature/Tool | Primary Strength | Ease of Use | Cost | Best For |
|---|---|---|---|---|
| Adobe Photoshop | Industry-standard, ultimate control, features | High learning curve | Subscription | Professional artists, detailed composites, commercial projects |
| Affinity Photo | Powerful alternative, non-destructive editing | Moderate | One-time purchase | Independent creators, strong feature set without subscription |
| GIMP | Free & open-source, robust features | High learning curve | Free | Budget-conscious users, complex editing, open-source enthusiasts |
| Photopea | Web-based Photoshop clone, good features | Moderate | Free (with ads) | Quick access to advanced editing, browser-based workflow |
| Canva AI | User-friendly, design templates, basic layering | Very Easy | Freemium | Simple overlays, social media graphics, quick content creation |
| ClipDrop | AI-powered utilities (background remove, relight) | Easy | Freemium | Pre-processing elements, enhancing individual components |
| Magnific AI | Advanced upscaling & detail enhancement | Easy | Subscription | Improving source image quality before combining, final polish |
Ultimately, the "best" tool for you depends on your specific needs, budget, and desired output quality. Don't be afraid to mix and match; you might generate with Best AI Image Generator Comparison, upscale with Magnific AI, and then combine everything in Photoshop. The goal is to make your workflow efficient and your final images stunning. For those aiming for professional-grade output, remember the importance of commercial usage rights, which can vary by tool. Consider reading about Best AI Image Generator for Commercial Use if this is a factor for you.
Disclaimer
The information provided in this article is for general guidance and informational purposes only. While we strive to offer accurate and up-to-date content, the field of AI image generation and editing is rapidly evolving. Tools, features, and best practices may change over time. Always refer to the official documentation and terms of service for any software or platform mentioned.