How to Use ControlNet in Stable Diffusion
Have you ever poured your heart and soul into crafting the perfect Stable Diffusion prompt, only to generate an image that's almost there, but the pose is all wrong, or the composition is just a bit off? It's incredibly frustrating to feel like you're constantly fighting against the unpredictable nature of AI, isn't it? This guide is here to walk you through exactly how to harness the incredible power of ControlNet in Stable Diffusion, giving you the precise creative control you've been craving.
What is ControlNet and Why It's a Game Changer
Before ControlNet, generating images with Stable Diffusion often felt like a roll of the dice. You could describe a majestic dragon, a futuristic cityscape, or a serene portrait, but how that dragon was posed, the exact layout of the city, or the specific gesture in the portrait was largely left to the AI's interpretation. This unpredictability, while sometimes leading to delightful surprises, was often a source of immense frustration for artists and designers who needed specific control over their outputs.
Understanding the Control Problem in AI Generation
Think about it: you tell an AI, "Generate a person standing on a mountain overlooking a valley." You might get a person facing away, facing towards, arms raised, hands in pockets, standing on the edge, or far back. The AI understands the elements you want, but the structure and composition are amorphous. This lack of granular control over spatial relationships, poses, and even specific outlines was a major hurdle for anyone trying to integrate AI images into a structured creative workflow, whether it was for a book cover, a marketing campaign, or even just a personal art project. It made refining an image a tedious process of regeneration and prompt tweaking, often without the desired results.
How ControlNet Solves the Control Dilemma
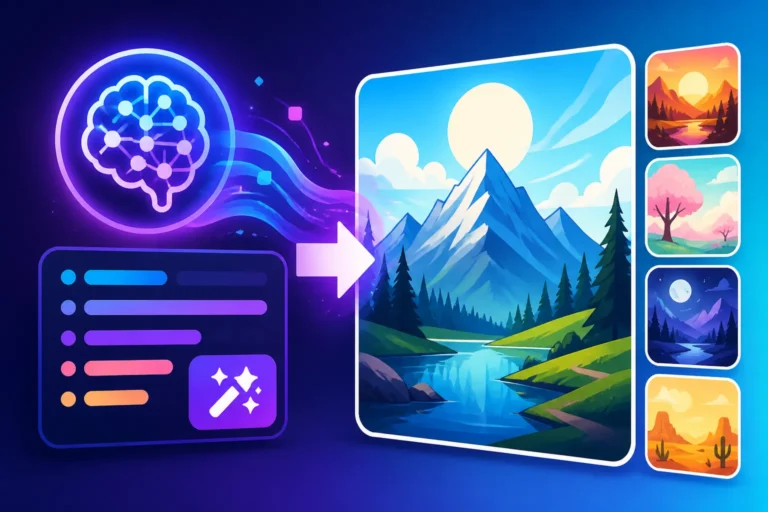
ControlNet fundamentally changes this dynamic by acting as an extra layer of instruction for Stable Diffusion. Instead of just relying on text prompts, ControlNet allows you to feed a structural guide into the image generation process. This guide can be an existing image, a line drawing, a depth map, or even a skeletal representation of a pose. The AI then uses this visual input as a strong constraint, ensuring that the generated image adheres to the specified structure while still interpreting your text prompt for style, color, and detail. It’s like giving the AI a blueprint before it starts building, making it possible to achieve consistent characters across images or get very specific compositions. For a broader look at the platform, you might want to check out our Stable Diffusion Review: Free and Customizable article.
How ControlNet Works Under the Hood
Diving a little deeper into the technical side, ControlNet isn't just a simple overlay; it's a sophisticated neural network architecture designed to condition large text-to-image diffusion models like Stable Diffusion. It essentially "teaches" the existing model to respect additional input conditions without sacrificing the quality or style generated by the original model.
The Science Behind Conditional Generation
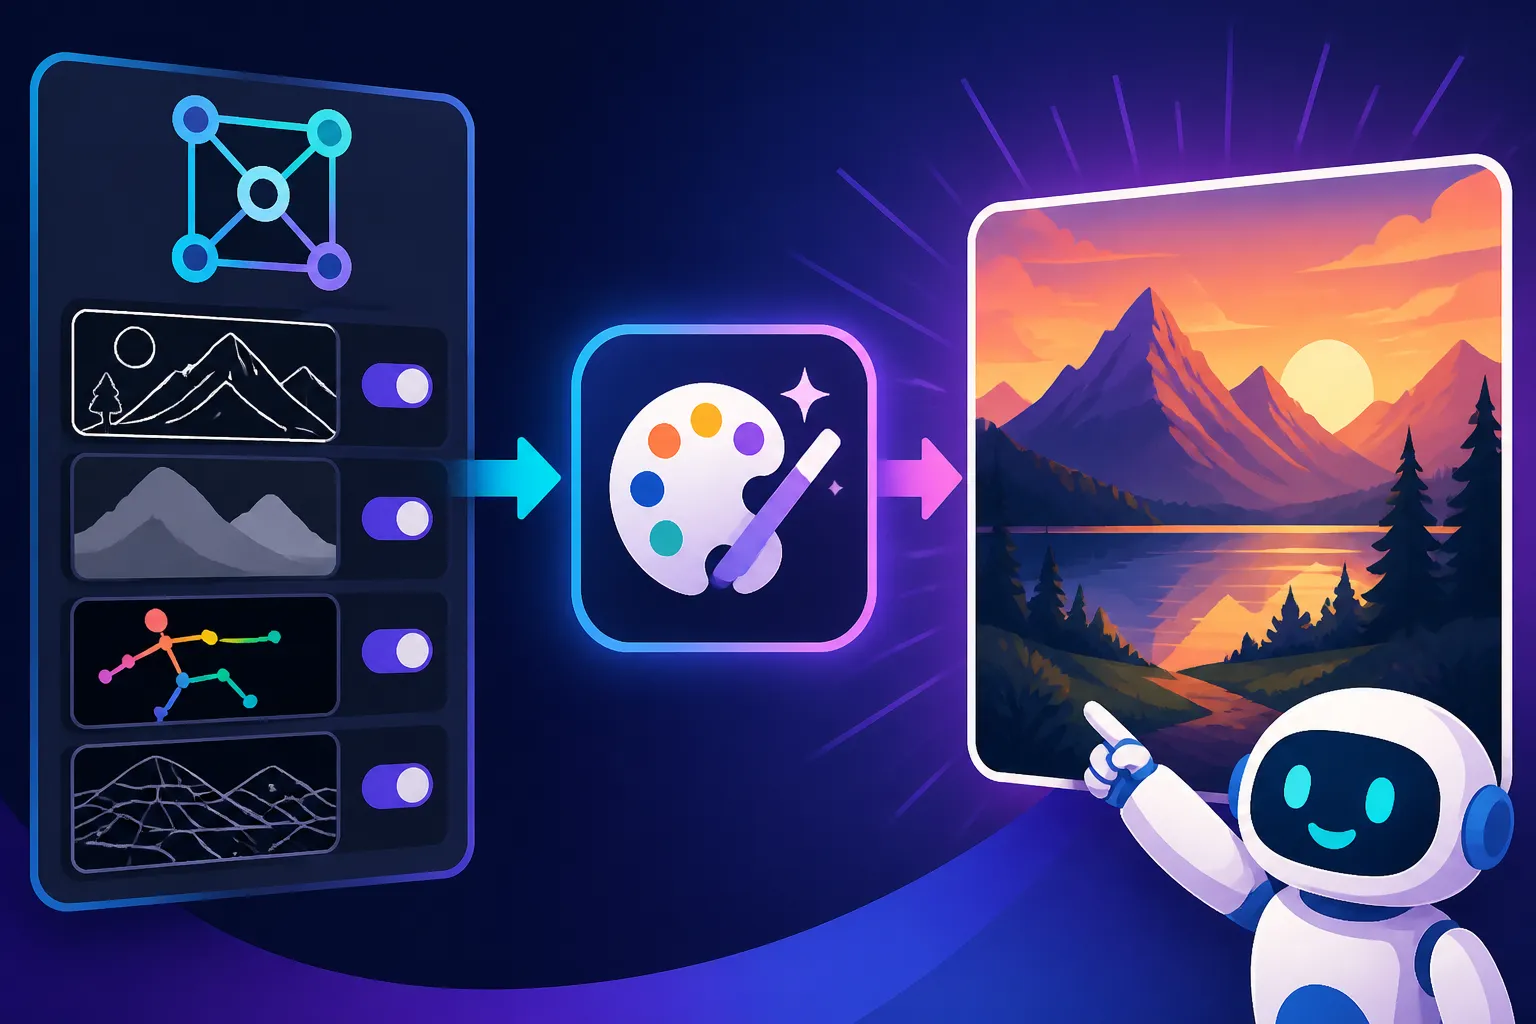
At its core, ControlNet works by taking a pre-trained Stable Diffusion model and adding trainable "copies" of its encoder blocks. These copies are then fine-tuned on specific types of input, like Canny edge maps, depth maps, or human pose skeletons. During image generation, the original Stable Diffusion model receives the text prompt, while the ControlNet model simultaneously processes the conditioning image. These two pathways converge, allowing the AI to generate an image that both follows your textual description and adheres precisely to the structural information provided by the conditioning image. It's a brilliant way to introduce precise control without retraining the entire massive diffusion model from scratch, which would be incredibly resource-intensive.
The Role of Preprocessor Models
Before your input image can be used by a ControlNet model, it often needs to be processed. This is where preprocessors come in. A preprocessor analyzes your original image and extracts the specific structural information that a particular ControlNet model understands. For example, if you want to use the Canny ControlNet model to outline your generated image, you'd first pass your reference image through a Canny preprocessor. This preprocessor would detect the edges in your reference image and convert it into a simple black and white Canny edge map. This map then becomes the input for the Canny ControlNet model, guiding the Stable Diffusion generation. There are different preprocessors for each type of ControlNet model, ensuring that the structural data is in the correct format for the AI to interpret. Understanding how to integrate these different elements can truly elevate your output quality, especially when paired with techniques on How to Prompt for Consistent Characters.
Getting Started with ControlNet Installation
Jumping into ControlNet can feel a bit daunting if you're not used to installing extensions or working with open-source tools. However, the community has made it incredibly accessible, especially through popular web UIs like Automatic1111's Stable Diffusion web UI.
Setting Up the Automatic1111 Web UI
If you haven't already, the first step is typically to get the Automatic1111 Stable Diffusion web UI up and running. This is generally the easiest and most feature-rich way to interact with Stable Diffusion and its extensions, including ControlNet. You'll need Python, Git, and a capable GPU. The installation usually involves cloning the repository from GitHub, running a batch file, and letting it download all the necessary dependencies. While the initial setup might take some time, especially for the model downloads, once it's configured, it provides a user-friendly interface in your web browser. If you're encountering issues or want a more in-depth setup guide for the core Stable Diffusion experience, our article on Is Stable Diffusion Still Worth Learning could provide valuable context.
Installing the ControlNet Extension
Once your Automatic1111 UI is working, installing ControlNet is straightforward.
- Navigate to the "Extensions" tab in the Automatic1111 UI.
- Click on "Install from URL."
- Paste the ControlNet GitHub repository URL (typically
https://github.com/Mikubill/sd-webui-controlnet.git) into the "URL for extension's git repository" field. - Click "Install."
- After installation, go to the "Installed" tab, click "Apply and restart UI."
This process installs the core ControlNet extension. However, you'll also need to download the actual ControlNet models separately. These are large files, often several gigabytes each, and they correspond to different functionalities (e.g., Canny, OpenPose, Depth). You can usually find links to these models on the ControlNet GitHub page or from prominent AI model repositories like Hugging Face. Download these .safetensors or .ckpt files and place them in the stable-diffusion-webui/extensions/sd-webui-controlnet/models folder. Without these models, the extension won't be able to process your conditioning images.
Key ControlNet Models and Their Applications
The real magic of ControlNet lies in its diverse range of models, each trained for a specific type of structural control. Understanding what each model does is crucial for effectively steering your AI generations. Choosing the right model for your task can make all the difference between a generic output and a precisely controlled masterpiece.
Canny Edge Detection for Outlines
The Canny ControlNet model is one of the most popular and versatile options. It works by detecting the edges in a reference image and using those crisp lines as a guide for your generated image.
- How it works: You provide a source image, and the Canny preprocessor extracts its prominent edges, ignoring colors, textures, and specific details. This edge map (a black and white image) is then fed to the Canny ControlNet model alongside your text prompt.
- Best use cases: This is fantastic for reproducing compositions, matching specific object outlines, or translating a rough sketch into a detailed AI image. For example, if you have a photo of a particular building and want to generate an AI image of a different building in the exact same architectural pose or perspective, Canny is your go-to. It's incredibly useful for maintaining a consistent visual structure even when changing styles or subjects, something crucial when trying to avoid How to Fix Bad AI Image Results due to compositional issues.
OpenPose for Human Poses and Skeletons
Generating realistic and specific human poses has historically been one of the trickiest aspects of AI image generation. OpenPose ControlNet changes that entirely.
- How it works: OpenPose detects the skeletal structure and key facial landmarks of people in a reference image. It converts this into a stick-figure-like representation, often with different colored lines for limbs and joints. This skeletal map, rather than the full image, then guides the AI.
- Best use cases: Need a character in a dynamic action pose? Have a specific human gesture in mind for a product advertisement? OpenPose is perfect for achieving precise body language and character positioning. You can even use simple stick-figure drawings as input for OpenPose, allowing you to quickly sketch out a pose and have the AI fill in the details. This level of control is invaluable for artists, illustrators, and anyone working with characters, eliminating the frustration of AI generating extra limbs or distorted figures, a common problem our guide on How to Fix AI Hands and Faces touches upon.
Depth Maps for Spatial Awareness
Depth ControlNet models understand the spatial arrangement and depth information within an image, providing the AI with a sense of three-dimensional space.
- How it works: A depth preprocessor analyzes a reference image and creates a grayscale depth map. In this map, lighter areas represent objects closer to the camera, and darker areas represent objects further away. The AI uses this gradient of light and dark to understand the spatial relationships between objects and the overall scene depth.
- Best use cases: This is excellent for maintaining perspective, ensuring objects are correctly positioned in 3D space, or re-imagining a scene with the same depth but entirely different content. For instance, if you have a photograph of a room and want to generate an AI image of that same room layout but with different furniture and decor, Depth ControlNet can preserve the spatial integrity. It's also great for generating images with consistent perspective for architectural renderings or landscape scenes.
Normal Maps for Surface Orientation
Normal maps provide information about the surface orientation of objects in an image, essentially telling the AI how light would bounce off those surfaces.
- How it works: The Normal preprocessor generates a colored map where different colors represent different surface angles relative to the viewer. This data helps the AI understand the geometry and shape of objects, influencing how shading and textures are applied.
- Best use cases: Normal maps are particularly useful for maintaining the form and volume of objects, especially in 3D-like renders or when you want to recreate specific object shapes with new textures. If you have a detailed 3D model render and want to re-texture it or change its style while keeping the exact geometric form, Normal ControlNet is incredibly powerful. It ensures that the generated image respects the original object's contours and shape, leading to highly consistent results.
Line Art and Scribble for Artistic Control
These models are fantastic for artists who start with basic sketches or line art and want the AI to refine and complete the image while respecting their initial strokes.
- How it works:
- Line Art: Detects clean, defined lines from a reference image, often producing a more stylized or illustrative output.
- Scribble (or Sketch): Tolerates much looser, rougher input, allowing for quick, unrefined sketches to guide the AI. It's more forgiving than Canny.
- Best use cases:
- Line Art: Perfect for turning comic book line art into fully colored illustrations, or converting a precise drawing into various artistic styles.
- Scribble: Ideal for brainstorming or quick concept art. You can doodle a basic idea, feed it to the AI with a prompt, and see it brought to life with detail and style, adhering to your rough composition. This is especially helpful if you're exploring different art styles, as covered in our guide on How to Prompt for Specific Art Styles.
Other Specialized ControlNet Models
Beyond these, there's a growing ecosystem of specialized ControlNet models. For instance, Tile allows for upscaling with fantastic detail preservation, Shuffle helps remix existing image elements, and IP-Adapter lets you transfer style or appearance from a reference image. Some models like Reference can even guide the AI based on the overall aesthetic or color palette of a source image. The versatility of ControlNet is truly expanding, offering more and more avenues for precise creative direction.
Here’s a quick overview of some popular ControlNet models:
| ControlNet Model | Primary Function | Best Use Cases | Preprocessor Type |
|---|---|---|---|
| Canny | Edge detection and outline adherence | Reproducing compositions, turning sketches into detailed images, matching architectural forms | Canny |
| OpenPose | Human pose and skeletal structure detection | Precise character posing, replicating specific gestures, stick-figure to full character | OpenPose |
| Depth | Spatial arrangement and 3D depth | Maintaining perspective, re-imagining scenes with consistent layouts, architectural visualization | MiDaS, Zoe |
| Normal | Surface orientation and object geometry | Preserving object shapes, re-texturing 3D renders, detailed object control | Normal Bae, Normal MLi |
| Line Art | Clean line detection | Converting line drawings to illustrations, stylistic transfers | Line Art |
| Scribble | Rough sketch guidance | Quick concept art, brainstorming, converting doodles to detailed images | Scribble |
| Tile | Upscaling and detail preservation | Enhancing image resolution while maintaining coherence | None (often works on raw image or combined with others) |
| IP-Adapter | Image-to-image style or subject transfer | Applying a specific style from a reference photo, consistent character appearance | None (uses raw image embeddings) |
Practical Applications and Use Cases
ControlNet isn't just a technical marvel; it's a practical tool that can revolutionize workflows for designers, artists, marketers, and even hobbyists. It bridges the gap between raw generative power and precise creative intent.
Maintaining Consistent Character Poses and Aesthetics
One of the most persistent headaches in AI image generation has been creating a consistent character across multiple images, especially when different poses or environments are needed. ControlNet, particularly with the OpenPose model, makes this significantly easier.
Imagine you're developing a children's book or a comic series. You have a main character, and you need them in various poses: running, jumping, sitting, looking thoughtful. Traditionally, you'd generate dozens of images, hoping for a match. With OpenPose, you can create simple stick-figure drawings for each pose, feed them into ControlNet along with your character description, and generate images where your character consistently maintains their appearance and the desired pose. This capability is a huge time-saver and ensures visual continuity, a challenge we often discuss when comparing tools, such as in Midjourney vs Stable Diffusion Compared.
Transforming Sketches into High-Quality Art
For artists, ControlNet opens up a world of possibilities for rapidly iterating on ideas and bringing sketches to life. Whether you're a digital artist, an architect, or even someone just doodling for fun, your initial lines can become the backbone of an AI-generated masterpiece.
Let's say you've drawn a rough architectural sketch of a futuristic skyscraper. You can use the Canny or Line Art ControlNet model to take that sketch and, with a descriptive prompt, transform it into a photorealistic rendering, a watercolor painting, or even a cyberpunk-style illustration. The AI will respect your original structural lines, preventing the generated image from deviating from your initial vision. This means you can focus on the broad strokes of your composition and let the AI handle the rendering of textures, lighting, and intricate details.
Recomposing and Restyling Existing Images
ControlNet isn't just for starting from scratch; it's also incredibly powerful for remixing and re-imagining existing visuals. This is a game-changer for content creators who need variations of a theme or want to update old imagery.
Suppose you have a photograph of a classic car and you want to see what it would look like in a different environment—say, cruising through a neon-lit futuristic city—while keeping the car's exact silhouette. You could use the Canny model to extract the car's outline from the original photo. Then, with a prompt describing the futuristic city, ControlNet would generate a new image featuring the same car outline, seamlessly integrated into the new scene. This is far more efficient than trying to get the AI to generate the exact same car silhouette from a text prompt alone. Similarly, if you want to apply a consistent artistic filter across different photographs, ControlNet's IP-Adapter or similar models can help transfer stylistic elements while preserving the core content.
Tips for Mastering ControlNet
While ControlNet offers incredible power, getting the most out of it often requires a bit of experimentation and understanding of its nuances. It's not always a magic bullet; sometimes, a little finessing goes a long way.
Experimenting with ControlNet Weights
Each ControlNet model comes with a "Control Weight" slider. This parameter dictates how much influence the conditioning image (your structural guide) has over the final generation.
- Low Weight (e.g., 0.5-0.7): The AI will use your structural guide as a loose suggestion. This can be useful if you want more creative freedom for the AI to interpret your prompt, or if your conditioning image is very simple and you want the AI to fill in a lot of detail. The output might diverge more from the exact structure, but it can lead to more varied and interesting results.
- High Weight (e.g., 1.0-1.5): The AI will adhere very strictly to your conditioning image. This is ideal when precise adherence to the structure is paramount, such as replicating a specific pose or composition. Be aware that a very high weight can sometimes override your text prompt too much, leading to less creative interpretation of style or details. It's a delicate balance, much like fine-tuning prompts in general, which you can learn more about in our Stable Diffusion Prompt Guide.
Combining Multiple ControlNet Models
One of ControlNet's most advanced features is the ability to use multiple models simultaneously. This allows for incredibly detailed and layered control over your generations.
Imagine you want to generate an image of a person striking a specific pose within a room that has a very particular architectural layout. You could use an OpenPose model for the person's pose and a Canny or Depth model for the room's structure. By activating both ControlNet units, the AI will synthesize both sets of structural information, creating an image that satisfies both conditions. This multi-model approach enables a level of control that was previously unimaginable, allowing for complex scene compositions where characters, objects, and environments are all precisely controlled. It's a fantastic way to tackle intricate scenes where just one type of control isn't enough.
Iterating and Refining Your ControlNet Inputs
Just like text prompting, getting perfect results with ControlNet often involves iteration. Don't expect your first attempt to be flawless every time.
- Adjusting Preprocessor Settings: Each preprocessor usually has its own settings (e.g., Canny's low and high threshold values, OpenPose's resolution). Experimenting with these can drastically change the quality and detail of the structural map, which in turn affects the AI's output. A clean, precise structural map usually leads to better results.
- Cleaning Your Source Images: Sometimes, your reference image might have unnecessary elements or noise that can confuse ControlNet. Simple image editing to clean up backgrounds, remove unwanted objects, or sharpen lines in your reference image before processing it with ControlNet can significantly improve the quality of your structural map and, consequently, your generated image.
- Prompting in Harmony: Remember that ControlNet works with your text prompt, not against it. Ensure your prompt accurately describes the style, content, and details you want, allowing the AI to fill in the artistic aspects around the structural guidance. Combining powerful techniques like How to Use Negative Prompts with ControlNet can further refine your outputs, steering the AI away from undesirable elements.
Troubleshooting Common ControlNet Issues
Even with the best intentions, you might run into a few hiccups when using ControlNet. Don't worry, it's a common experience, and there are often straightforward solutions.
Generated Image Doesn't Match the Input
This is perhaps the most common frustration. You've provided a fantastic conditioning image, but the output still feels off.
- Check Control Weight: Is your Control Weight too low? Increase it to give the conditioning image more influence. Conversely, if it's too high, it might be overwriting your prompt, leading to less artistic freedom.
- Verify Model and Preprocessor Match: Are you using the correct ControlNet model for your preprocessor output? For instance, if you generated a Canny map, make sure you've selected the Canny ControlNet model. Mismatched models will yield unpredictable results.
- Quality of Conditioning Image: Is your conditioning image clean and clear? A blurry or cluttered source image will produce a noisy structural map, making it hard for the AI to interpret. For example, if using Canny, ensure your lines are crisp. If using OpenPose, make sure the human figure is clearly visible and not obscured.
- Resolution Mismatch: While not always critical, sometimes ensuring your conditioning image's resolution is close to your generation resolution can help, especially with models like Canny where precise lines matter.
ControlNet Doesn't Seem to Do Anything
You've got everything installed, but when you activate ControlNet, it appears to have no effect on your generated images.
- Model Files Present and Correct: Double-check that you've downloaded the actual ControlNet model files (e.g.,
control_v11p_sd15_canny.safetensors) and placed them in the correct folder (stable-diffusion-webui/extensions/sd-webui-controlnet/models). If they're missing or in the wrong directory, ControlNet simply won't have the data it needs to function. - Enable ControlNet Box Checked: In the ControlNet section of the Automatic1111 UI, ensure the "Enable" checkbox is ticked. It sounds obvious, but it's an easy one to miss!
- Correct Preprocessor/Model Selection: Make sure you've selected both a preprocessor and a ControlNet model in the dropdown menus. Sometimes, people select one but forget the other.
- Restart UI: After installing new models or making significant changes, always apply changes and restart the UI. Sometimes a simple restart can resolve inexplicable issues.
Errors or Crashes During Generation
If you're experiencing crashes or error messages, especially during the generation process, it could be a resource issue or a corrupted file.
- VRAM Overload: ControlNet, especially when combined with high resolutions or multiple units, can be very demanding on your GPU's VRAM. If you have a lower-end GPU, try reducing your generation resolution or using fewer ControlNet units. You might see messages like "CUDA out of memory."
- Corrupted Model File: Occasionally, a ControlNet model file might get corrupted during download. Try re-downloading the problematic
.safetensorsfile from its source. - Update ControlNet Extension and UI: Ensure both your ControlNet extension and your Automatic1111 web UI are up to date. Developers frequently release updates that fix bugs and improve stability.
By systematically going through these troubleshooting steps, you can usually pinpoint and resolve most ControlNet-related issues, getting you back to generating stunning, controlled AI images.
Disclaimer
The information provided in this article is for general guidance and informational purposes only. The field of AI image generation is rapidly evolving, and software interfaces, models, and best practices may change over time. Always refer to the official documentation and community resources for the most up-to-date and specific instructions.